
| Minimum Software Version | 10.9.0 |
| Solution(s) | Hearings ⨉ Cases International ✓ Cases US ✓ Institutions ⨉ Counsel ✓ |
This article explains how to clone an existing Opus 2 project or training area. The process creates a duplicate workspace while preserving the original, making it straightforward to replicate environments for training or testing purposes.
There is no single-click clone function in Opus 2. Instead, cloning is achieved by temporarily renaming the original project, archiving it, restoring the original name, and then unarchiving — which produces a second workspace containing the archived data. This approach ensures the original project remains intact and fully accessible.
How to clone a project
- Temporarily rename the project you wish to clone.
- Navigate to the project settings
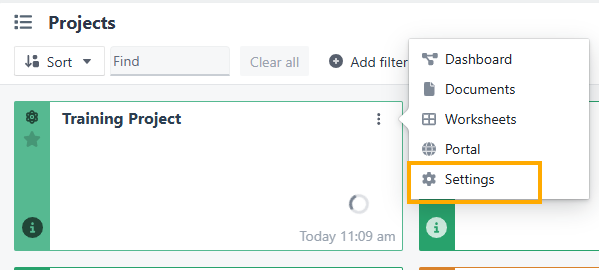
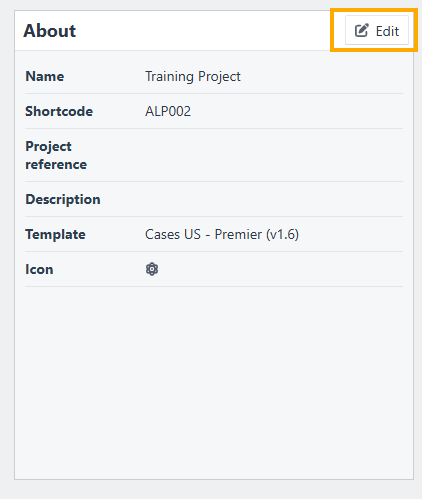
- In the About and select Edit
- In the Edit project dialog, update the name; for example, change "Opus 2 Cases Training" to "Opus 2 Cases Training_NEW".
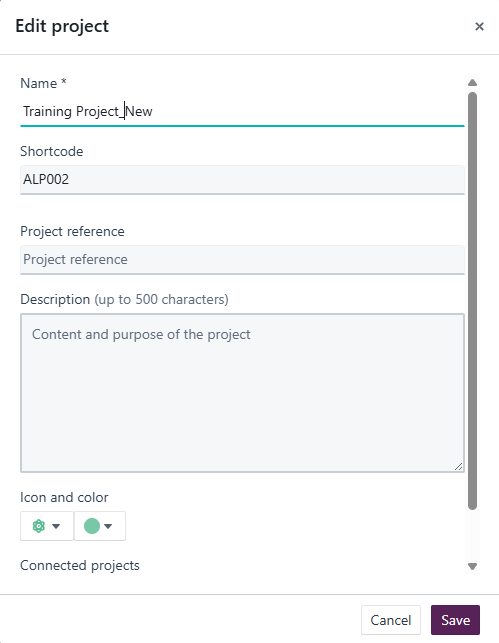
- Then save the changes
- Navigate to the project settings
- Navigate to the Actions tab
- Select Create archive
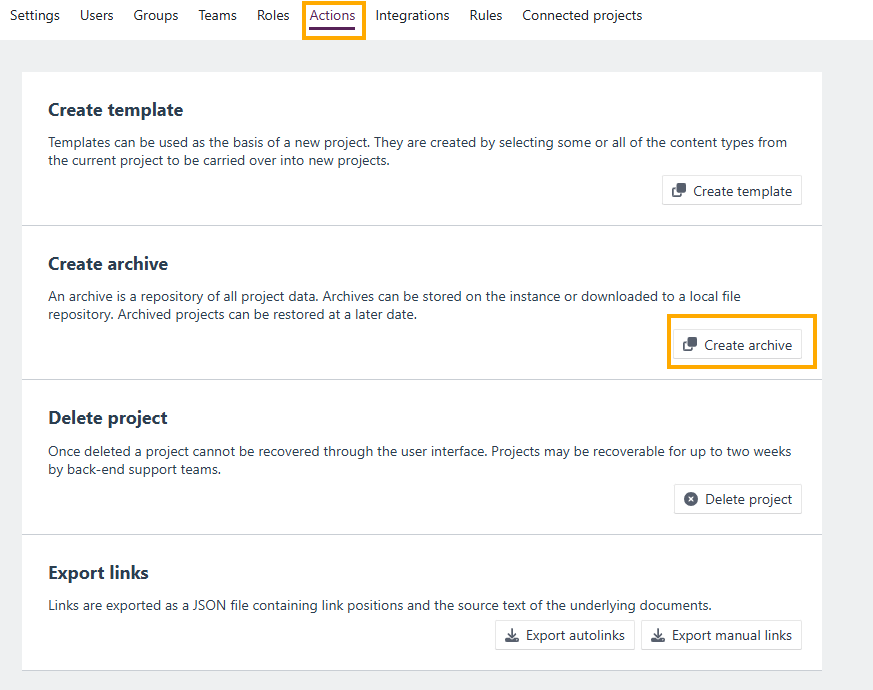
- in the Create archive dialog, you can give a name to the archive or add a description.
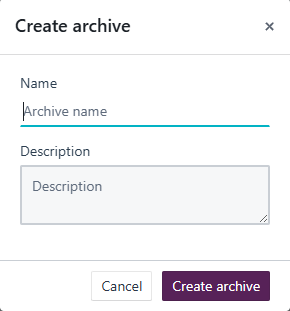
- in the Create archive dialog, you can give a name to the archive or add a description.
- Once the archive is complete, rename the project back to its original name (e.g. "Opus 2 Cases Training").
- Go to System Admin > Archives and unarchive the project you archived in step 3.

- This will generate a new project containing the archived file, effectively creating your cloned workspace.
Related links
Related documentation
Opus 2 has help information accessible within the application; click the question mark and then select Documentation in the upper-right area of the platform application. You can also access the documentation at: Opus 2 Support.
How to contact us
To contact us about the documentation, or if you have any other questions or issues about Opus 2 solutions, contact Opus 2 Platform Support by emailing Opus 2 Platform Support.