
| Minimum Software Version | 10.46.2 |
| Solution(s) | Hearings⨉ Cases International ✓ Cases US ✓ Institutions ✓ Counsel ✓ Focused View⨉ |
View chronology events on a timeline, control how much detail each event shows, and export the timeline to a PowerPoint file.
The Chronology timeline view displays your chronology events as tiles or chips along a time axis. You can choose which fields each event shows, group events by year, month, date, or a custom interval, and export the timeline to PowerPoint, with or without the source documents.
Why use the timeline view
The table view is the best way to review and edit chronology entries in detail. The timeline view helps you see how events relate in time, such as clusters of activity or gaps between events. It is also useful when you need to present a chronology to others.
You control how much detail appears. Tiles show the full event, including fields such as summary, description, and sources. Chips are compact, so you can fit more events on screen. The fields shown on tiles and chips are set independently, and the PowerPoint export reflects what is currently displayed.
Work with the timeline view
Switch to the timeline view
- Open the Chronology worksheet.
- Use the view selector to switch from Table view to the timeline view.
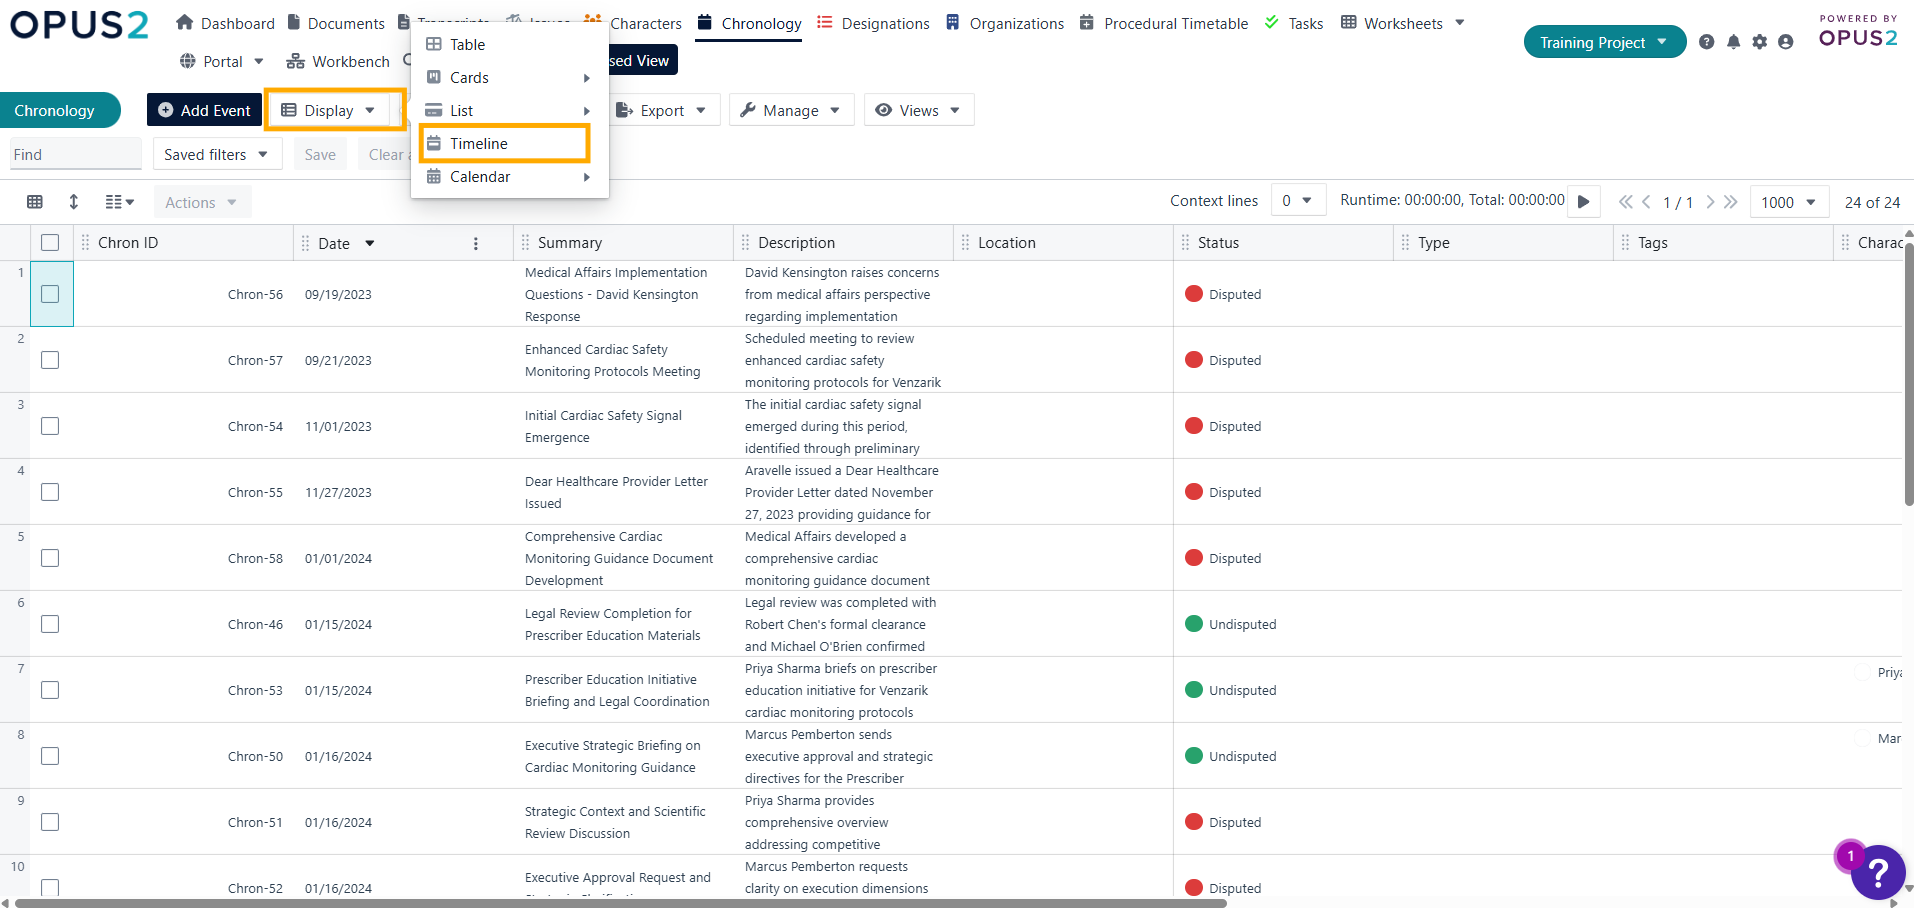
- Select Tile to show full event cards, or select Chip to show compact event cards.

The timeline footer shows a summary of the events displayed, for example, "10 events over 3 months", with counts of disputed and undisputed events.
Choose the fields shown on tiles and chips
- Select Tile/chip fields.

- In the Tile/chip fields window, select the checkbox in the Tile column, the Chip column, or both, for each field you want to display. Available fields include Chron ID, Date, Summary, Description, Location, Status, Type, Tags, Characters, Organizations, Highlighted text, Sources, Issues, Date created, Created by, Date updated, and Updated by. The Date field is always shown and cannot be cleared.
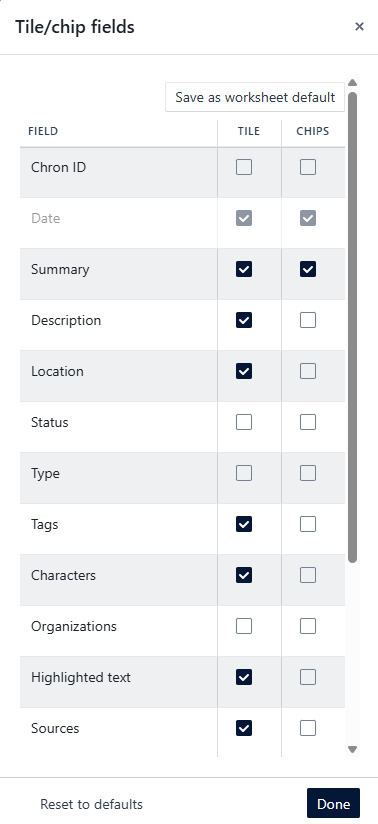
- To keep your selection for everyone using the worksheet, select Save as worksheet default.
- To return to the standard selection, select Reset to defaults.
- Select Done.
Example: To show a compact timeline with only the date and summary, select the Chip view, then clear every field except Date and Summary in the Chip column.
Group events by time period
Select one of the grouping options in the toolbar:
- Year
- Month
- Date
- Custom

To set your own interval:
- Select Custom.
- In the Custom grouping window, enter a number in the Every field.
- In the Unit list, select Year, Month, Day, Hour, or Minute.
- Confirm your selection.
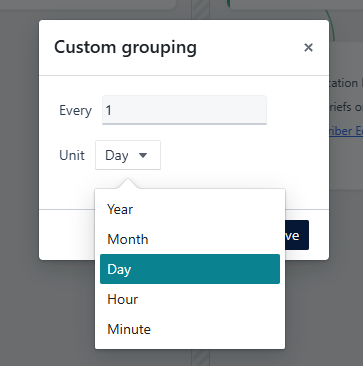
Example: To group events into two-week periods, enter 14 in Every and select Day as the Unit.
Hide tiles or chips
You can hide events you do not want to see on the timeline.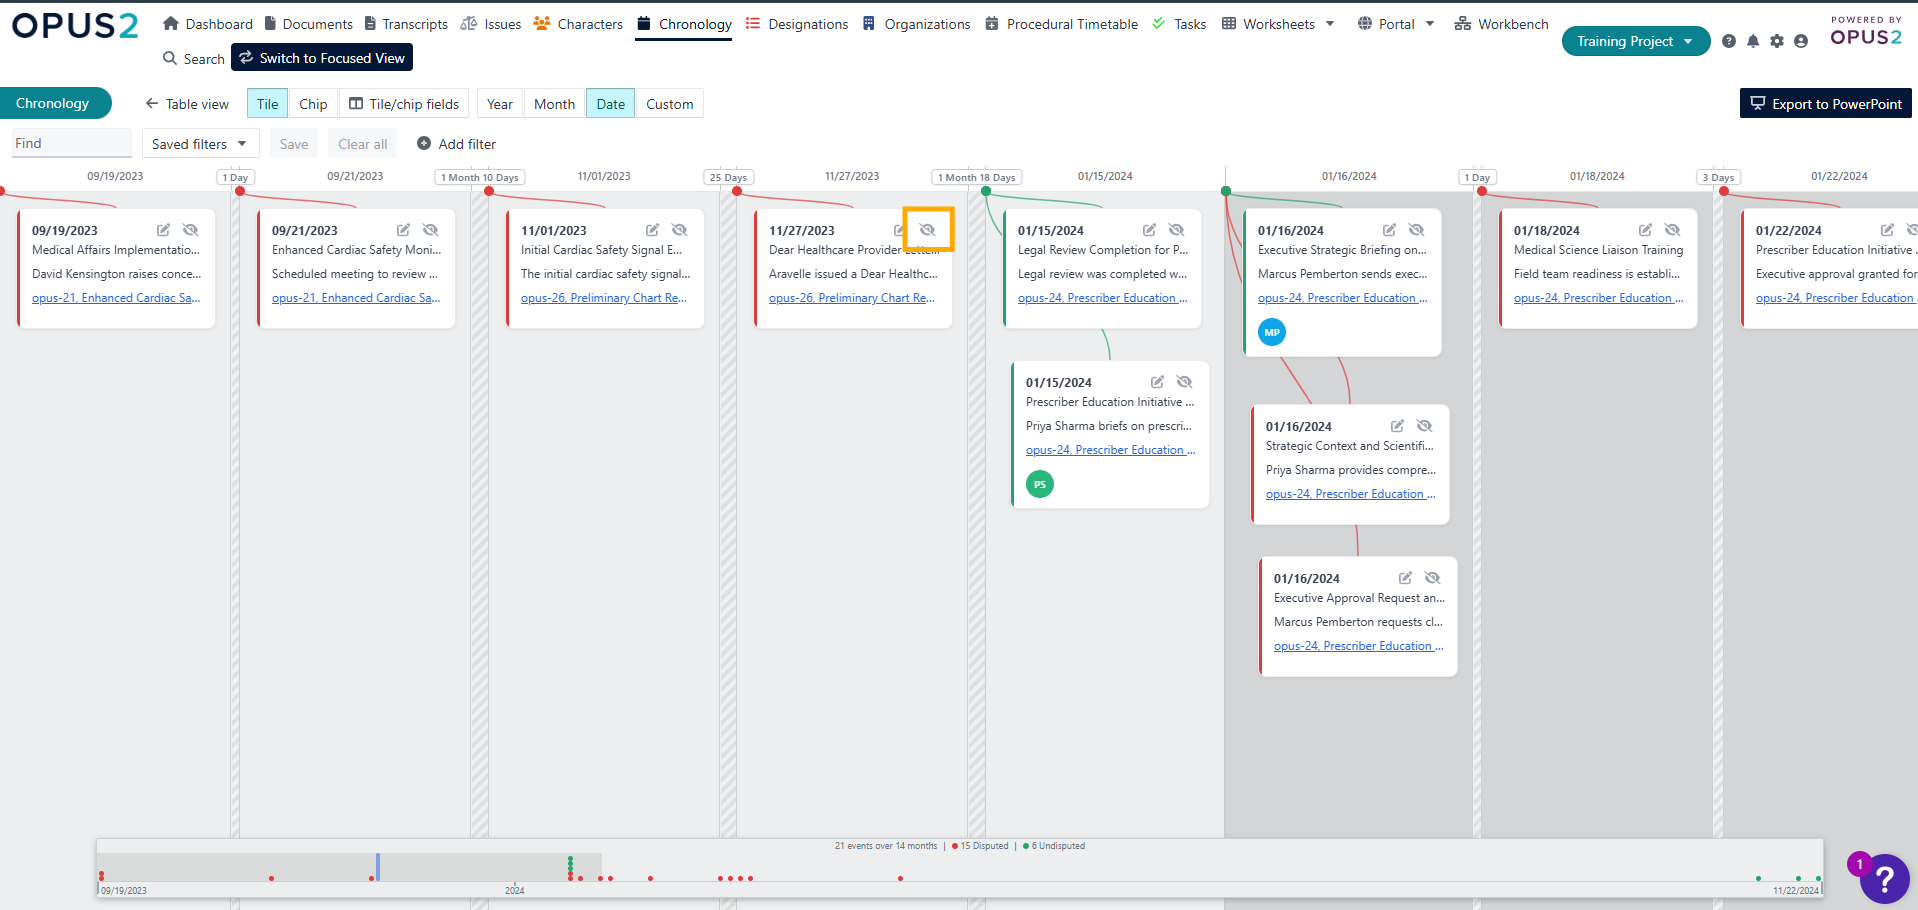
- On the tile or chip you want to hide, select the Hide (eye) icon. The tile or chip is removed from the timeline, and a notice appears next to the filters showing how many events are hidden, for example, 1 event hidden.
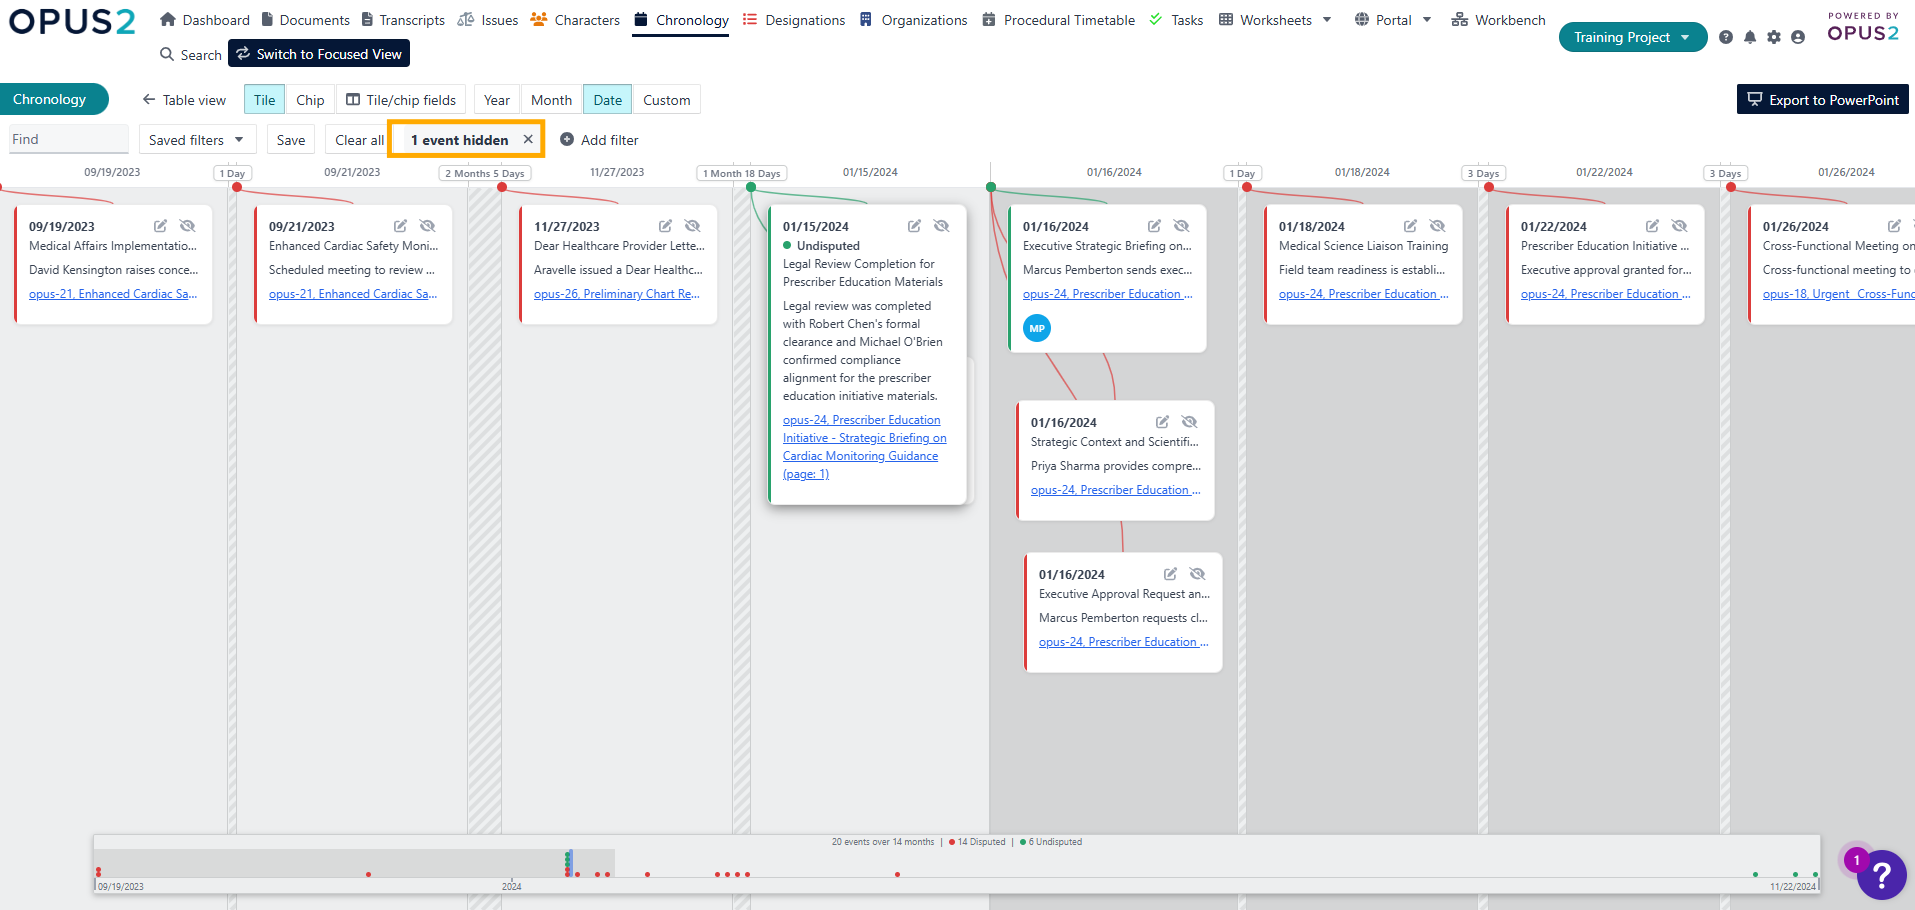
- To show hidden events again, select the x in the hidden event notice.
Note: Hiding an event removes it from your view of the timeline only. It does not delete the event from the chronology. Hidden tiles and chips are not included in exported PowerPoint files.
Export the timeline to PowerPoint
- Set up the timeline as you want it to appear in the export, including the view (Tile or Chip), the fields shown, and the grouping.
- Select Export to PowerPoint.
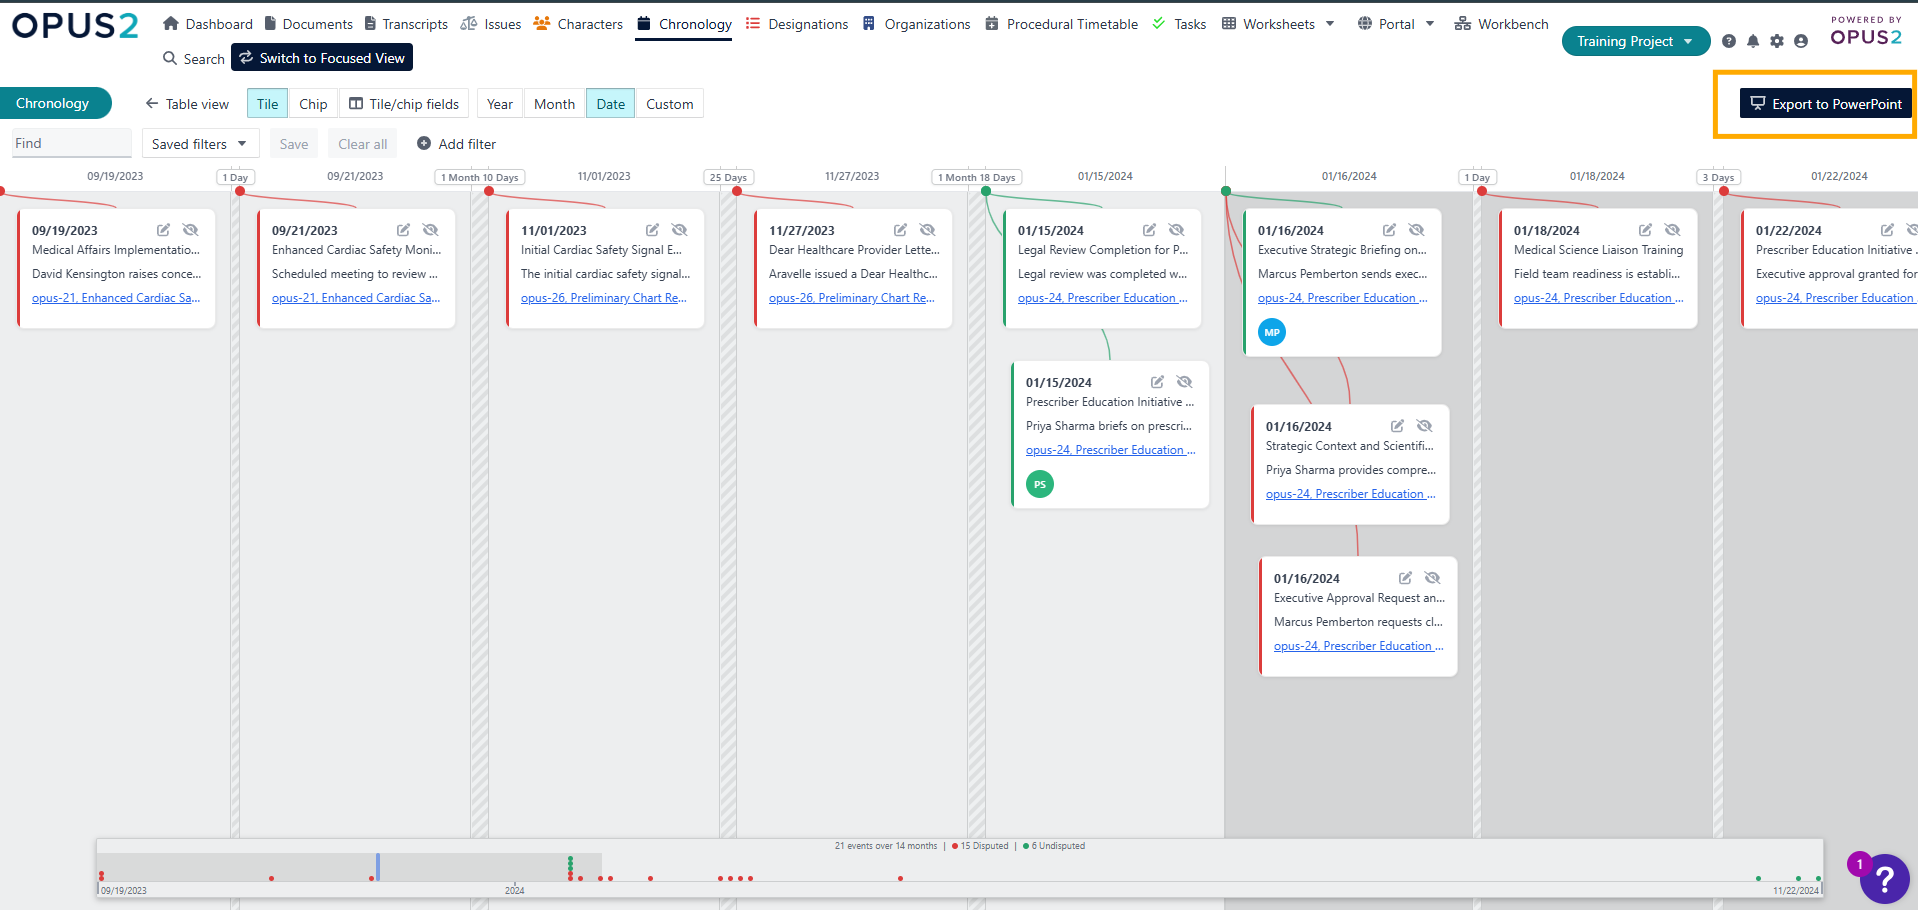
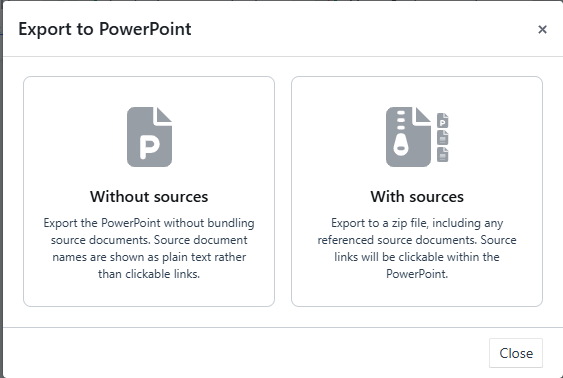
- In the Export to PowerPoint window, select one of the following options:
- Without sources: Exports the PowerPoint file only. Source document names appear as plain text rather than clickable links.
- With sources: Exports a zip file that includes the PowerPoint file and any referenced source documents. Source links are clickable within the PowerPoint.
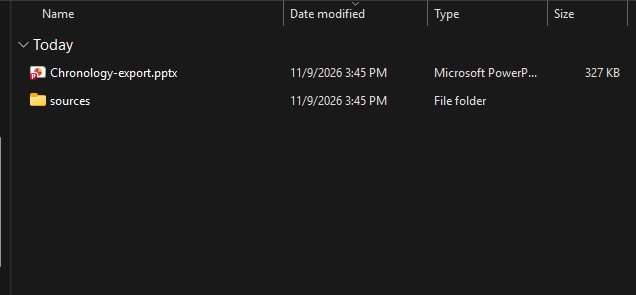
- Save the downloaded file to a location of your choice.
Note: To use the Export to PowerPoint: With sources option you must select both Highlighted text and Sources in the Tile/chip fields window. Transcript file types (TXT, PTF, MDB, PCF, LEF, and XMEF) that are used as event sources are not currently supported when using Export to PowerPoint: With sources.
Work with the exported file
If you chose With sources:
- Extract the zip file. The extracted folder contains the PowerPoint file and a sources folder with the referenced source documents.
- Keep the PowerPoint file and the sources folder together in the same location so the source links continue to work.
- Open the PowerPoint file.
In PowerPoint, each event is a separate object, so you can move, resize, format events, and edit their text to suit your presentation.
Note: All PowerPoint functionality is subject to the PowerPoint software and version you use. Available editing options and the behaviour of source links may differ between versions.
Related links
- How to Create a Chronology Event
- How to Create a Chronology Event from a Single Document
- Adding Documents and Transcripts to Chronology Events
Related documentation
Opus 2 has help information accessible within the application; click the question mark and then select Documentation in the upper-right area of the platform. You can also access the documentation at: Opus 2 Support.
How to contact us
To contact us about the documentation, or if you have any other questions or issues about Opus 2 solutions, contact Opus 2 Platform Support by emailing Opus 2 Platform Support.