
| Minimum Software Version | 8.18.10 |
| Solution(s) | Hearings ⨉ Cases International ✓ Cases US ✓ Institutions ⨉ Counsel ✓ |
Explains how to upload transcripts containing embedded annotations and tags into Opus 2, including how to import and map notes within the system.
PCF, PTF, XMEF, and LEF transcript files can contain embedded annotations and tags. Uploading these files allows users to bring annotated transcript content into Opus 2 while preserving notes and work product created outside the platform. Additional options for note import and mapping ensure annotations are placed into the appropriate worksheets and fields within Opus 2.
Uploading a transcript with embedded notes
- Navigate to Documents within your project.
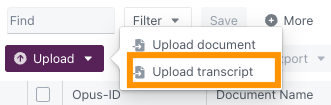
- Select Upload and choose Upload transcript.
- Drag and drop the transcript file into the dialog, or select Browse for files to locate it on your computer.
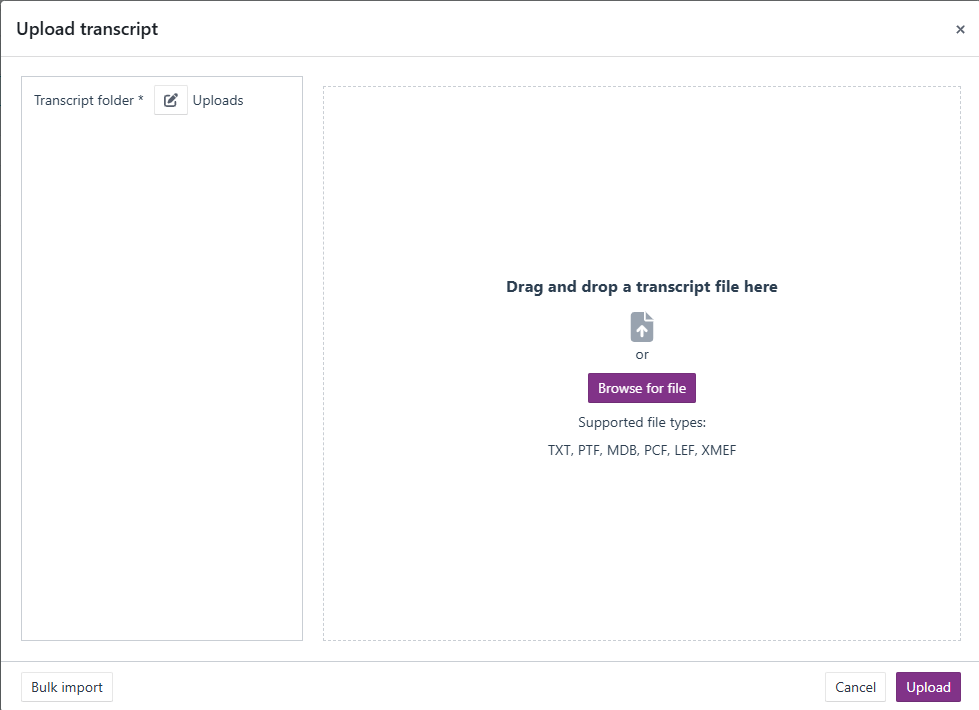
- Select the Folder icon and choose the destination folder.
Configuring upload options
Once the transcript file is selected, complete any required fields on the left-hand side of the dialog.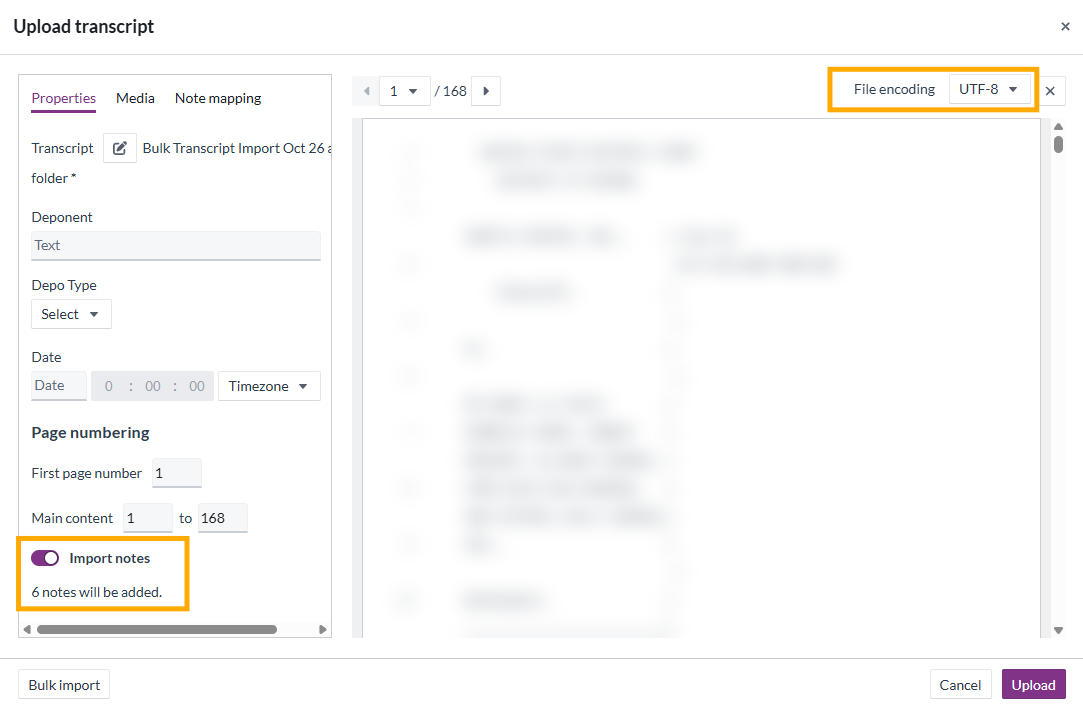
- Enable the Import notes toggle (bottom left) if you want to import annotations from the transcript file.
- Select the appropriate File encoding from the dropdown in the top-right corner.
Note mapping
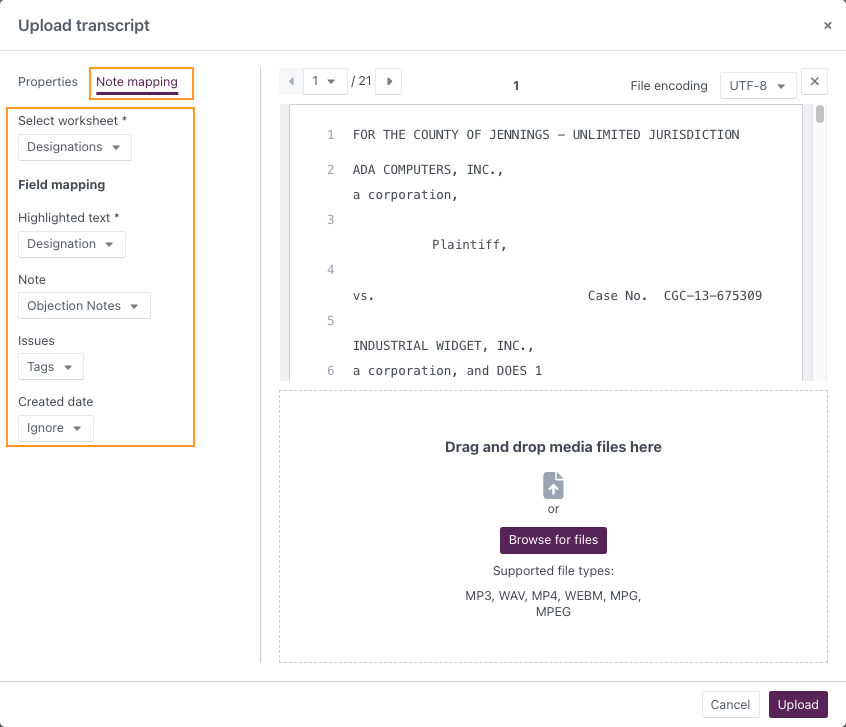
- Navigate to the Note mapping tab.
- Use the left-hand dropdowns to configure how imported notes are mapped. Typical settings include:
| Field | Description |
|---|---|
| Selected worksheet | The worksheet where imported notes will be stored (typically Designations). |
| Highlighted text | Text field used for transcript excerpts (typically Designation). |
| Note | Long-text field for annotation content (typically Objection Notes). |
| Issues | Tag fields for categorisation (typically Tags). |
| Created date | Date and time fields in the selected worksheet. The system Date added field automatically uses the upload date and time. |
Uploading media (optional)
If there are associated media files, drag and drop them into the dialog or select Browse for files to upload them at this stage. Media can also be added after the transcript has been saved.
Completing the upload
Select Upload to process the transcript file. Green confirmation notifications appear, and the transcript is added to the Documents table.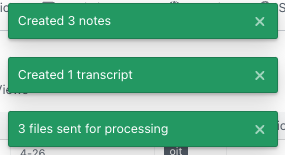
Viewing imported content
When opened in the Transcript Viewer, imported notes appear in the right-hand margin. The corresponding transcript text is automatically highlighted to reflect the original annotations.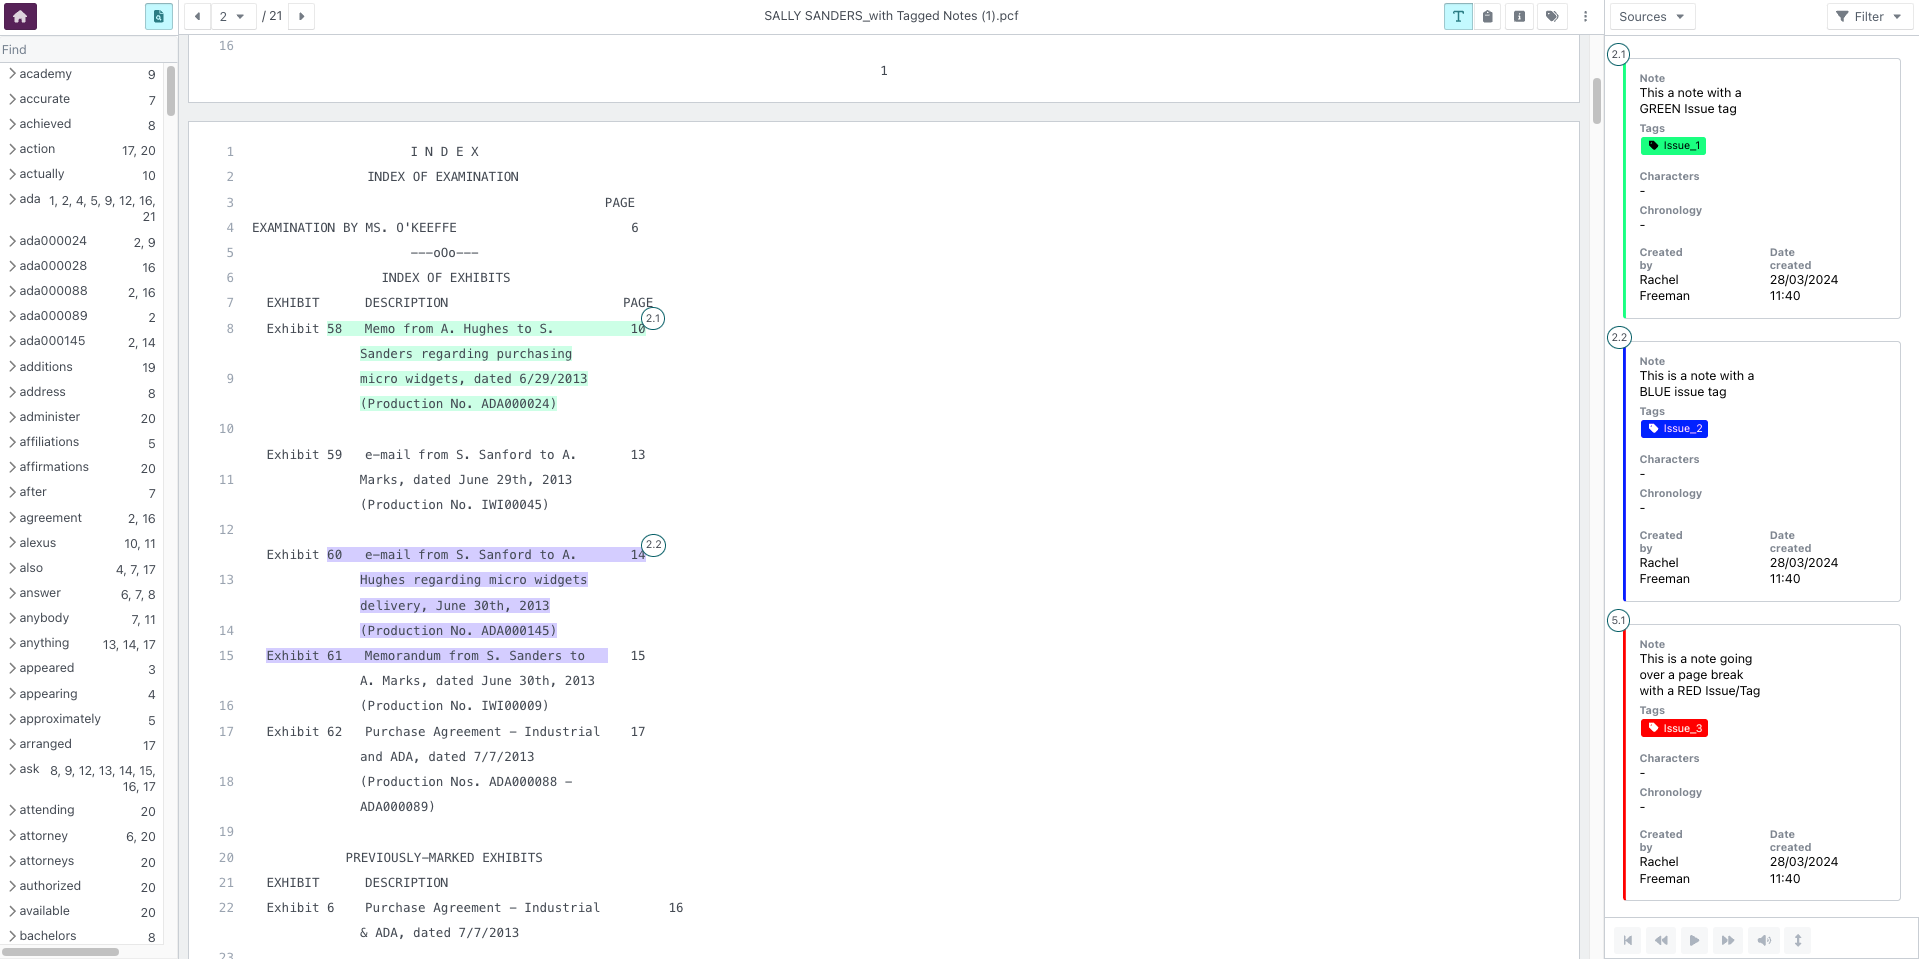
Example: Upload a PCF transcript containing objections and issue tags, mapping them into the Designations worksheet so reviewers can continue analysis seamlessly in Opus 2.
Related links
- Uploading transcripts
- Transcript file types
- How to upload and synchronise a media file to a transcript
- How to create a designation on a transcript
Use transcript uploads with note import to bring existing annotations and tags into Opus 2, ensuring valuable prior work product is preserved and ready for continued analysis within the platform.
Related documentation
Opus 2 has help information accessible within the application; click the question mark and then select Documentation in the upper-right area of the platform. You can also access the documentation at: Opus 2 Support.
How to contact us
To contact us about the documentation, or if you have any other questions or issues about Opus 2 solutions, contact Opus 2 Platform Support by emailing Opus 2 Platform Support.