
| Minimum Software Version | 8.18.10 |
| Solution(s) | Cases International ✓ Cases US ✓ Institutions ⨉ Counsel ✓ |
Explains how to add and configure the Upload component in the Portal Builder, including folder configuration, button appearance, and the portal user upload experience.
The Upload component enables portal users to submit documents directly through the portal. Uploaded documents are stored in a predefined folder within the platform. Administrators configure the destination folder, upload button appearance, and header styling.
To ensure consistency and avoid user confusion, a folder must already exist in the platform before it can be selected as an upload destination. Administrators can optionally allow portal users to change the destination folder, although best practice is to disable this option.
Preparing a folder in the platform
Before configuring the Upload component, ensure that a destination folder has been created in the platform and confirmed as available for document storage.
Important: Folder selection is a mandatory configuration step. Without an existing folder, the Upload component cannot be completed.
Adding an Upload component
- Open the Portal Builder.
- Add the Upload component to the desired location on the page.
- Open the Properties tab to configure settings.
Configuring Upload properties
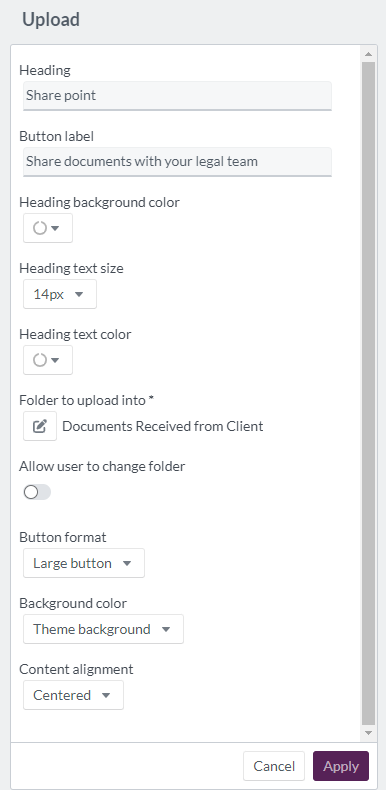
Configure the following options in the Properties tab:
| Option | Description |
|---|---|
| Heading | Header text for the Upload component (maximum 100 characters). |
| Button label | Text displayed on the upload button (maximum 100 characters). |
| Heading background colour | Select a colour using the colour wheel, hexadecimal, or RGB code. |
| Heading text size | Set size between 12px and 72px. |
| Heading text colour | Choose a colour using the colour wheel, hexadecimal, or RGB code. |
| Folder to upload into | Required. Select the folder where uploaded documents will be stored. |
| Allow user to change folder | Allows portal users to select a different folder. Best practice is to disable this option. |
| Button format | Display the upload action as a button, large button, card, or image. |
| Background colour | Choose from theme background, white, site primary or secondary colour, or a custom colour. |
| Content alignment | Align content left, centre, or right. |
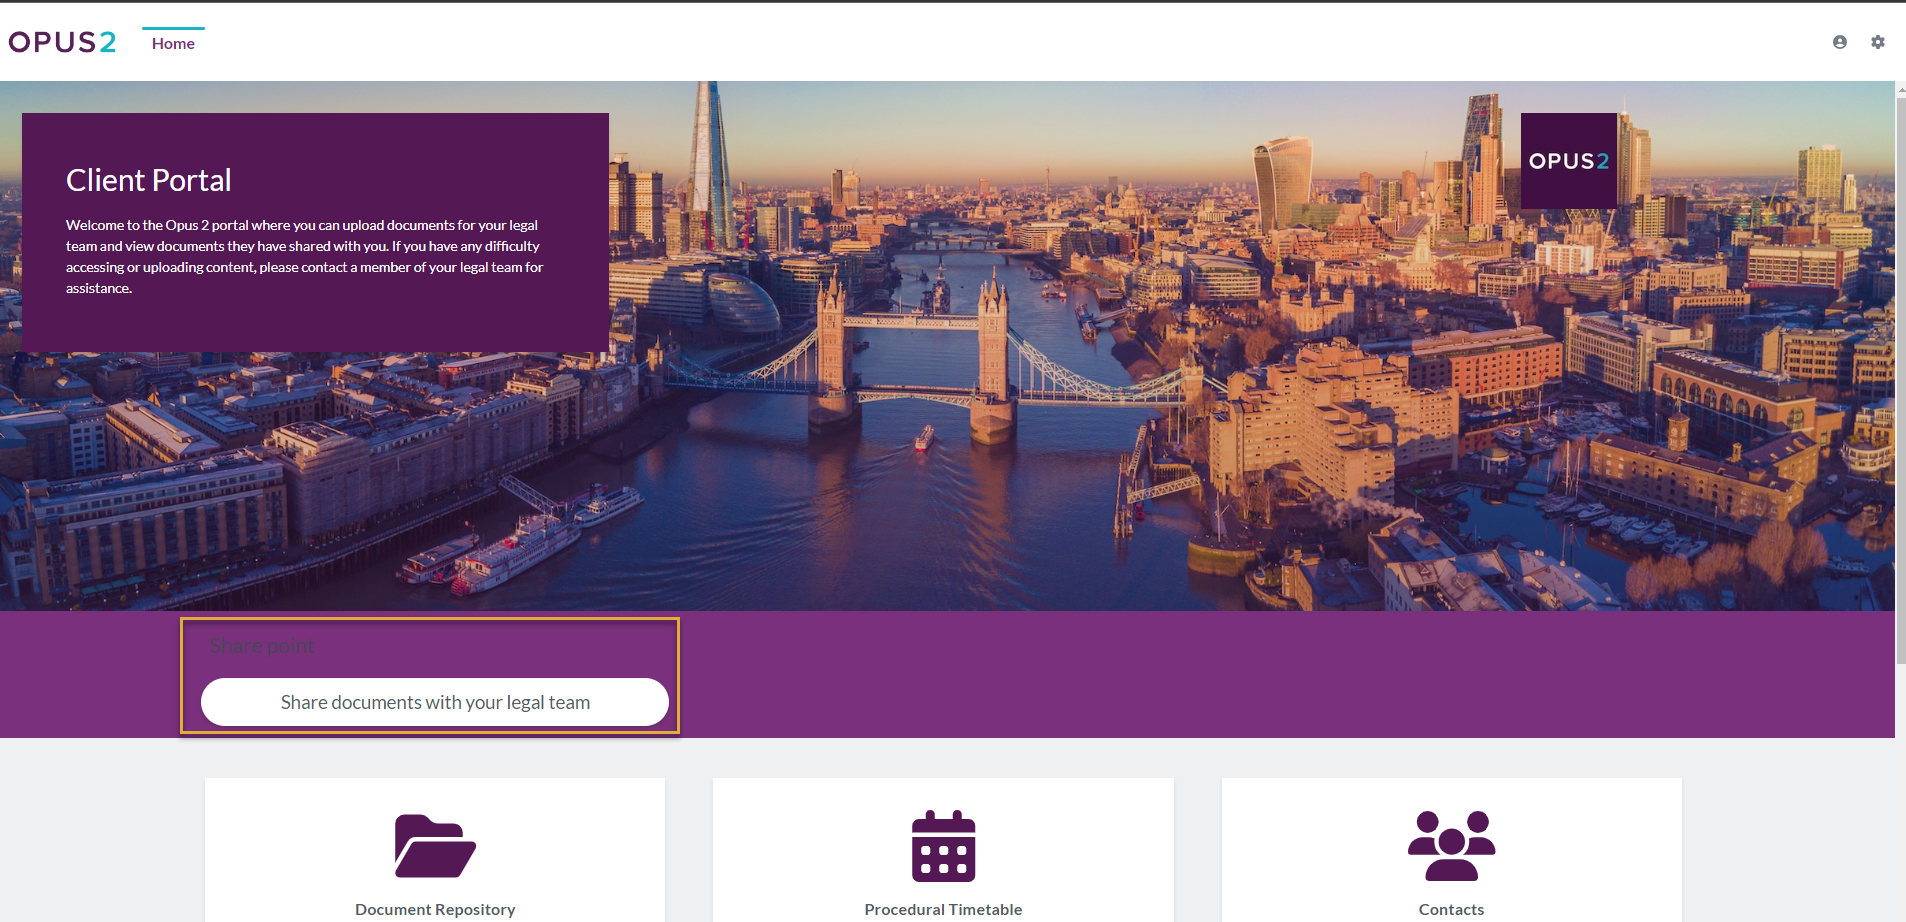
Example: Create an Upload component titled Upload Supporting Documents with a large button labelled Submit Files and a fixed destination folder.
Portal user upload experience
When a portal user selects the Upload button, an Upload Document dialog appears showing the destination folder. Users can:
- Drag and drop files into the dialog.
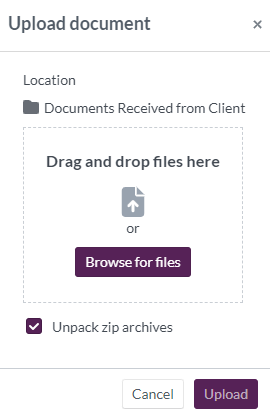
- Browse their device to select files.
- Enable Unpack zip archives when uploading multiple documents in a compressed file.
Related links
Related documentation
Opus 2 has help information accessible within the application; click the question mark and then select Documentation in the upper-right area of the platform. You can also access the documentation at: Opus 2 Support.
How to contact us
To contact us about the documentation, or if you have any other questions or issues about Opus 2 solutions, contact Opus 2 Platform Support by emailing Opus 2 Platform Support.