
| Minimum Software Version | 8.14.3 |
| Solution(s) | Hearings ⨉ Cases International ✓ Cases US ✓ Institutions ✓ Counsel ✓ Focused View⨉ |
Explains how to use the AI Autofill function to add extracted entities from document analysis directly to worksheets in Opus 2.
The document analysis component of AI Analysis allows users to add information to worksheets using the built-in AI Autofill function when accessed through the Document Viewer. After analysis of Events, People, or Organisations is complete, each item appears in a card view with a summary of related information. Selecting an item opens a dialog where AI Autofill pre-populates applicable worksheet fields automatically.
Prerequisites
To see all available options in the card menu and allow the linking of highlighted text to characters, a Highlighted text metadata field must be added to the Events, Organisations, and Characters worksheets.
To add the field:
- Open the worksheet and select Edit.
- In the Edit worksheet dialog, select File fields > Text in a document.
- Add a field called Highlighted text.
- Set Characters to extract to 100.
- Select the checkboxes for both Documents and Transcripts.
- Set Annotation style to Highlight.
- Select Include word values.
- Select Save.
System administrator note: A field setting called User only (no autocomplete) must be switched off to allow AI to autocomplete fields. If the autocomplete is completing fields that should not be autocompleted, switch this setting on.
Note: AI Autofill does not work when adding to a worksheet by selecting documents using checkboxes and then selecting Actions > Add to [worksheet name].
Using AI Autofill
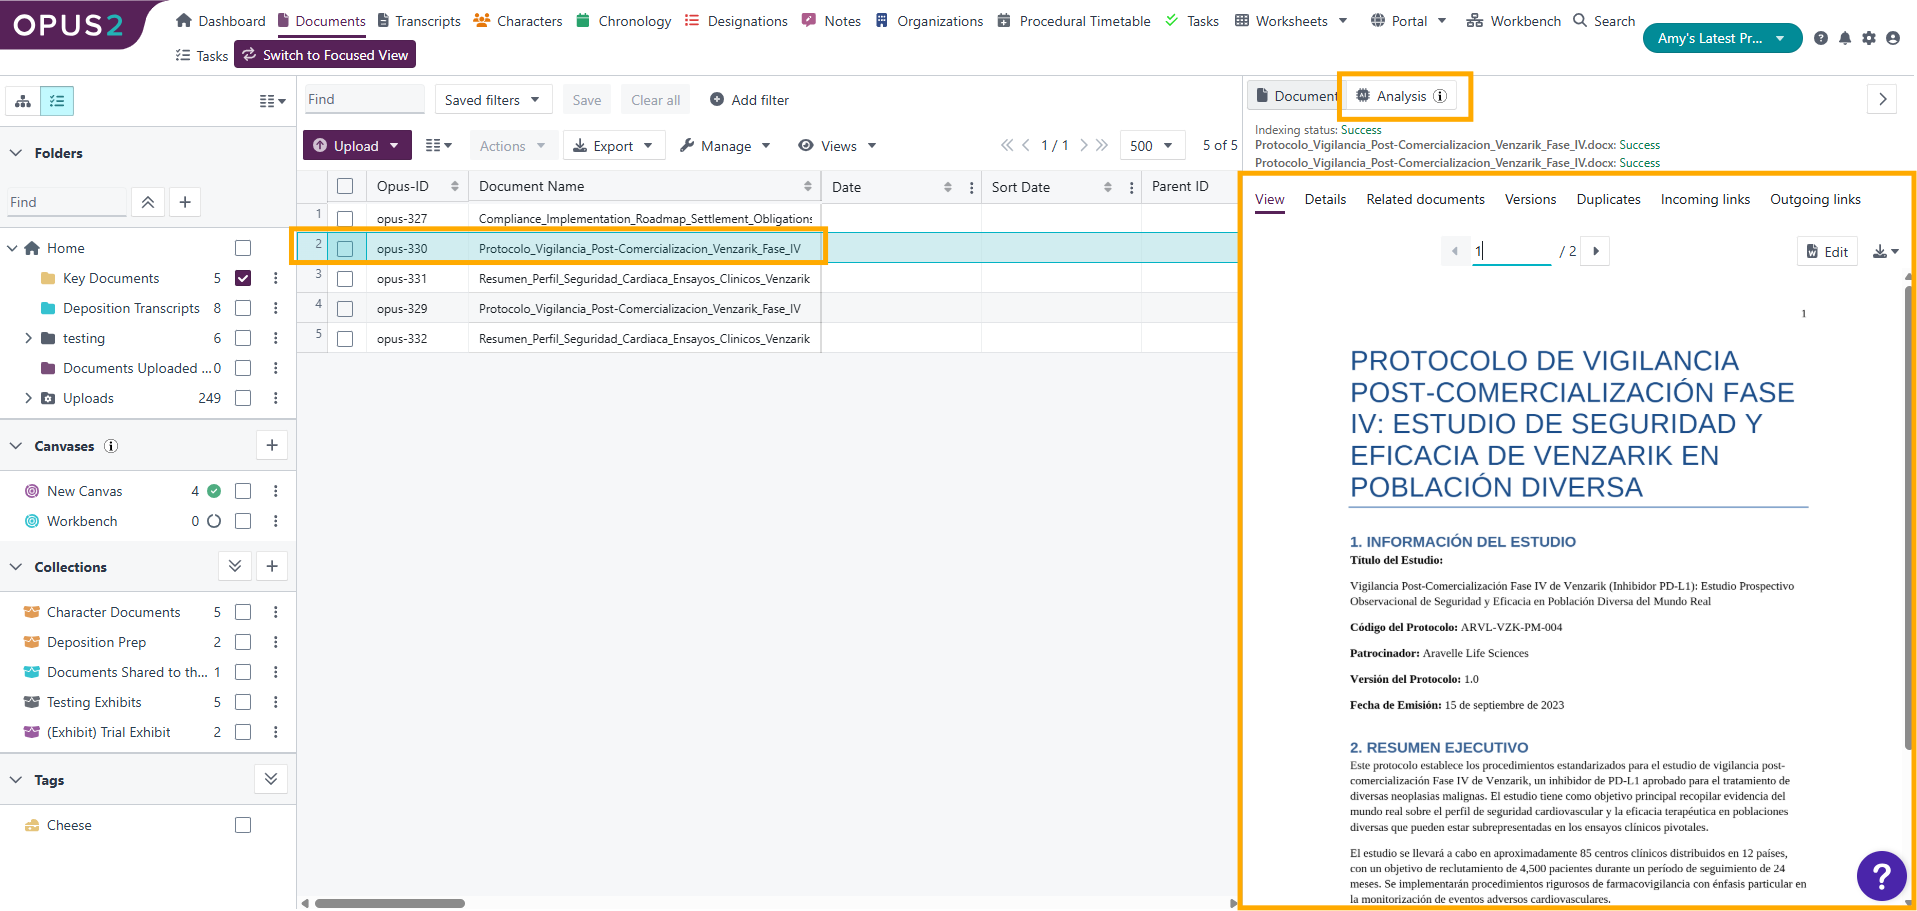
- In the Documents page, select a document to open it in the Document Preview pane.
- Select the Document tab, then select the document image to open the Document Viewer.
- Select the Document Analysis tab.
- After analysis of Events, People, or Organisations is complete, each item appears in a card view within the AI Analysis column with a summary of related information.
- Select the three-dot kebab menu at the top right of the desired card. A list of options for linking the identified information to other worksheets appears.
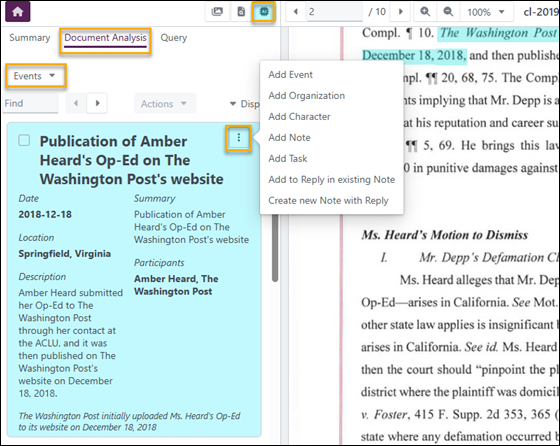
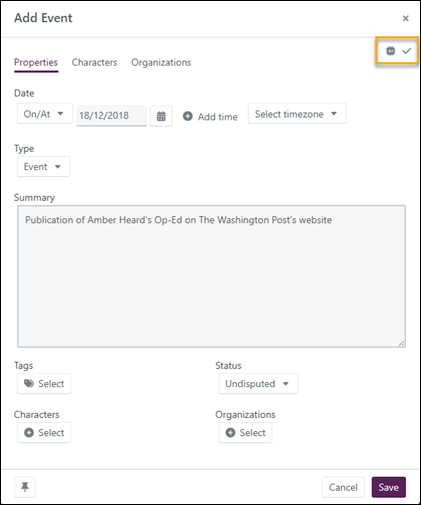
- Select Add Event, Add Organisation, Add Character, or Add Note. A dialog opens with AI Autofill pre-populating applicable fields for the new item.
- Add any additional information to the form. A checkmark appears next to the AI icon in the top-right corner of the dialog to confirm that AI Autofill has completed.
- Select Save.
A small card appears in the right panel of the viewer, and the corresponding text remains highlighted in the main pane. A new entry is also added to the associated worksheet — for example, Chronology.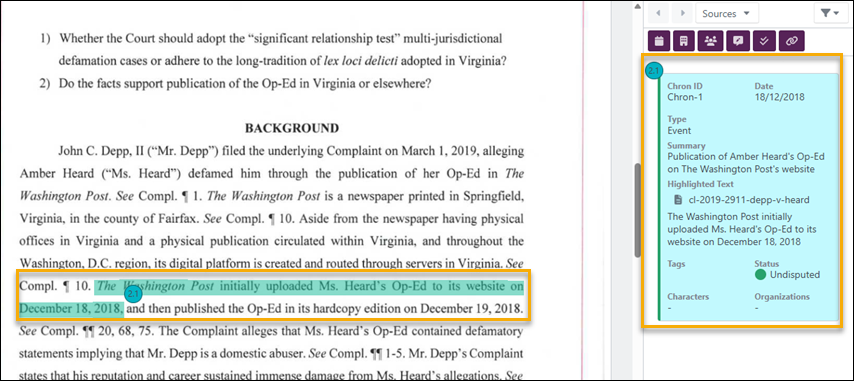
Related links
Related documentation
Opus 2 has help information accessible within the application; click the question mark and then select Documentation in the upper-right area of the platform. You can also access the documentation at: Opus 2 Support.
How to contact us
To contact us about the documentation, or if you have any other questions or issues about Opus 2 solutions, contact Opus 2 Platform Support by emailing Opus 2 Platform Support.