
| Minimum Software Version | 8.18.10 |
| Solution(s) | Cases International ✓ Cases US ✓ Institutions ⨉ Counsel ✓ |
Importing chronology events from an Excel or CSV file offers a faster, more efficient alternative to creating events manually. The Opus 2 Platform supports structured imports where spreadsheet columns are mapped to Chronology worksheet fields.
For best results, spreadsheet column headings should match the Chronology worksheet field names exactly. Where headings do not match, columns can be mapped manually during the import process. The import includes validation to highlight missing or invalid data before creating records.
Importing chronologies from Excel or CSV
Step 1: Prepare the spreadsheet
- Create an Excel or CSV file containing your chronology events.
- Use column headings that match the Chronology worksheet fields wherever possible.
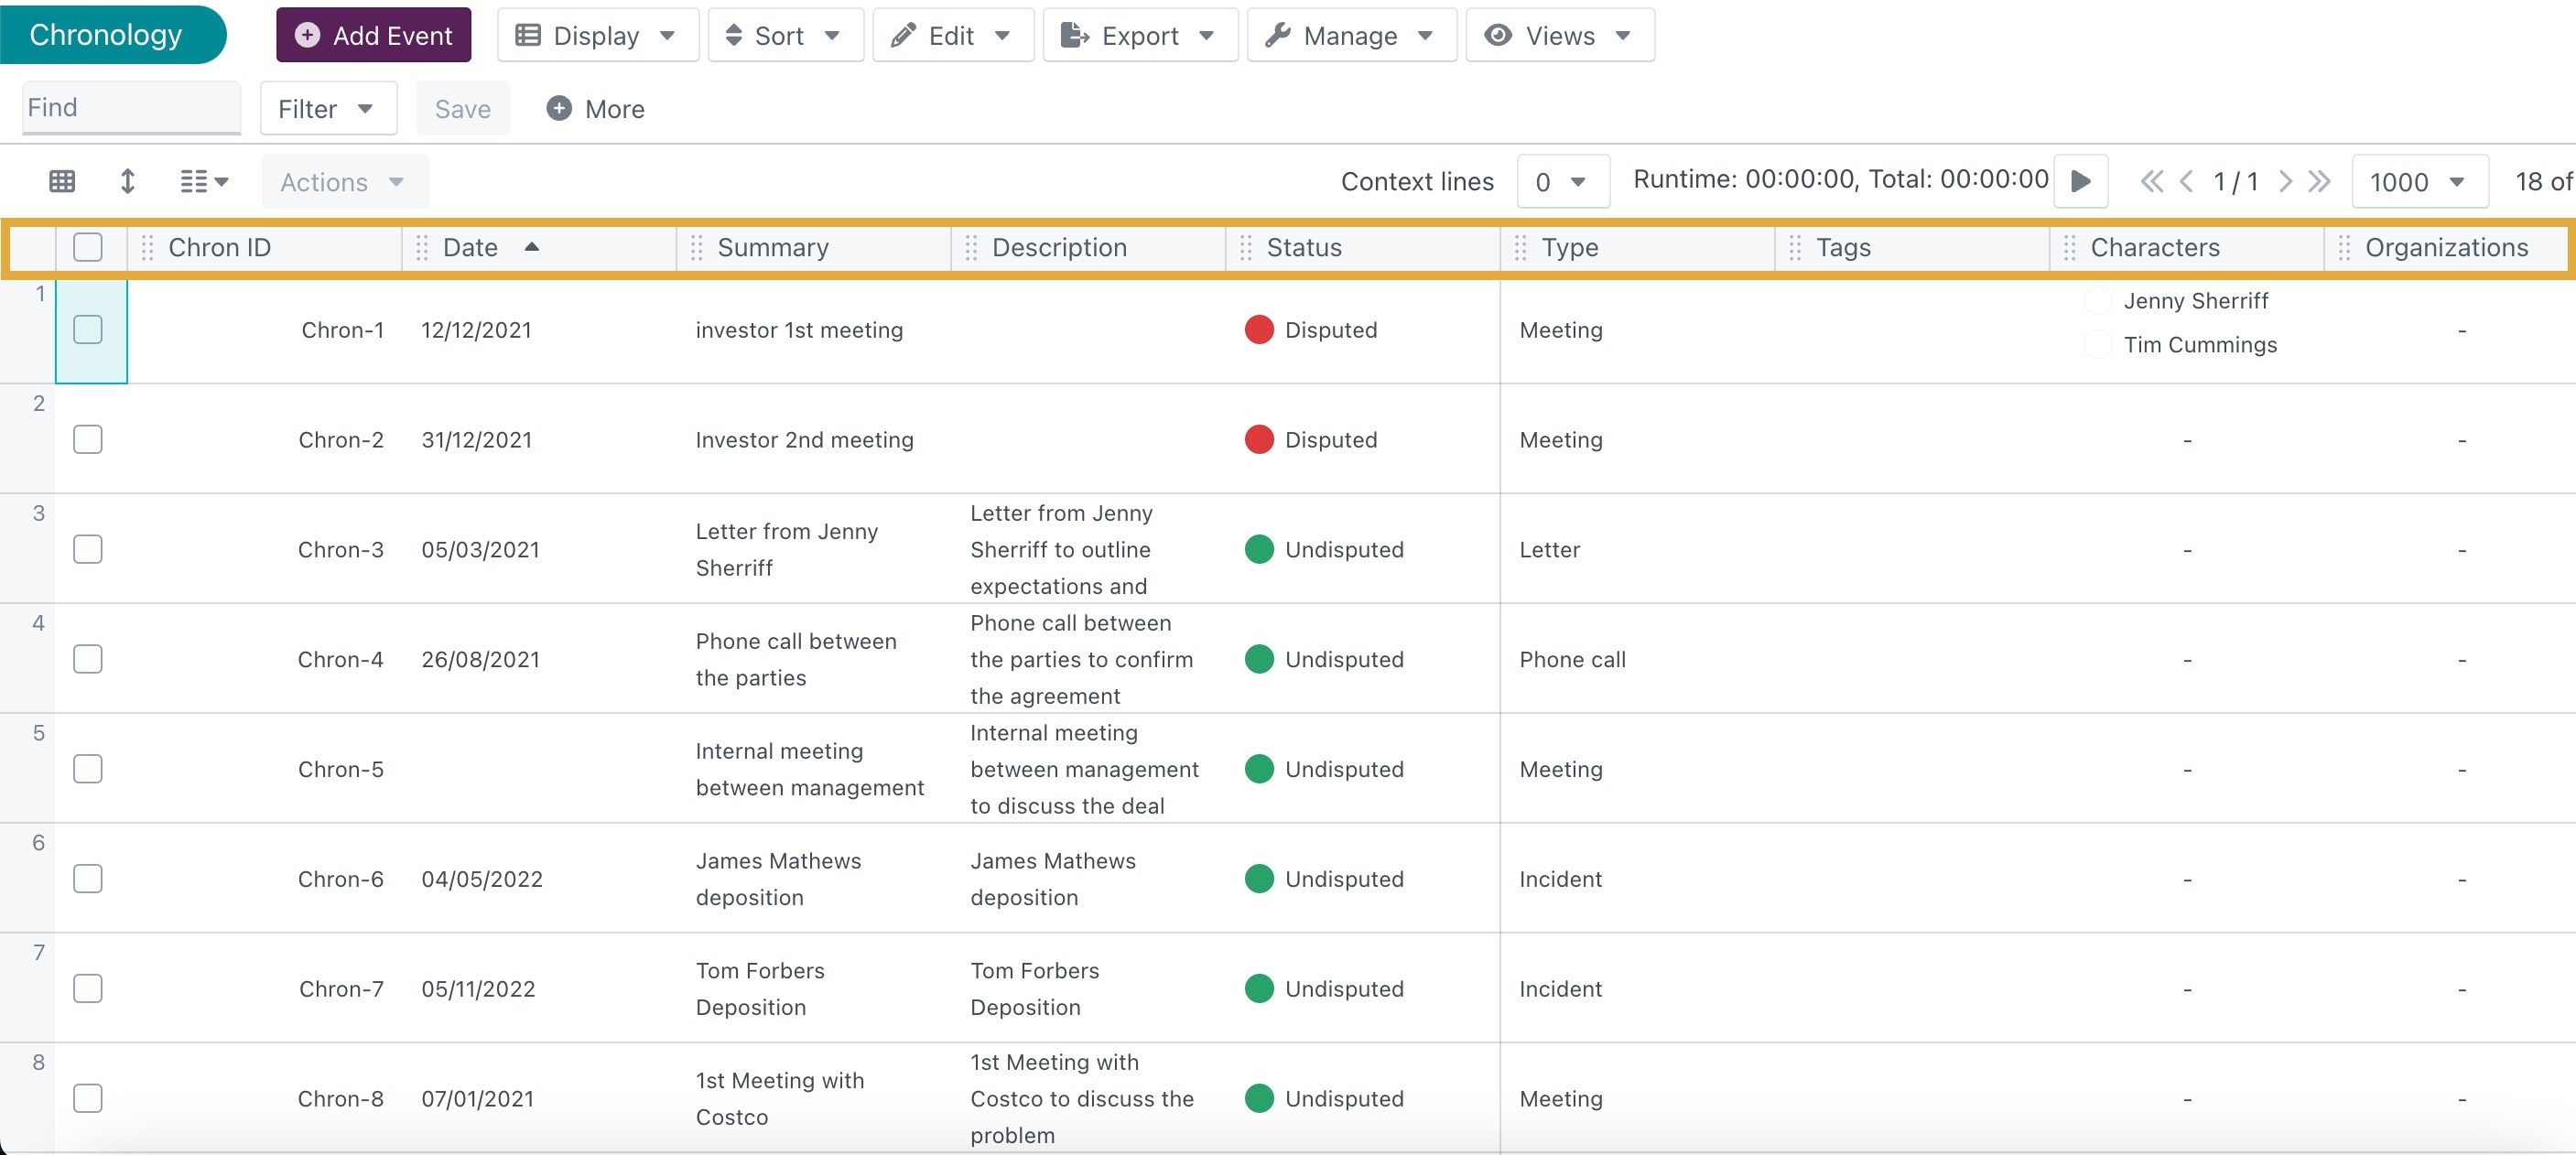
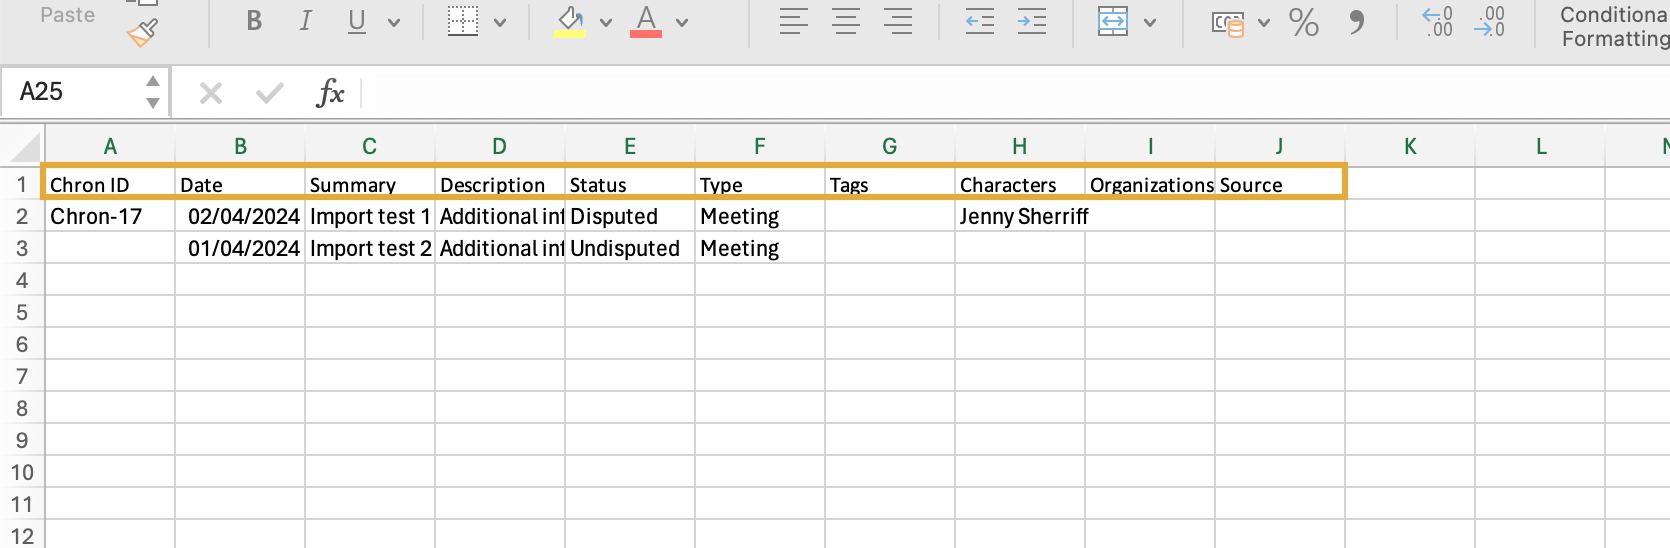
- Ensure any fields that link to other worksheets (for example, Characters or Organisations) use values that already exist in those worksheets.
Step 2: Import chronology events
- Navigate to the Chronology worksheet.
- Select Manage → Import items.
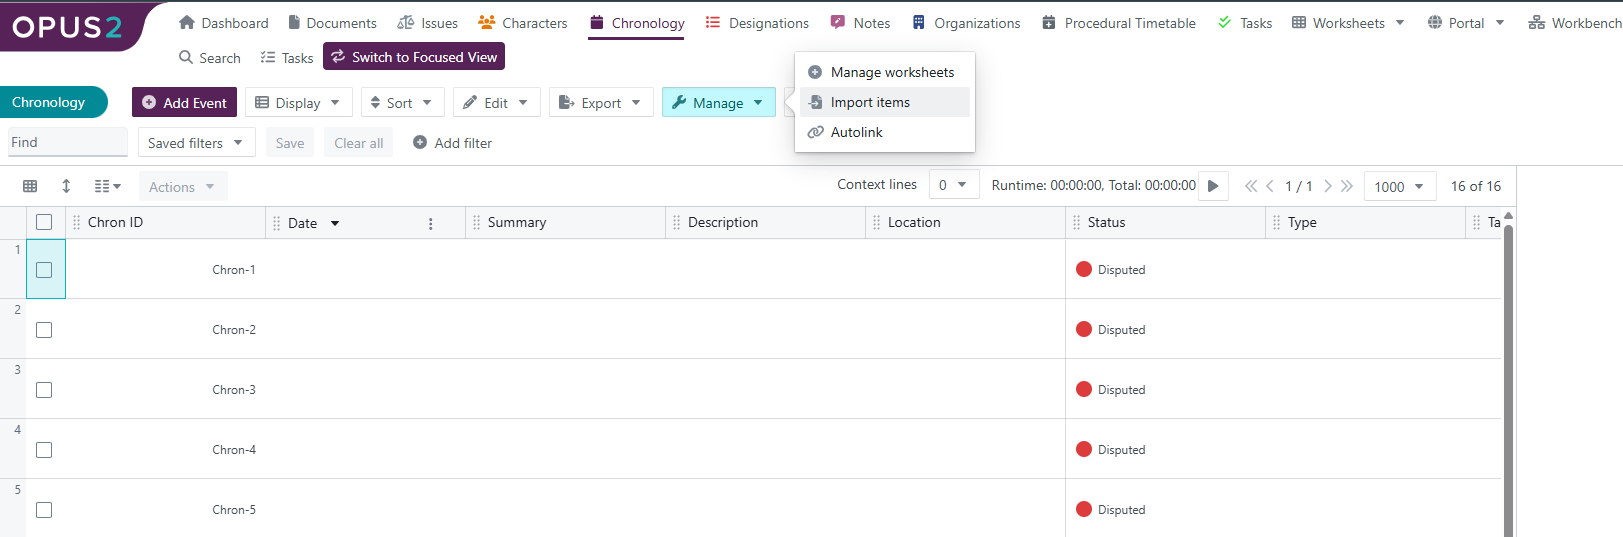
- Upload the Excel or CSV file.
Step 3: Match column headings
- If column headings match worksheet fields exactly, fields are mapped automatically.
- If they do not match, use the dropdown menu beneath each column heading to select the correct Chronology worksheet field.
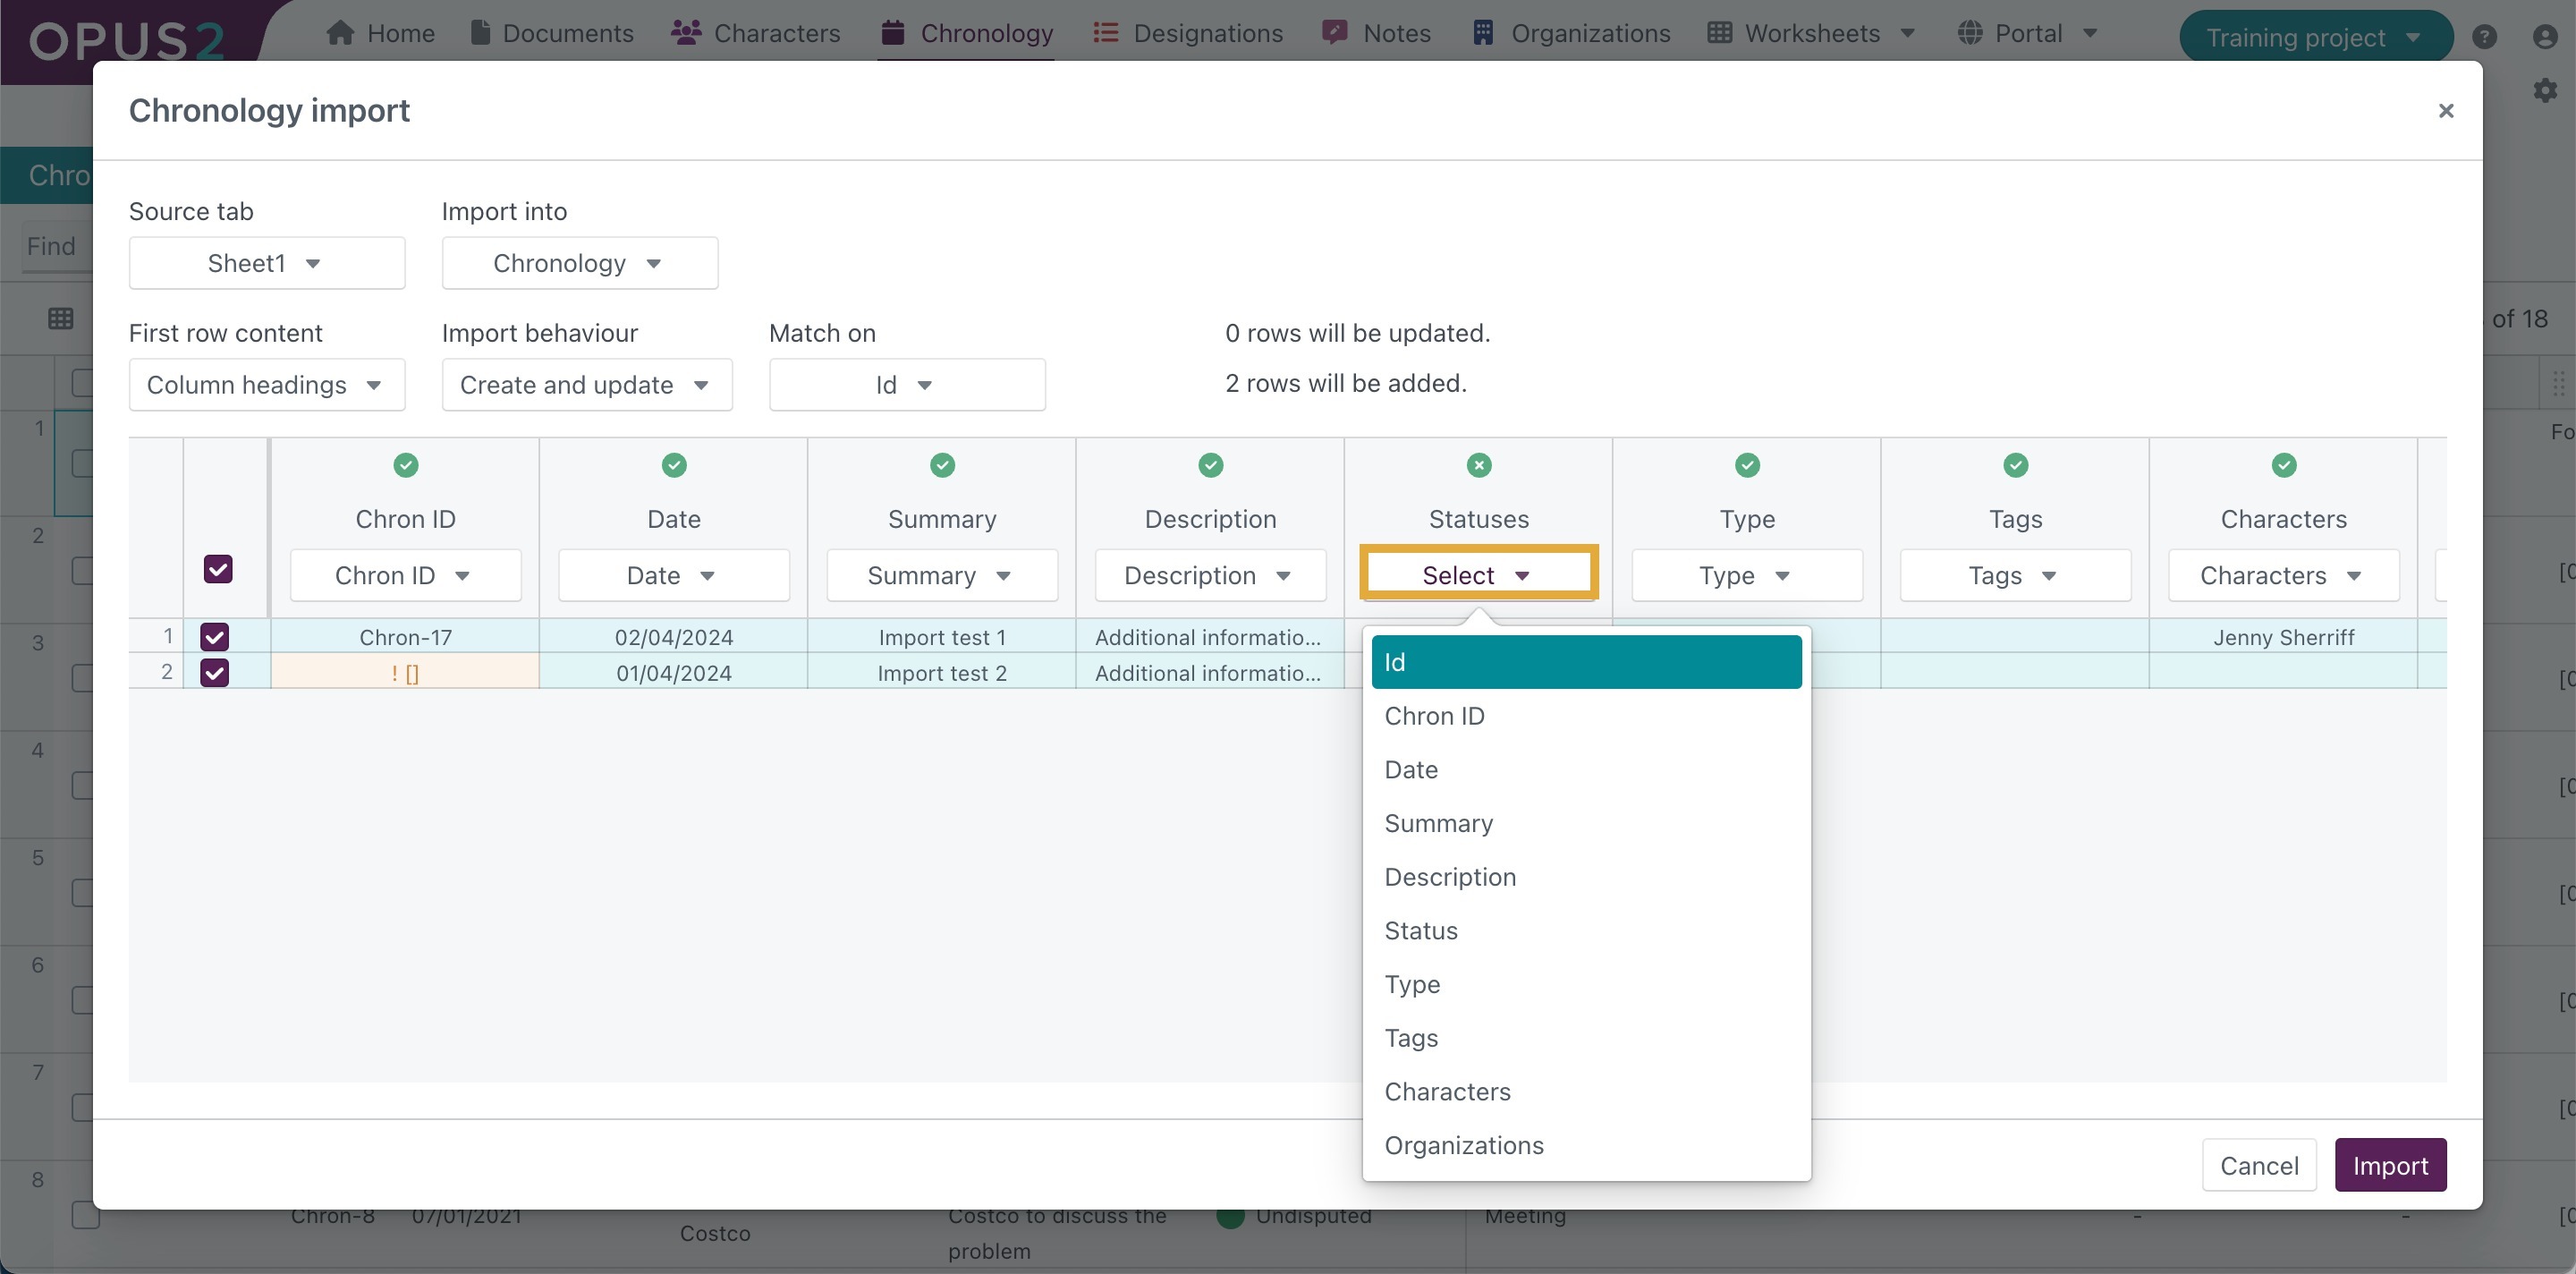
Step 4: Review validation warnings
During import, any invalid data or missing required fields are flagged for review. Fields linking to other worksheets (such as Characters or Organisations) are validated against existing records. If a referenced record does not exist, the field is flagged. Continuing the import will leave that field blank rather than creating a new linked record, maintaining data integrity and connectivity between worksheets.
Step 5: Complete the import
- Review any warnings or mapping issues.
- Proceed with the import once satisfied with the field matching.
- The valid data is imported into the Chronology worksheet.
Note: The Chron-ID field is automatically generated by the system and is unique to each chronology record. It should not be included or modified in import files.
Related links
Related documentation
Opus 2 has help information accessible within the application; click the question mark and then select Documentation in the upper-right area of the platform. You can also access the documentation at: Opus 2 Support.
How to contact us
To contact us about the documentation, or if you have any other questions or issues about Opus 2 solutions, contact Opus 2 Platform Support by emailing Opus 2 Platform Support.