
| Minimum Software Version | 8.18.10 |
| Solution(s) | Cases International ✓ Cases US ✓ Institutions ⨉ Counsel ✓ |
Explains how to create a designation by selecting text in the Transcript Viewer and completing the designation details.
A designation marks a specific section of a transcript so you can categorise it and refer back to it. You create a designation in the Transcript Viewer by selecting text and completing the Add Designation dialogue.
Designations let you formally mark and categorise segments of transcript text for analysis, objections, and downstream review. A designation remains highlighted in the transcript, with its details displayed in the right-hand margin. Once saved, it is also added to the Designations worksheet, where you can review and manage designations across the project.
How to create a designation
Open the Transcript Viewer
- Open your project and go to Documents.
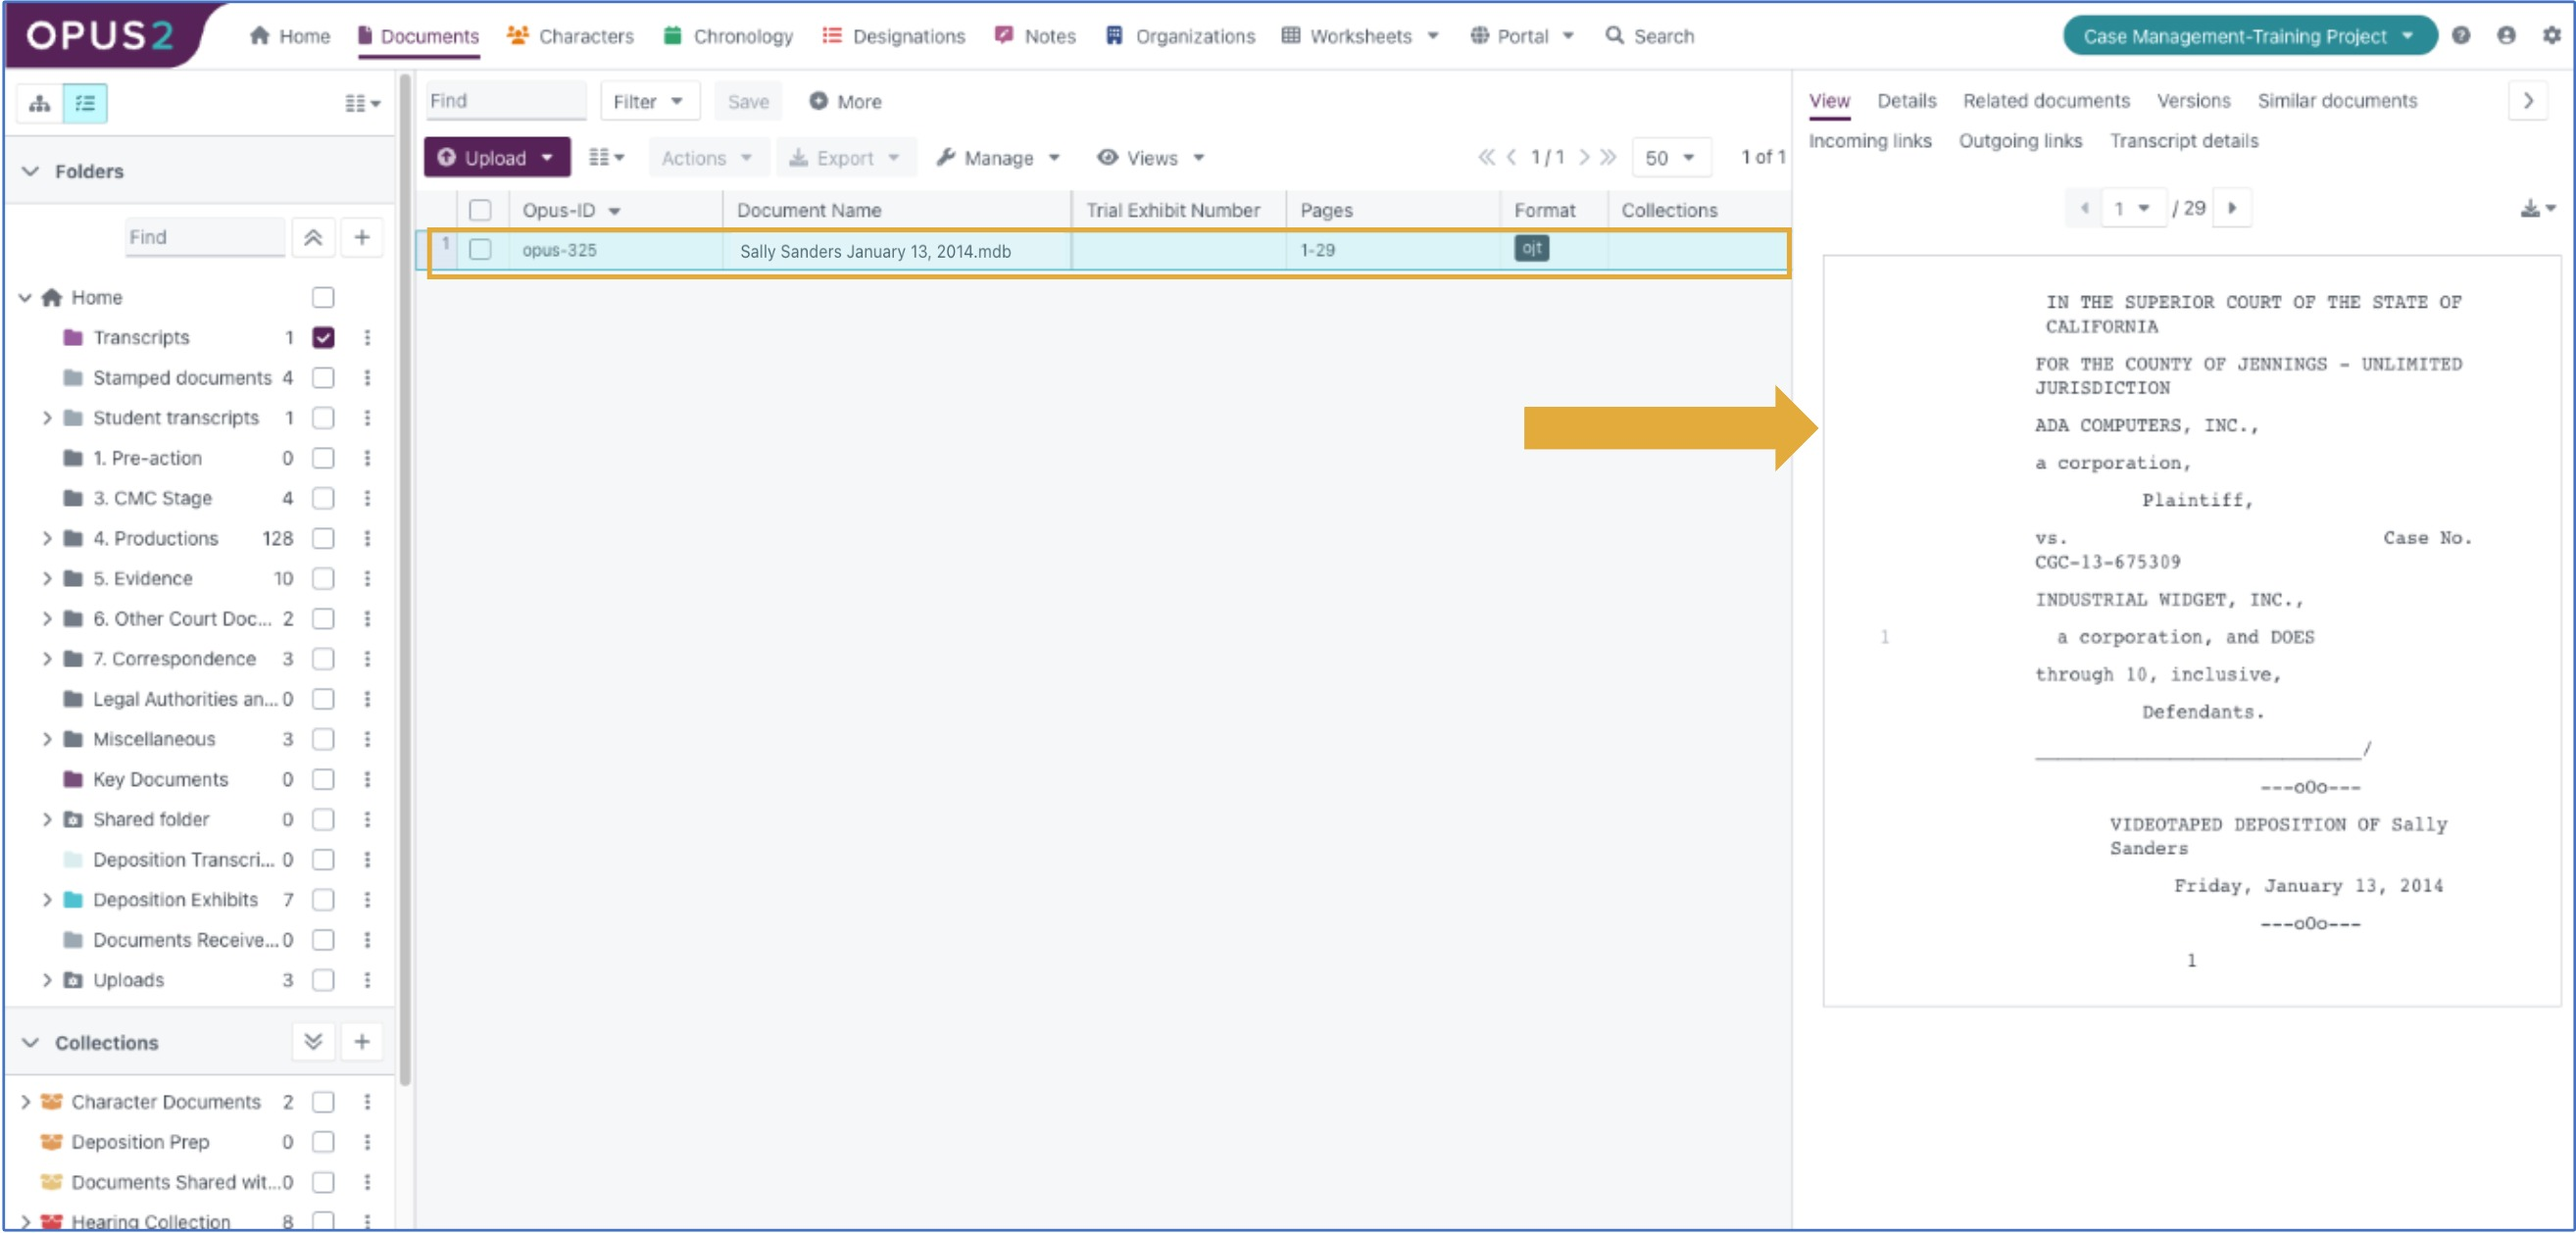
- Click the row of the required transcript.
- In the Details panel, click the preview image of the transcript. The Transcript Viewer opens.
Create the designation
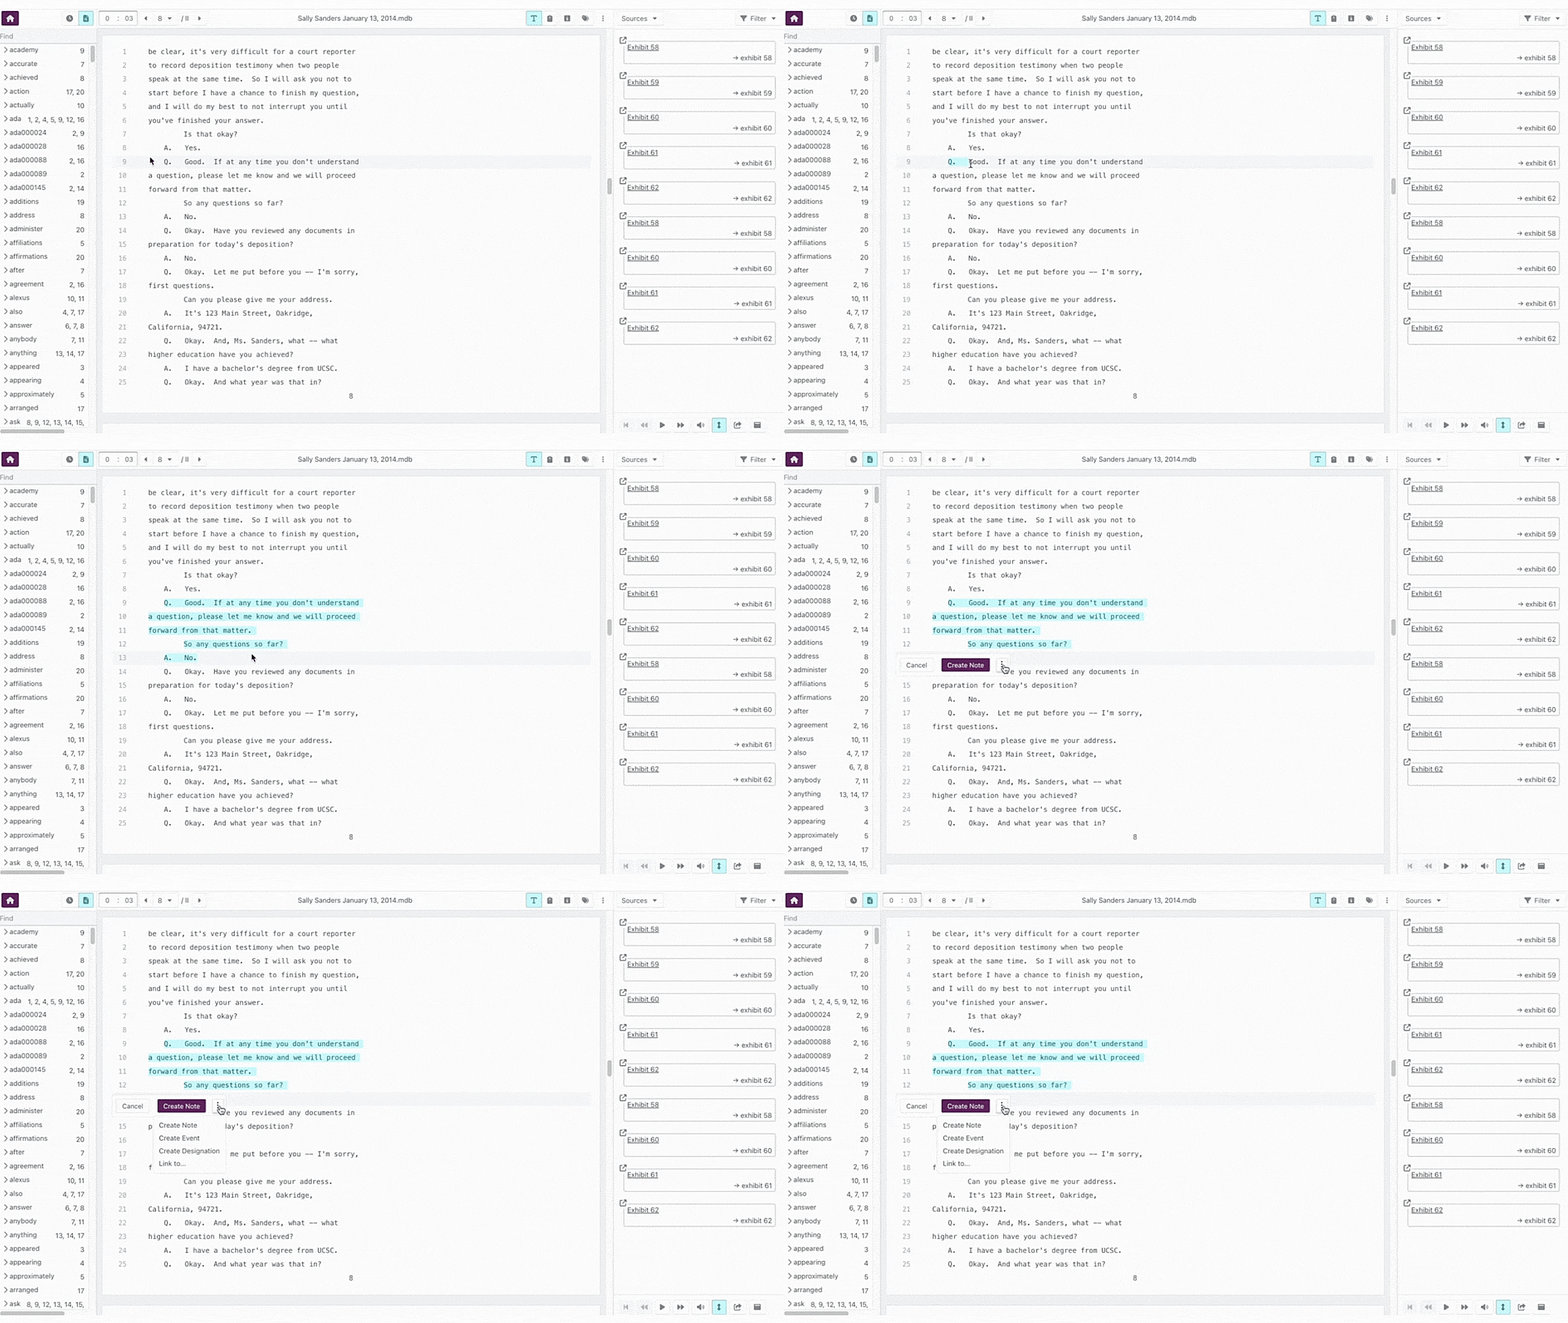
- Click and drag across the section of text you want to designate.
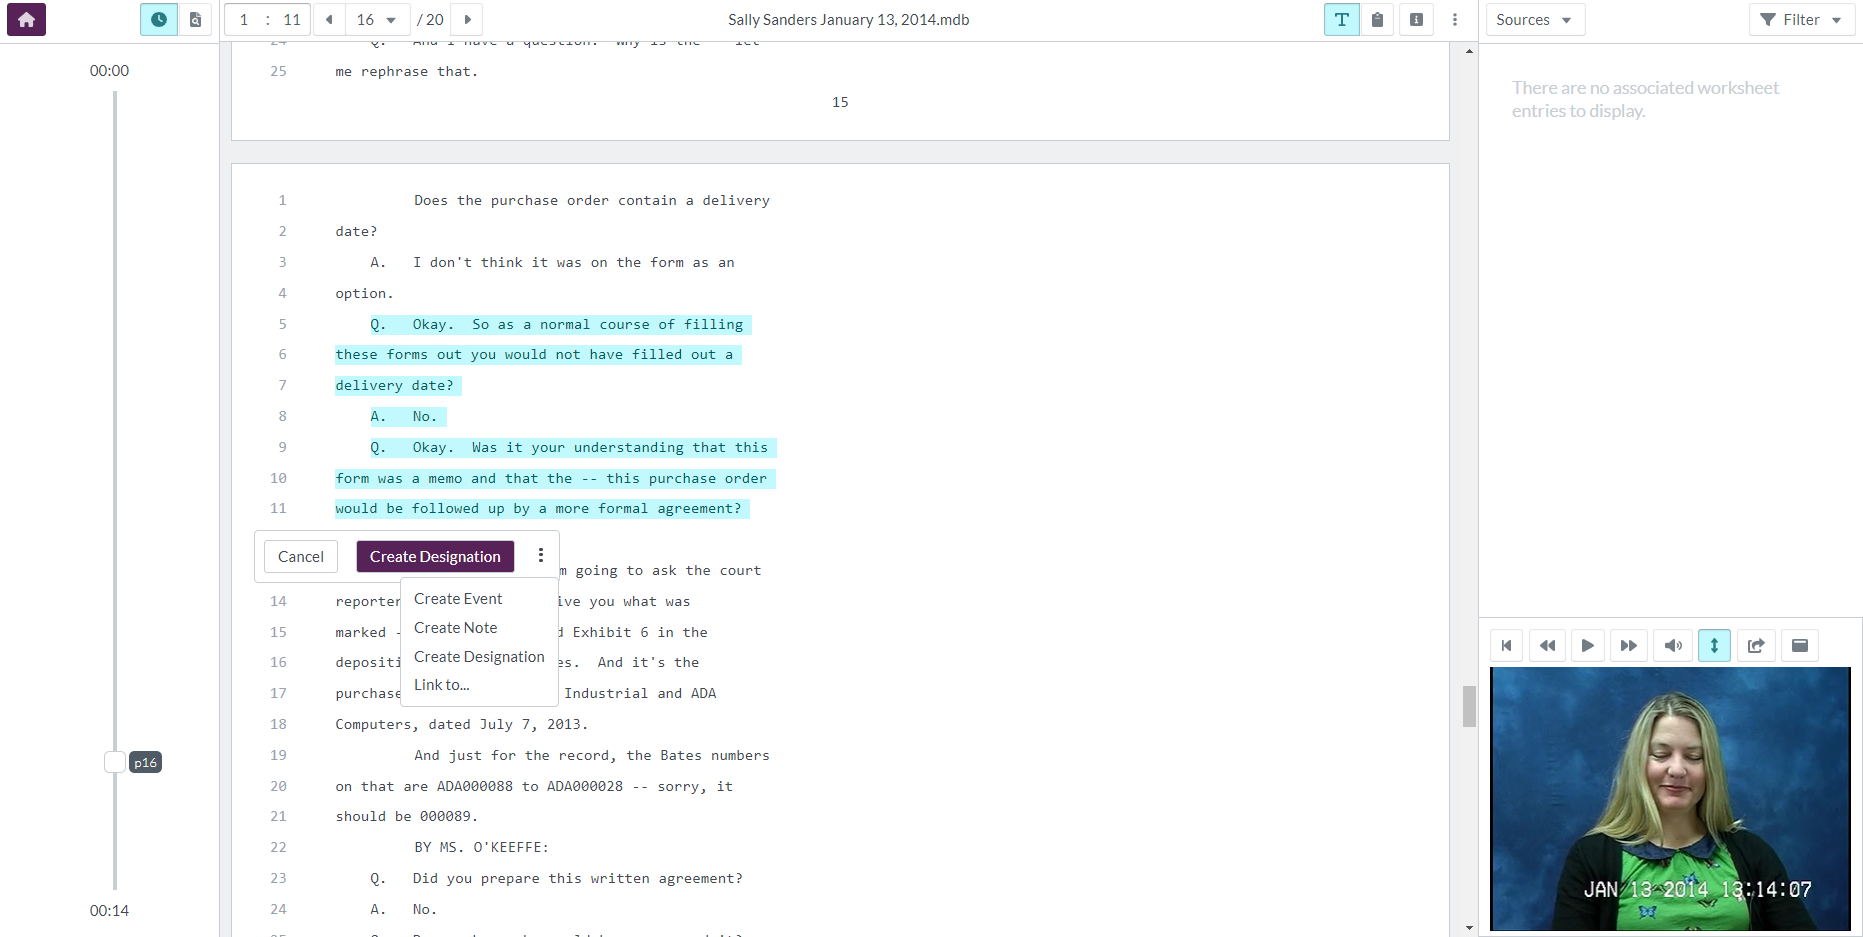
- Release the mouse button. The selected text is highlighted, and the options pop-up appears.
- Click Create Designation. If it is not visible, click the more options (⋯) icon and select it from the list. The Add Designation dialog opens.
Complete the Add Designation dialogue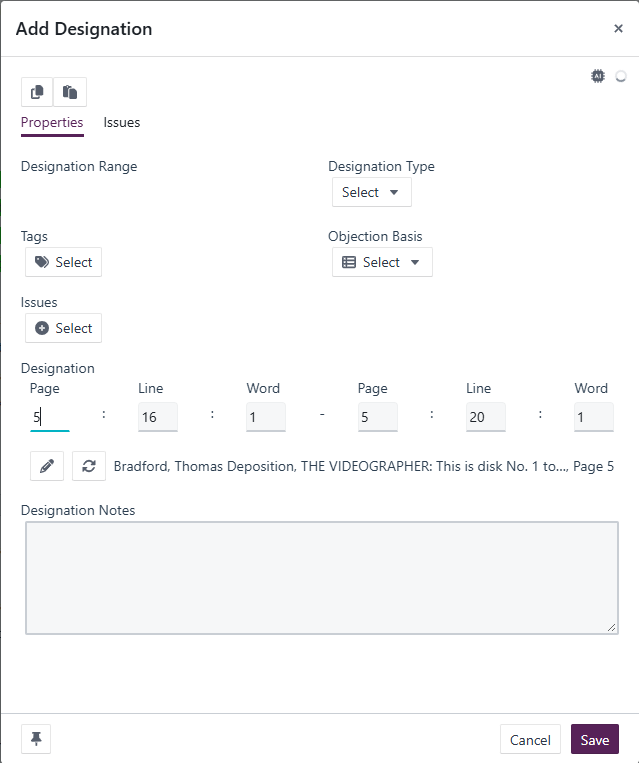
- Choose the appropriate Designation type.
- If applicable, select an Objection basis.
- Add any Issues, Objection notes, or Tags you need.
- Adjust the selection range by doing one of the following:
- Edit the Page, Line, or Word numbers.
- Click the media icon and use the video playback slider to fine-tune the timing.
- Click Save.
After you save, the designated text stays highlighted in the transcript, the designation details appear in the right-hand margin, and the designation is added to the Designations worksheet.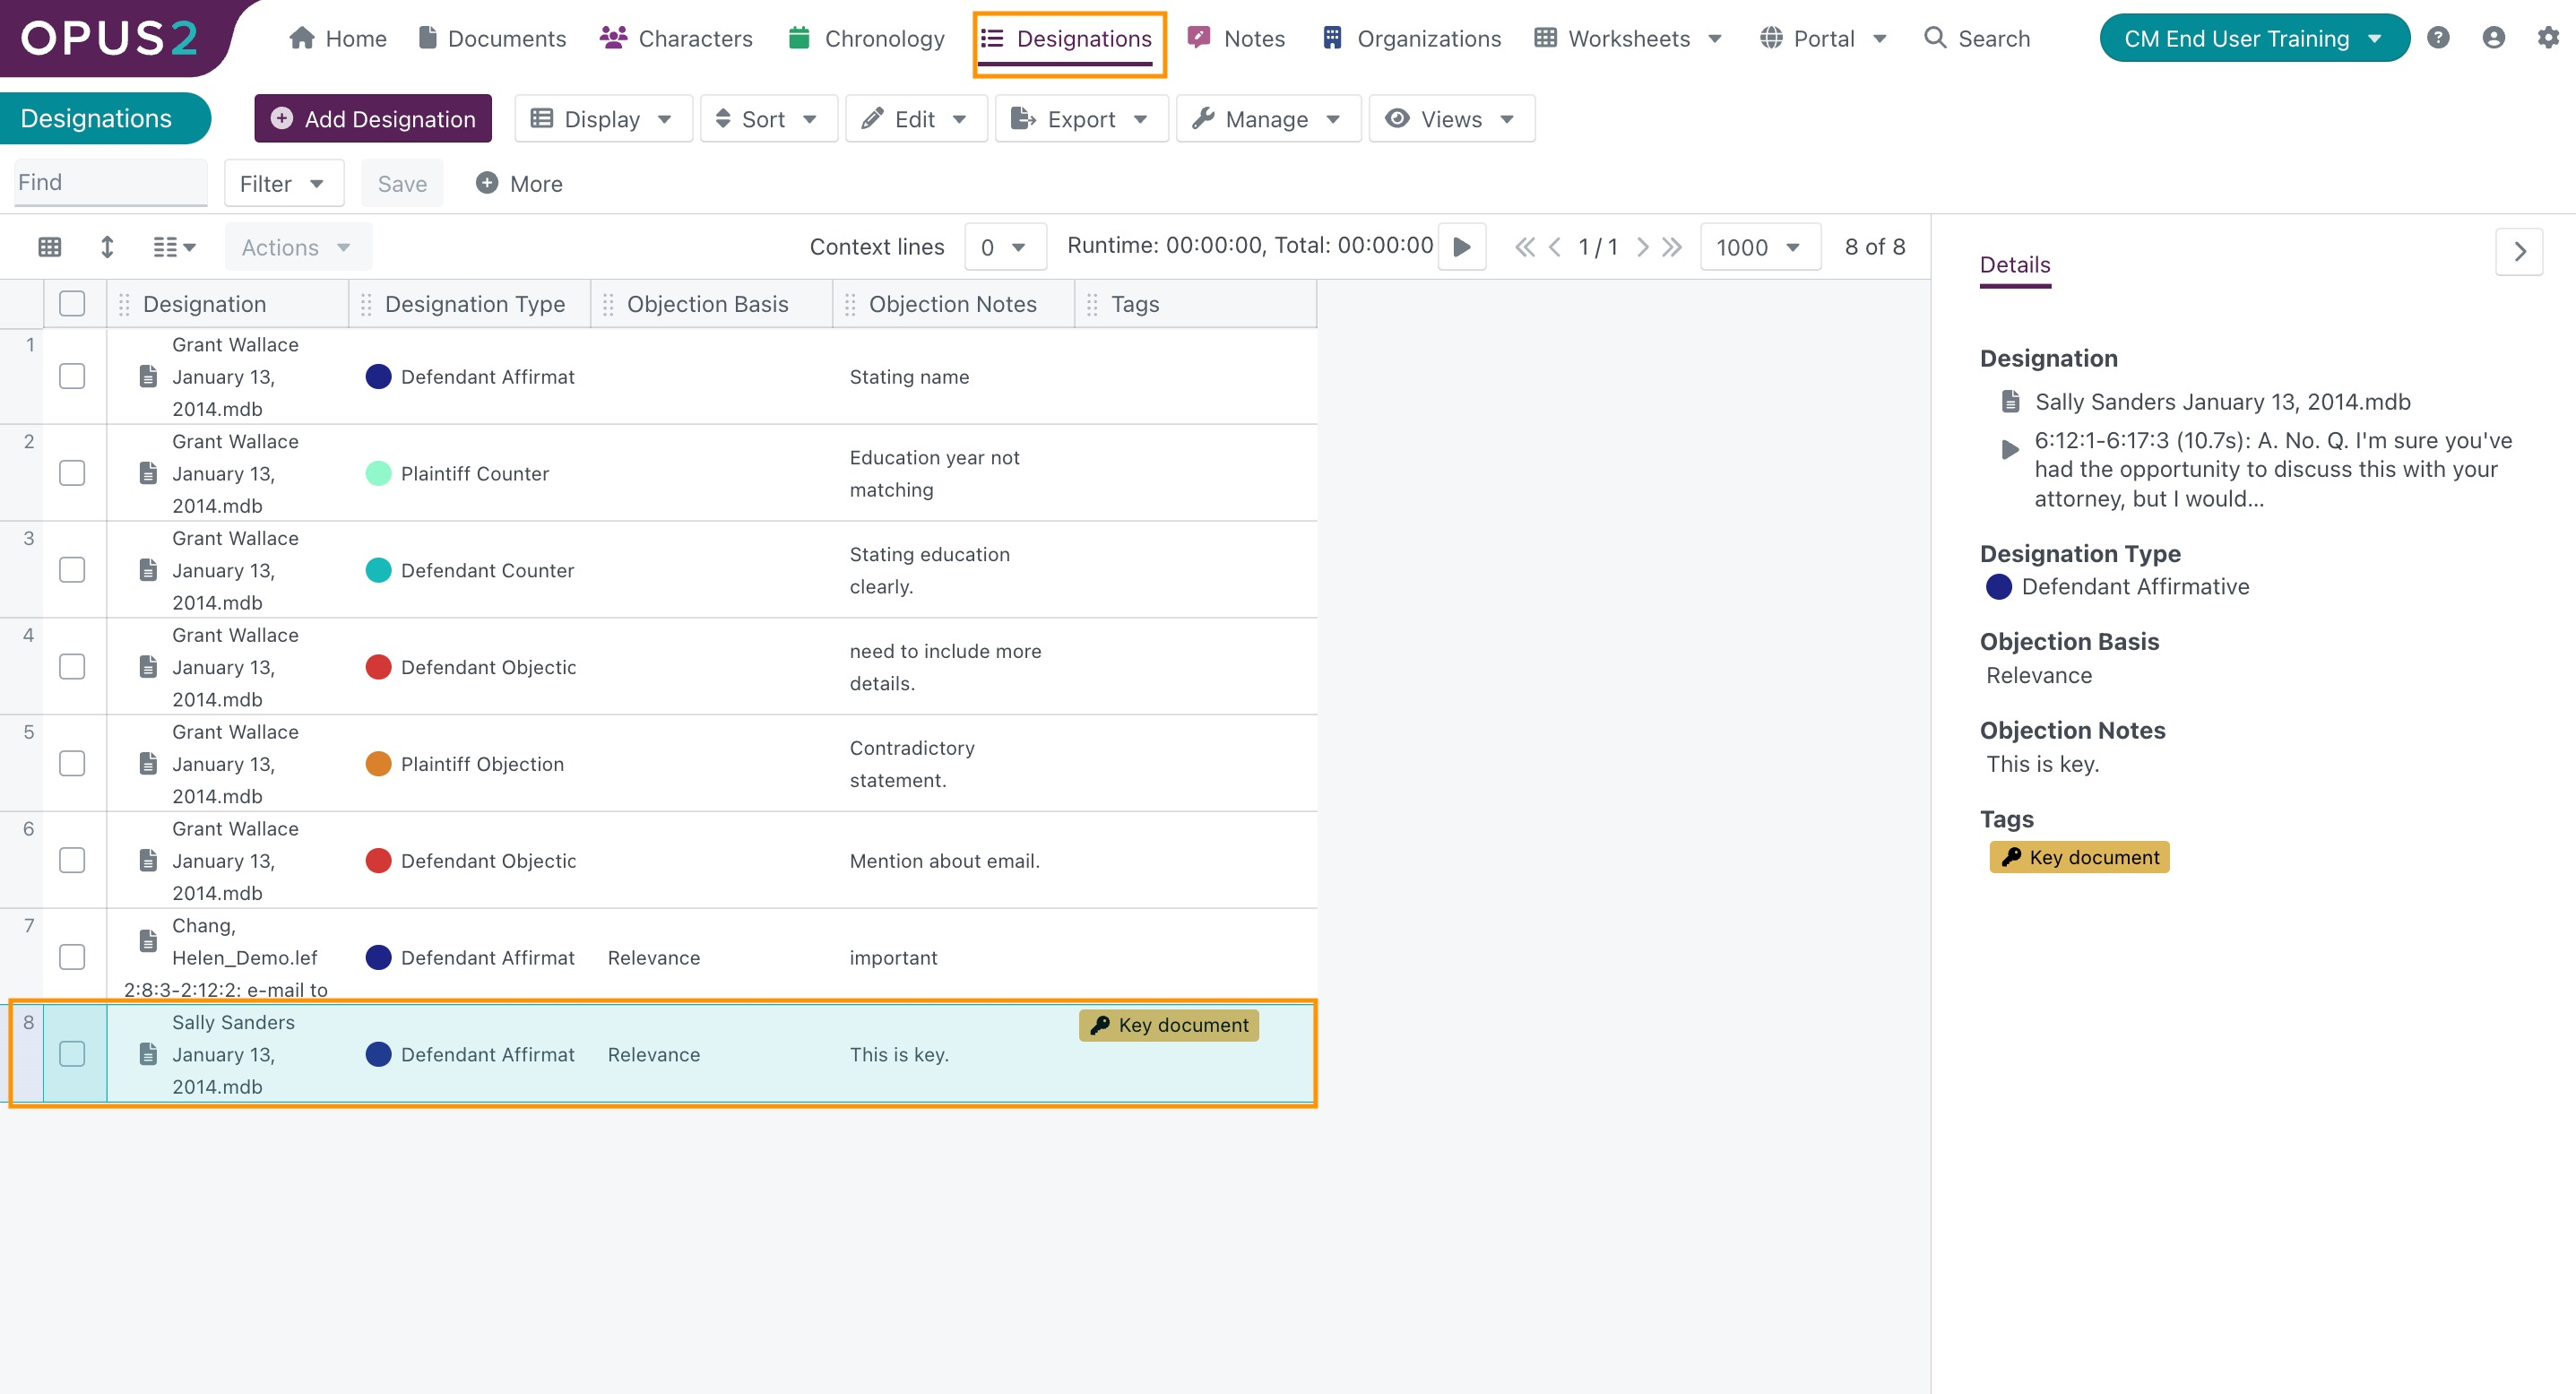
Tip: Review the designation range before you save to make sure it is accurate, especially when you are working with synced video and transcript content.
Related links
- Uploading transcripts
- How to annotate a transcript
- Using the Issues worksheet
Related documentation
Opus 2 has help information accessible within the application; click the question mark and then select Documentation in the upper-right area of the platform. You can also access the documentation at: Opus 2 Support.
How to contact us
To contact us about the documentation, or if you have any other questions or issues about Opus 2 solutions, contact Opus 2 Platform Support by emailing Opus 2 Platform Support.