
| Minimum Software Version | 8.18.10 |
| Solution(s) | Cases International ✓ Cases US ✓ Institutions ⨉ Counsel ✓ |
Explains how to bulk replace documents in Opus 2 to update document versions while preserving existing work, such as notes, links, and annotations.
Opus 2 supports bulk document replacement, allowing users to update multiple documents at once while retaining prior work, including notes, links, and other document-level relationships. Bulk replacement is performed from the Files page and relies on matching each replacement file to an existing document using a unique identifier.
Bulk replacement is recommended when replacement documents are almost identical to the originals, with only minor changes such as redactions, highlights, or trial exhibit numbers. Using bulk replacement ensures that existing work is accurately transferred to the corresponding locations in the new document versions, reducing the risk of misalignment or formatting issues.
Bulk replacement
Step 1: Choose a unique identifier
Bulk replacement relies on matching each replacement document to an existing document using a unique identifier. Common options include:
- Exact filename matching, or
- A custom document metadata field created specifically for matching
For guidance on creating metadata fields, refer to the document metadata configuration article.
Step 2: Open the Files page
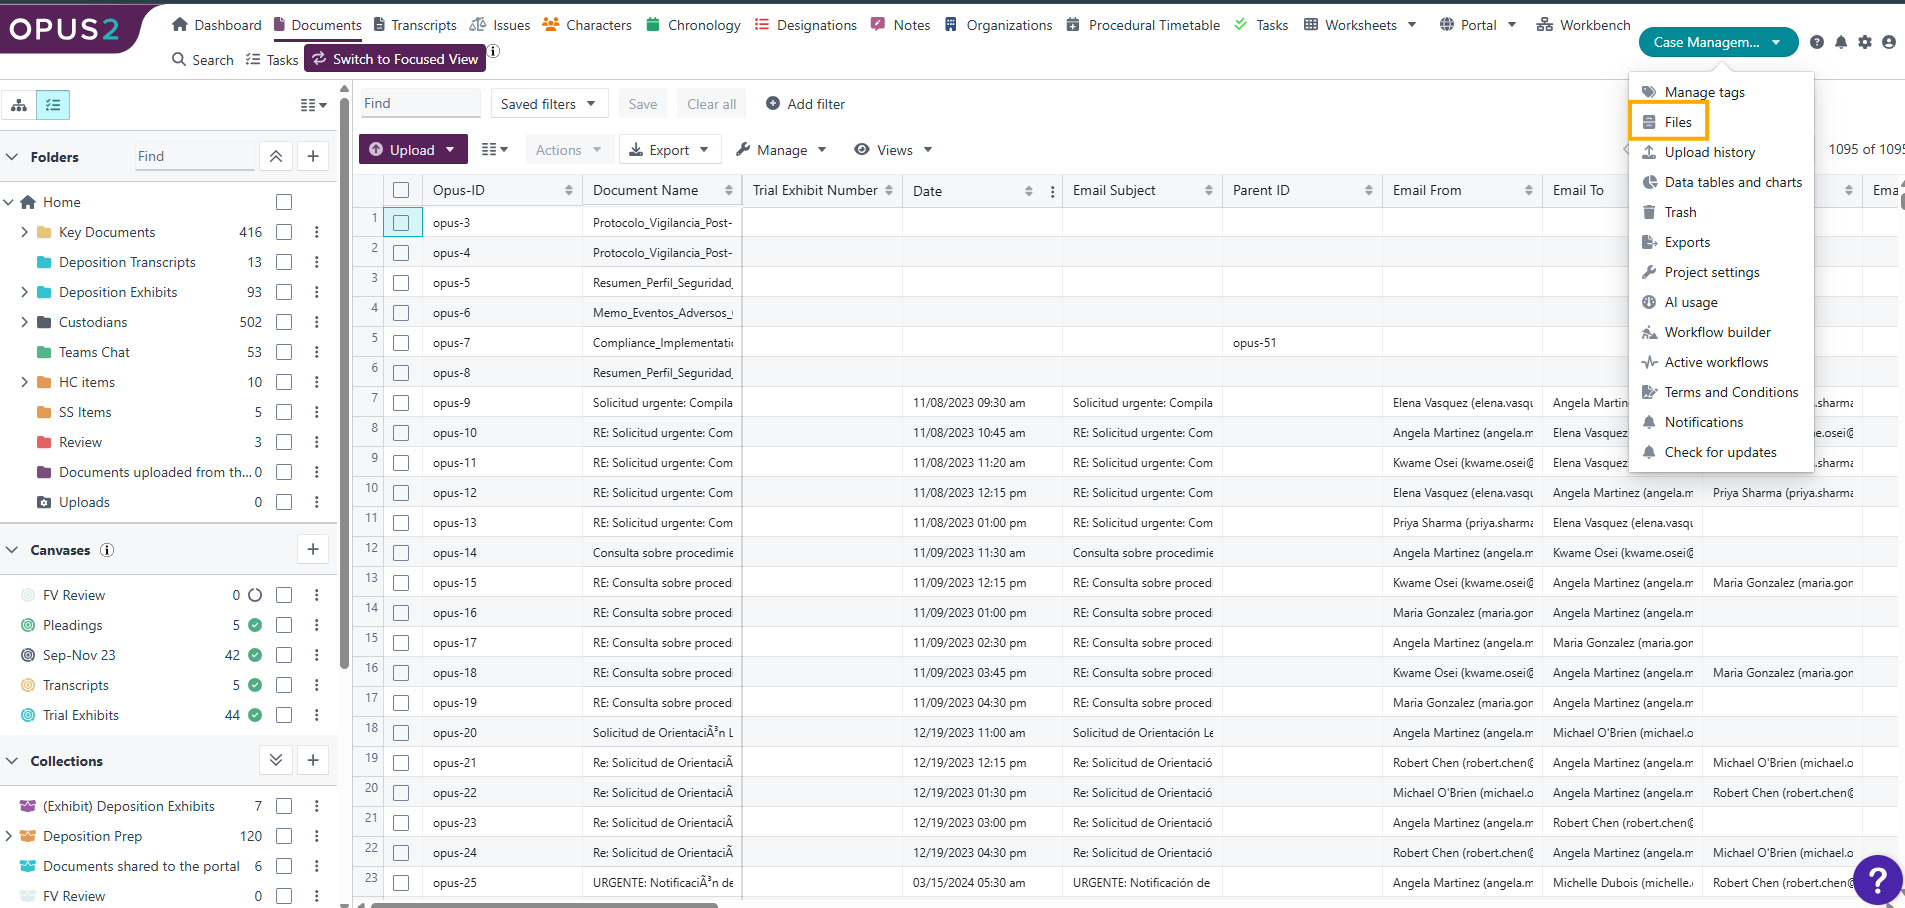
Bulk replacement is performed from the Files page.
- Click Project.
- Select Files.
Step 3: Upload the replacement documents
Replacement documents must be uploaded without being published.
- Click Upload.
- In the upload dialog, toggle Publish off.
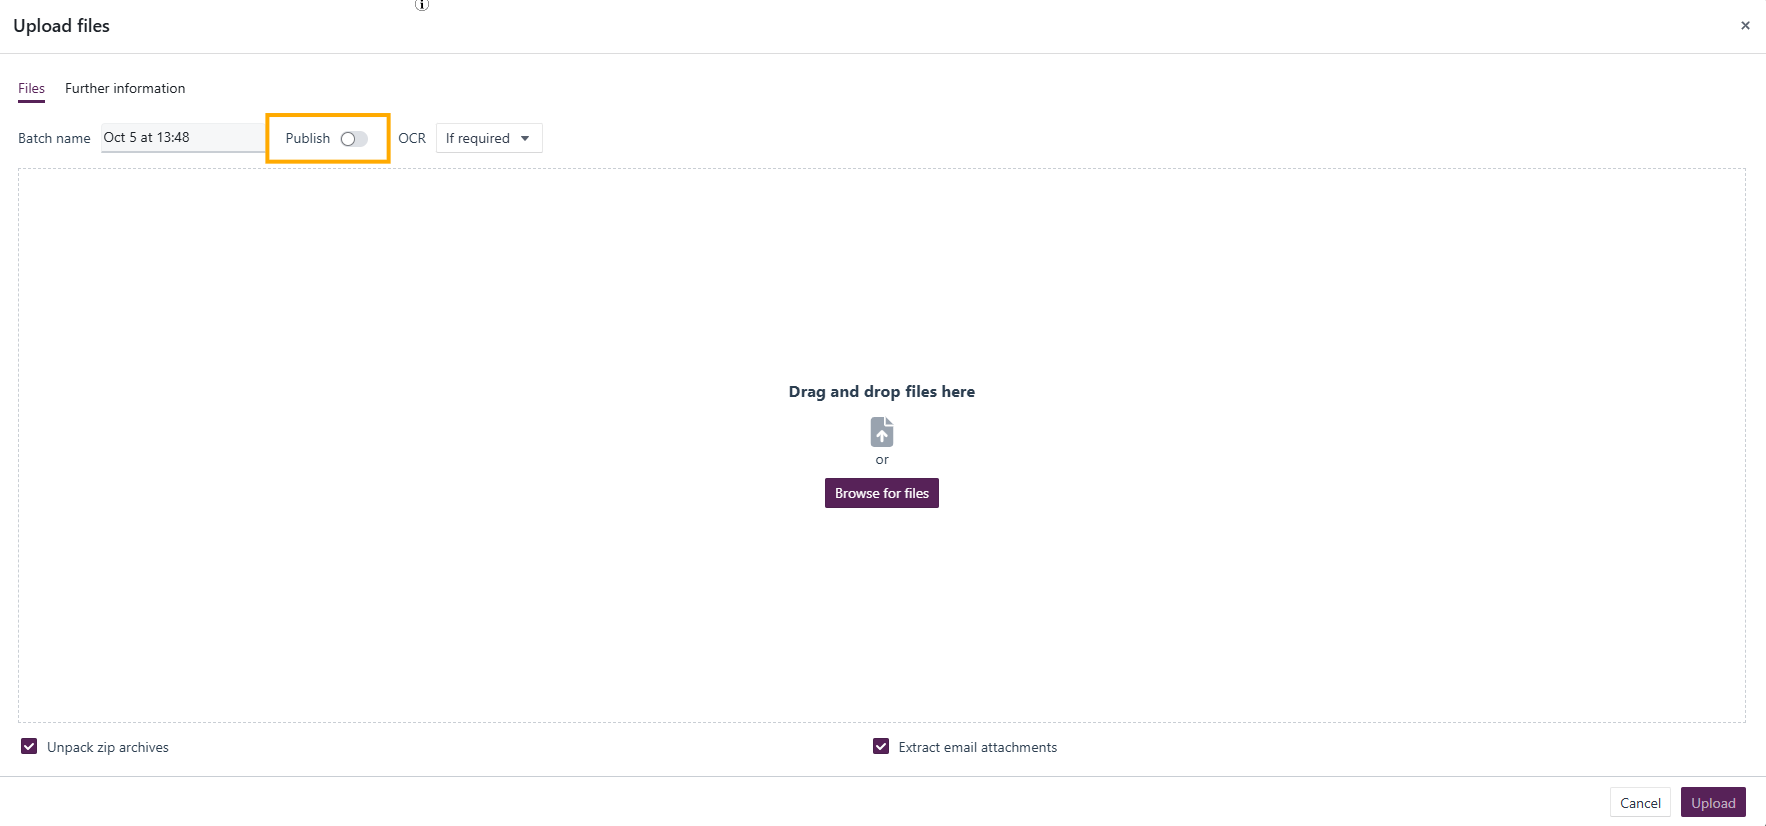
- Drag and drop the replacement files into the upload dialog.
- Click Upload.
This ensures the files are available for matching but not yet visible as documents.
Step 4: Select the documents to be replaced
Use the checkboxes to select the newly uploaded replacement files that should be used in the bulk replacement process.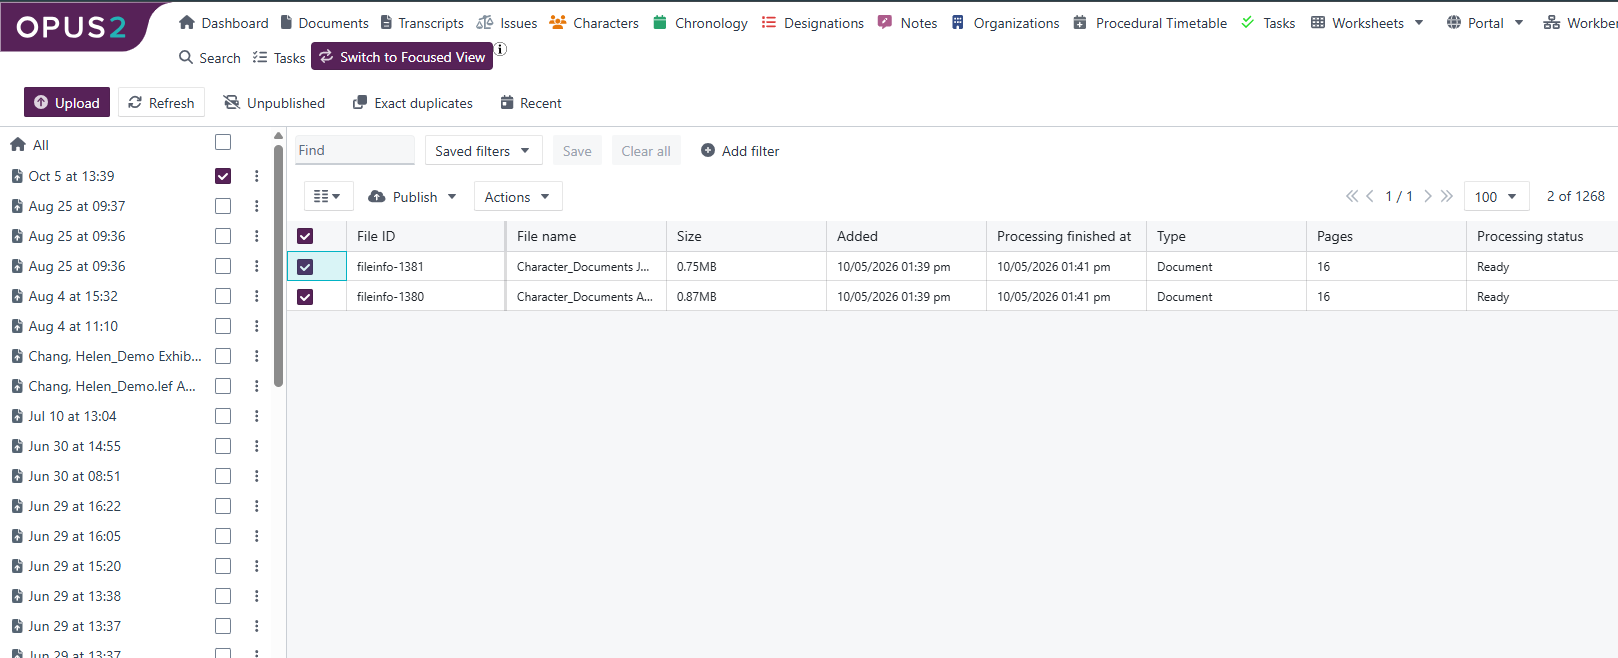
Step 5: Publish using auto-update
- Click Publish.
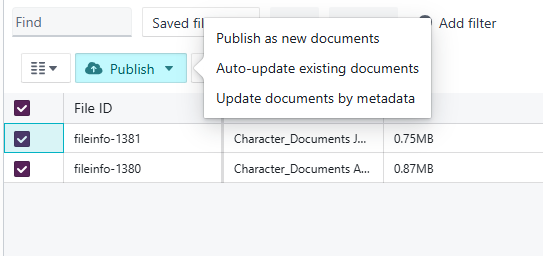
- Select the appropriate option from the dropdown:
- Publish as new documents – Creates new documents from the uploaded files without replacing any existing documents.
- Auto-update existing documents – Matches replacement files to existing documents by filename and updates them. This opens the document-matching dialog.
- Update documents by metadata – Matches replacement files to existing documents using a custom metadata field. This opens the document-matching dialog.
This opens the document-matching dialog.
Step 6: Match the documents
- Under Match files by, choose how replacement files should be matched to existing documents:
- Exact filename – Matches files where the filename is identical.
- Fuzzy filename – Matches files where the filename is similar but not identical, allowing for minor differences.
- Similarity – Matches files based on content similarity rather than filename.
- Metadata – Matches files using a custom metadata field created for this purpose.
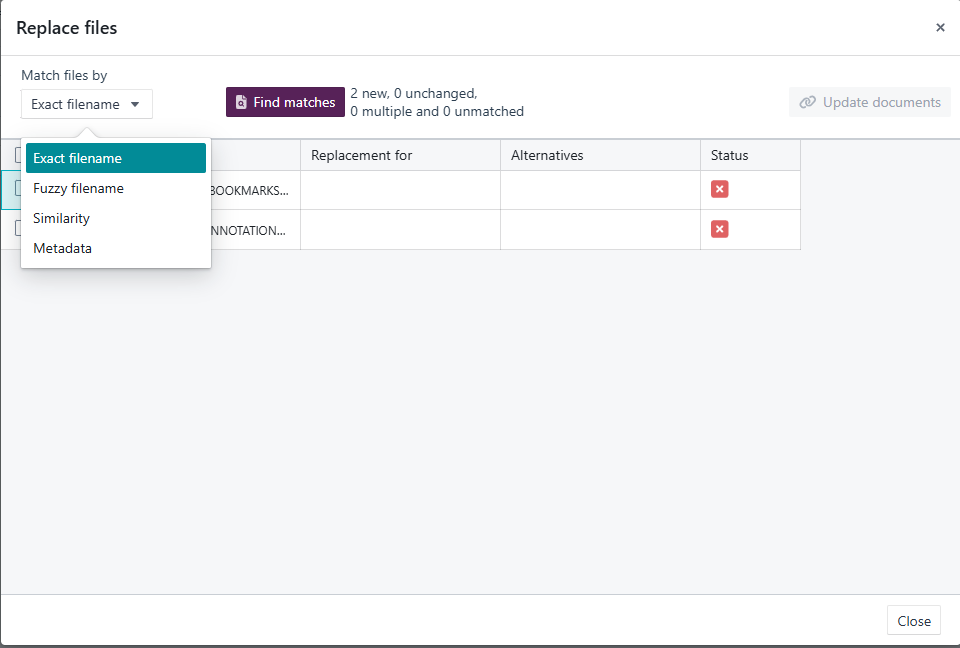
- Click Find matches to identify corresponding documents.
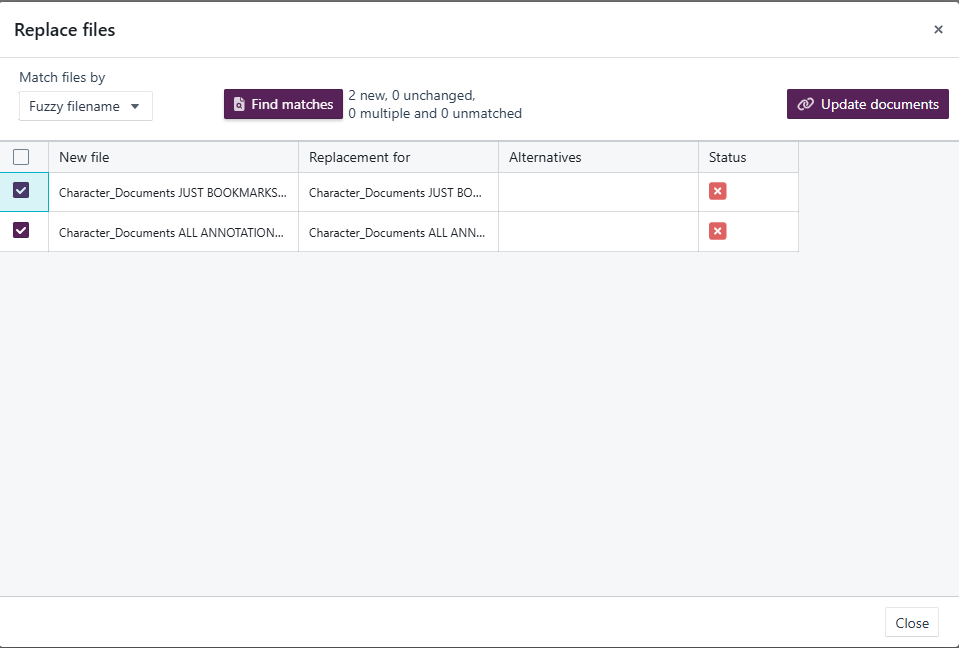
Step 7: Update the documents
- Review the matched documents carefully.
- Deselect any incorrect matches using the checkboxes.
- Click Update documents to complete the replacement.
After completing bulk replacement, review a sample of the updated documents to confirm that notes, links, and annotations have transferred correctly. Always ensure that matching identifiers are accurate before running the update to avoid incorrect replacements.
Related links
Related documentation
Opus 2 has help information accessible within the application; click the question mark and then select Documentation in the upper-right area of the platform. You can also access the documentation at: Opus 2 Support.
How to contact us
To contact us about the documentation, or if you have any other questions or issues about Opus 2 solutions, contact Opus 2 Platform Support by emailing Opus 2 Platform Support.