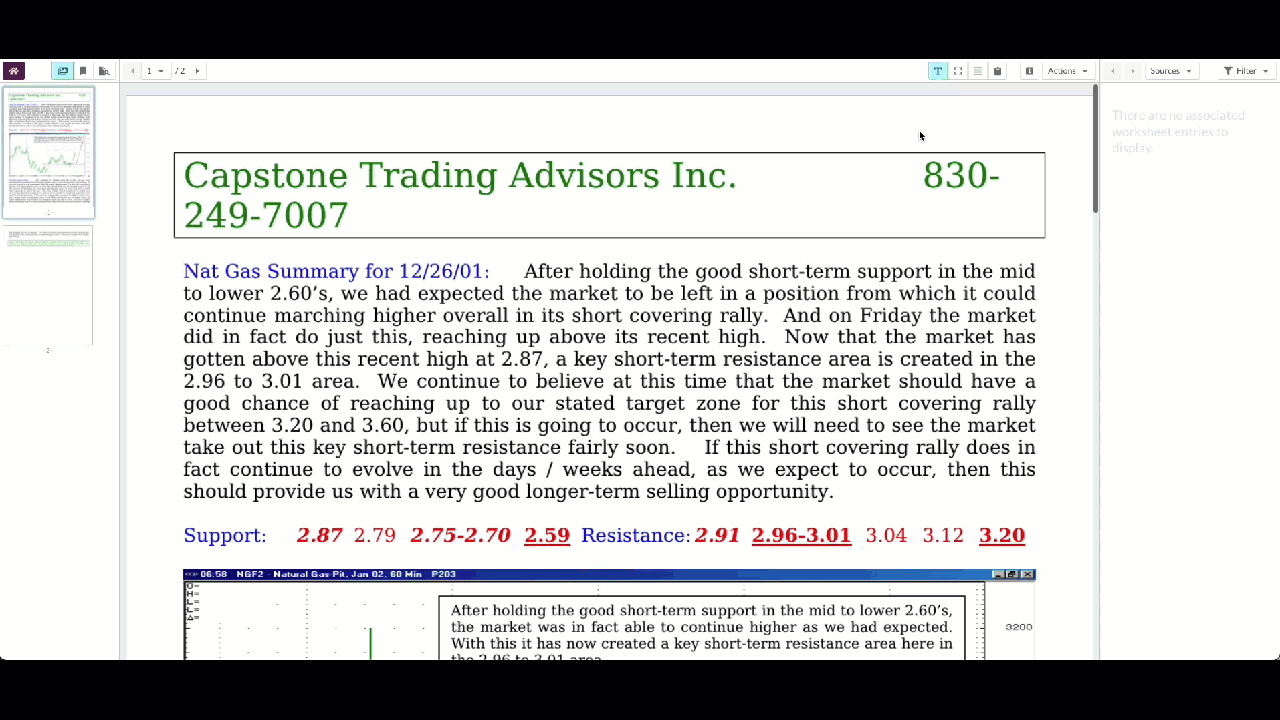
| Minimum Software Version | 8.18.10 |
| Solution(s) | Cases International ✓ Cases US ✓ Institutions ⨉ Counsel ✓ |
Explains how to add a box note annotation to a specific area of a document, such as charts, images, or un‑OCR’d text, using the Document Viewer.
The Opus 2 Document Viewer includes several tools for text selection and annotation. While text highlighting is the most common annotation method, it is not suitable for content such as images, charts, or text that has not been OCR’d.
For these scenarios, users can add a box note annotation by placing a selectable box over a specific region of the document. This allows notes to be associated with visual elements or non‑selectable content while maintaining visibility and access controls.
Adding a box note annotation
- Open the required document in the Document Viewer.
(See related guidance for opening a document if required.) - From the document toolbar, click the Select Box button.

- Click and drag to draw a box over the image, chart, or un‑OCR’d text you want to annotate.

- Release the mouse to display the action prompt.
- Select Create Note.
- If Create Note is not visible, click the three‑dot menu and select it from the dropdown.
- Complete the Add Note dialog:
- Notification Setting – Choose who will be notified when a new note is created. By default, no notifications are sent.
- Note – Enter the annotation text.
- Other options – Complete any additional settings as required.

- Click Save to create the note.
Related Links (optional)
Use box note annotations to capture context and insight directly on visual or non‑OCR’d content. Notify the appropriate users or groups to support collaboration and review within your case.