
| Minimum Software Version | 8.16.0 |
| Solution(s) | Cases International ✓ Cases US ✓ Institutions ⨉ Counsel ⨉ |
Explains how to query multiple documents using AI Workbench, including how to enter queries, interpret results, and save query outputs.
Querying multiple documents in AI Workbench works differently from a single-document query. This article explains how to query a canvas of documents, interpret relevancy scores, and save query outputs. For further background, see AI Workbench FAQs.
Querying multiple documents
- Select Workbench in the top toolbar.
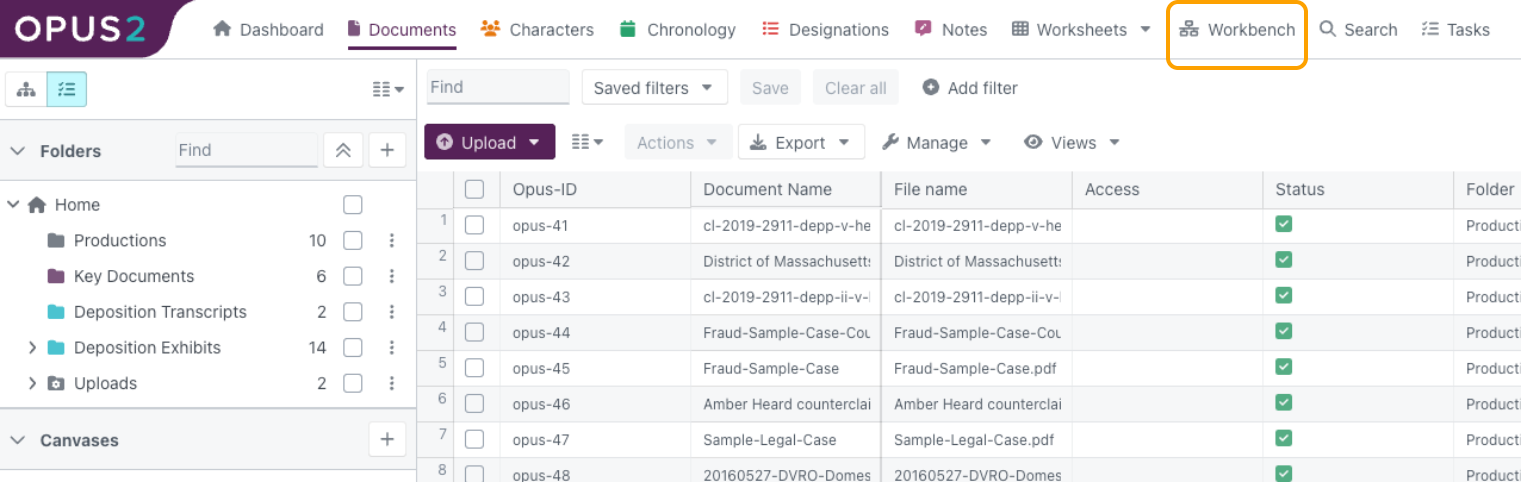
- Choose the canvas or canvas section you want to query using the dropdown menu near the top-left corner.
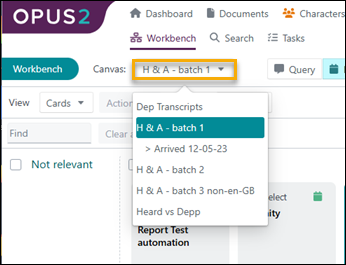
- Select Query to the right of the canvas dropdown.
- Enter your query in the Question box and select Go or press Enter.
If your query does not return the expected results, clear the query history and rephrase the query.
Query examples
The following are examples of effective queries:
- Generate a list of events, in chronological order, that relate to [topic].
- Summarise the witness's opinion on [topic].
- Prepare a list of potential defences to the allegations in this document.
- Generate a list of key themes, issues, or topics mentioned in this document.
- Identify what this document says about [topic].
- Identify the testimony the witness gave about [topic].
Tips for writing effective queries
Use commands rather than questions: Frame your query as an instruction rather than a question. Example: Generate a list of people mentioned in this document.
Be specific: The more detailed your query, the more relevant the answer will be. Example: How many times was Mrs Smith injured by her husband?
Use key terms: Including important words or phrases from the document helps focus the answer. Example: List the people involved in international anti-doping agencies.
Give context: Adding background information makes your query clearer. Example: Several cases have been brought against ADA Computers in the last 10 years. List the complainants.
Keep it simple: Clear, direct requests work best. Example: List the events related to defamation.
Build on previous prompts: You can submit several prompts in sequence to progressively refine the results. For example, start with an open prompt such as Generate a list of people mentioned in this document, then follow up with Provide more details about [person's] involvement or Based on the document set, who was the principal person involved from this list and why.
Interpreting results
Each answer is shown with a source relevancy score as a percentage.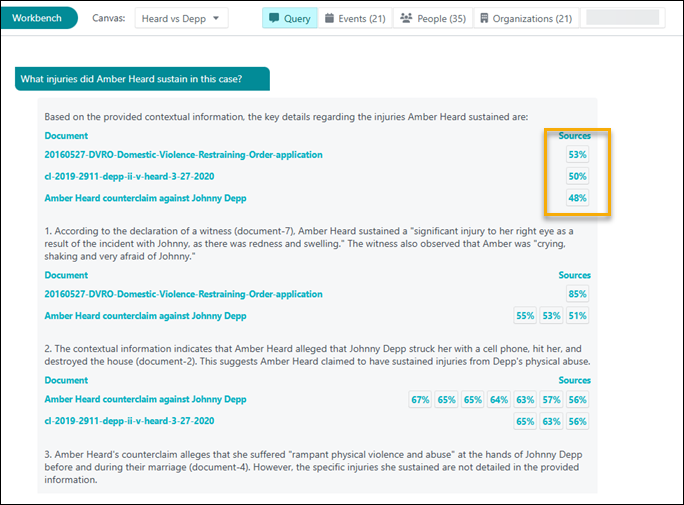
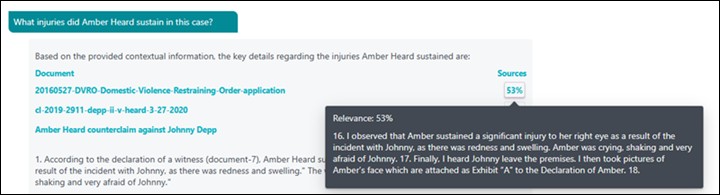
- Hover over the relevancy score to see the text extract.
- Select the relevancy score to expand the right-hand panel and view a preview of the source document at the relevant page, with the text extract highlighted.
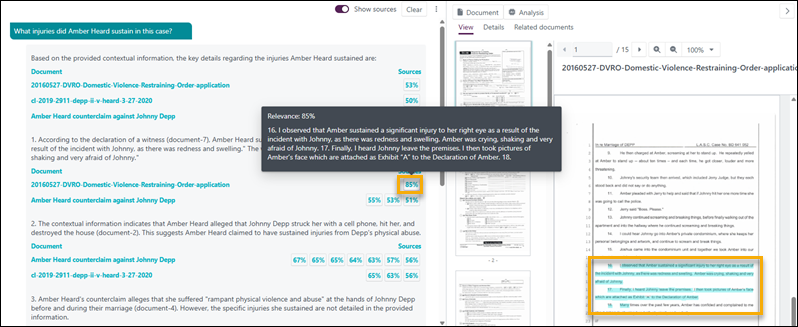
The document preview contains two tabs — Document and Analysis — which behave in the same way as in a single document query.
To clear the chat history, select Clear.
Saving queries
Save to a Word document: Select the three-dot kebab menu in the top-right corner and select Download (docx). The prompts and responses are saved to a .docx file (without sources) in the download location specified in your browser settings.
Save to the project: Select the three-dot kebab menu and select Add to project (docx). A message confirms the file has been sent for processing. A document named chat.docx is generated and published to the Uploads folder.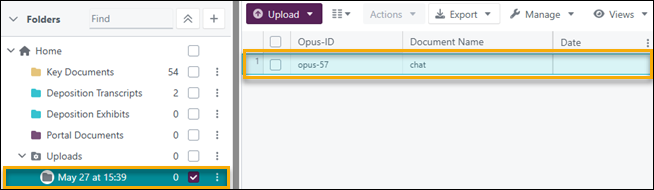
Related links
Related documentation
Opus 2 has help information accessible within the application; click the question mark and then select Documentation in the upper-right area of the platform. You can also access the documentation at: Opus 2 Support.
How to contact us
To contact us about the documentation, or if you have any other questions or issues about Opus 2 solutions, contact Opus 2 Platform Support by emailing Opus 2 Platform Support.