
| Minimum Software Version | 8.15.0 |
| Solution(s) | Hearings ⨉ Cases International ✓ Cases US ✓ Institutions ⨉ Counsel ⨉ |
This article outlines how to configure your Relativity Integration within a project. For information on security and APIs in use, refer to Relativity Integration: Setting up a new connection and Relativity Integration Overview
Prerequisites
You require some additional information before setting up the integration, and you also require certain permissions, as follows:
- You require at least a Project Admin level role on Opus 2.
- You need the Client ID and Client Secret from Relativity or your Relativity Provider.
- The URL of your Relativity instance.
Setup
As a System or Project Admin within Opus 2:
- Navigate to Project settings option in the main project menu.
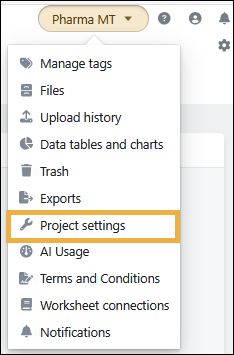
- Navigate to the Integrations menu tab.
- Add New Integration and then select Relativity from the drop-down menu.
The initial integration setup dialog opens with the Relativity service selected. 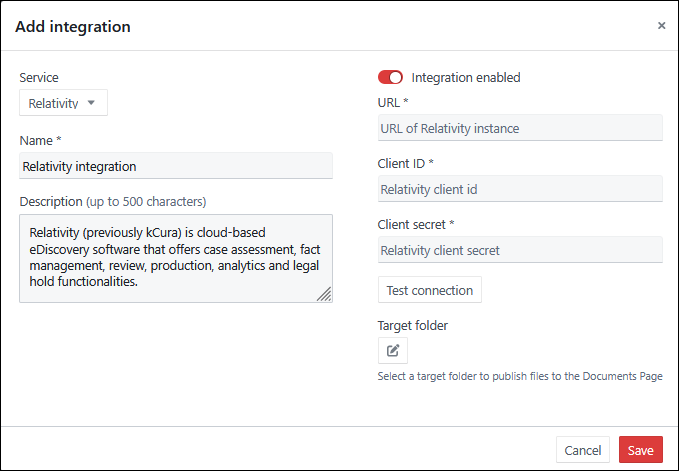
- Enter a Name, and optionally, a Description. These details are used to identify different connections if you have more than one.
- Enter the URL of the Relativity instance you want to connect to, for example: https://relativity.example.com/Relativity/
- Enter the Client ID and Client Secret to connect to your Relativity instance. The Client ID / Client Secret need to be generated on your Relativity Instance by an admin.
- Select Test Connection. You are looking for a "Connected" message to confirm all above details are correct.
- Select a target folder to publish files to the Documents Page.
- Select Save.
Configuration
Once you have setup your integration as described above, there are some additional steps to be carried out to enable syncing.
If you hover over the Run button of a newly created integration, the button is unavailable and you are reminded of what needs to be selected before the integration can be run:
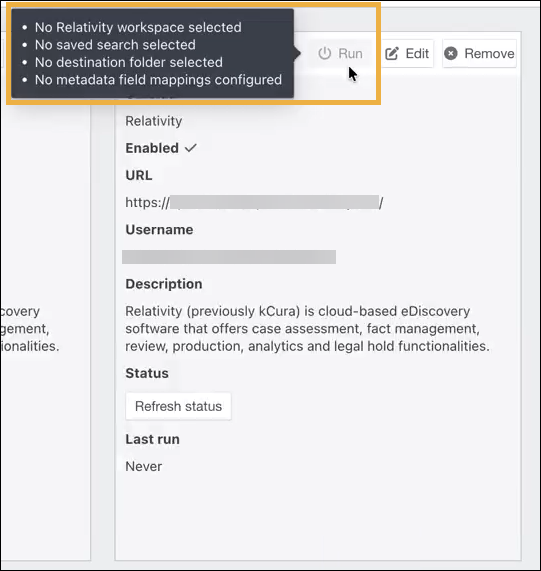
You must Edit the integration and configure the following options.
Options
On the Options tab, select the following:
- A Relativity workspace
- A saved search
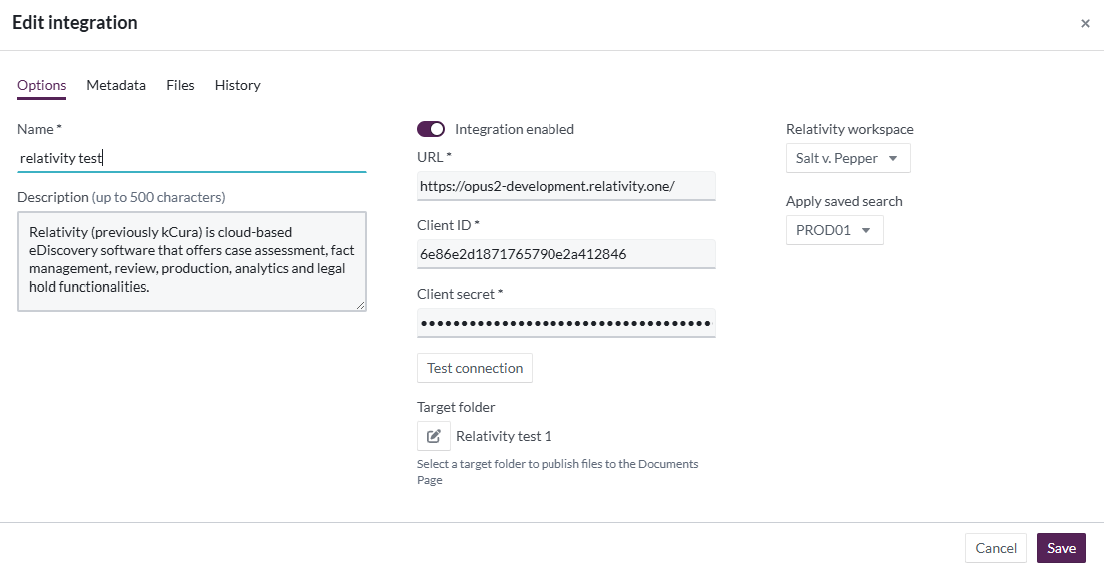
Note: The current integration limit for saved searches is 1000, sorted newest to oldest. If your saved search list exceeds 1000, you can recreate the same search within the Relativity workspace to ensure it is at the top of the list.
Metadata
The Metadata and Files tabs are not enabled until you have selected a workspace and a saved search.
On this tab, you can map Relativity Fields to Opus 2 Metadata fields.
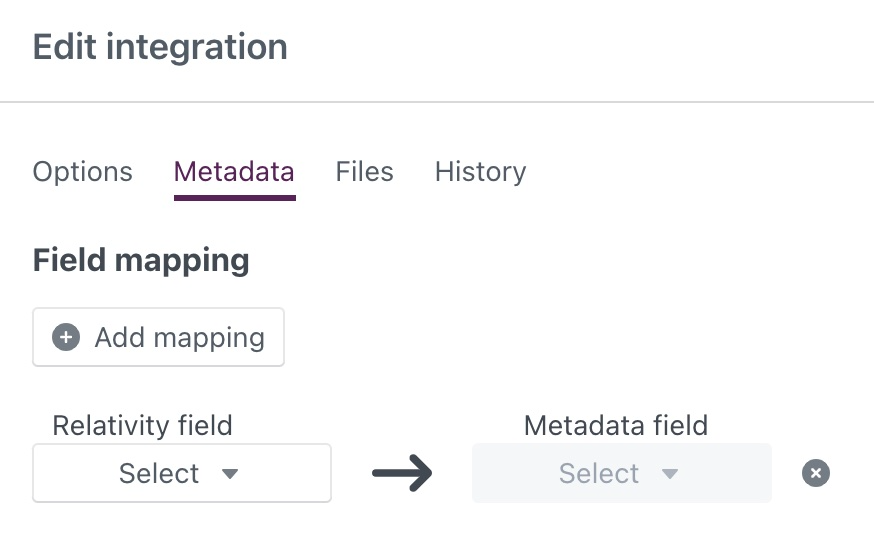
Select Add Mapping for each new field you wish to map. The field type is listed alongside each field to help you identify matching field types to map together. Depending on the field or field type in Relativity, you may want to create or update fields in your Opus 2 project before running the integration.
Note: Field Types must be the same in order to carry out a mapping. For example, you cannot sync a Long Text field in Relativity to a Short Text Field in the Opus 2 Platform.
The following field types can be mapped between Relativity and Opus 2:
- Short text
- Long text
- Number
- Single choice
- Multiple choice
- Tags
- Labels
Files
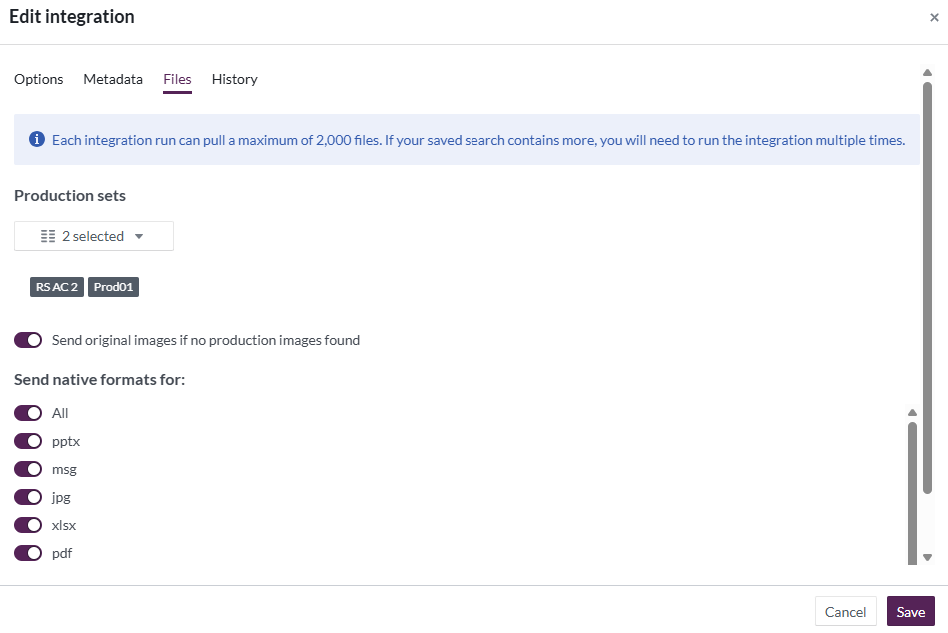
On this tab, you can choose a variety of options for what format you would like your data to be synced in.
The options are as follows:
- Production sets
- If a set or sets are selected, these produced images will display as Versions under the same Opus-id
- Send original images if no production images found
- This toggle imports the original image as a PDF, displaying it as the primary version.
- Send native formats for:
- This includes a list of formats that Relativity has reported to the integration as being available.
After the configuration is complete, select Save.
Running the Integration
Once the integration details have been configured, you are ready to pulls files and metadata.
Select Run Prompting the integration pull to begin by providing a 'Attempting to run integration' message. You may need to refresh your browser after few moments to confirm that the integration has started.
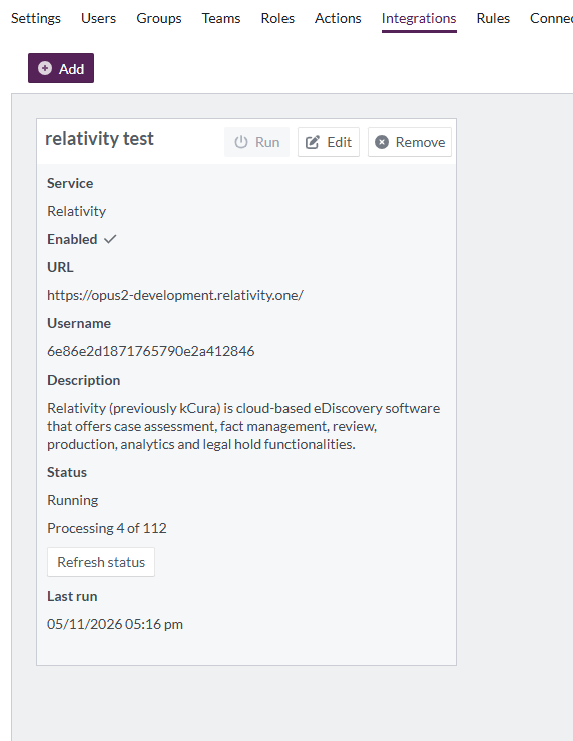
To monitor the status of an integration run, we recommend utilizing the Files Menu within the Opus 2 project. The History tab within the integration is a good resource to confirm files after the integration has completed.
Issues and Troubleshooting
We do have performance limits when syncing Relativity documents and metadata, these can be found here. If you receive an error message when selecting Run, stop and contact platformsupport@opus2.com before selecting the button again so we can review the integration for you.
Transferring and processing files from Relativity
Relativity's imaging engine creates .tiff images of each page in a document. When these images are brought into a project they are converted to .pdfs so that a project user can work on them similarly to any other document that has been published in an Opus 2 project. Sometimes a Relativity user has to create a production set within Relativity prior to these being fetched by Opus 2. If this is the case, the production images may be fetched instead of or as well as the original file images.
In addition to fetching production and original images, any native file that is included in a Saved Search can be sent from Relativity to an Opus 2 project. Users may choose to receive all native file types, or only those with specified extensions. If the native files are of a type that the Opus 2 service can convert to .pdf in order to create a published document, this happens automatically when the files from Relativity are being processed. If the native files are of a type that cannot be converted to .pdf, they remain as original files within Opus 2.
If a user chooses to fetch both a production version and a native version of a file, the two files are published as two versions of the same document in an Opus 2 project. The native file is set as the original version and the Relativity production image as the most recent version.
Note: Once files from Relativity have been processed and turned into documents in an Opus 2 project, it is necessary to run OCR on any documents containing text in order for this text to be available for highlighting and annotation. The production images that are sent from Relativity come in .tiff format, a file type which does not contain machine readable text.
Re-running the same integration
Users have the ability to run the same integration again, updating the Opus 2 project with the latest files and metadata from the Relativity workspace/saved search.
A good use case could be the creation of a new production set within the Relativity saved search. Choosing to edit the integration and include this new production set before re-running will update the relevant Opus-ids with the new production images.
Note: Choosing to re-run an integration with mapped metadata fields will overwrite metadata changes made in Opus 2. If you do not want to overwrite the metadata of a field, it is important to remove the metadata field as a selection within the integration.
Related articles
Relativity Integration: Setting up a new connection
Related documentation
Opus 2 has help information accessible within the application; click the question mark and then select Documentation in the upper-right area of the platform. You can also access the documentation at: Opus 2 Support.
How to contact us
To contact us about the documentation, or if you have any other questions or issues about Opus 2 solutions, contact Opus 2 Platform Support by emailing Opus 2 Platform Support.