
| Minimum Software Version | 8.16.0 |
| Solution(s) | Hearings ✓ Cases International ✓ Cases US ✓ Institutions ⨉ Counsel ✓ |
Explains how to link multiple document sources to worksheet records using a CSV import, including spreadsheet preparation, source formatting, and autolinking to project documents.
Multiple document sources can be linked to records in the Issues, Characters, Chronology, and Organisations worksheets using a structured CSV import. This process involves preparing a spreadsheet with unique identifiers, importing sources as sub-records, and then using the Autolink feature to create the connections between source text and project documents.
Note: The steps and examples in this article use the Chronology worksheet. The same process applies to the Issues, Characters, and Organisations worksheets — substitute the relevant worksheet name and fields where indicated.
Prerequisites
In the relevant worksheet, select Edit > Subtypes. If an option for Edit Sources is not visible, contact Opus 2 Platform Support to have this option enabled, or import sources via another method.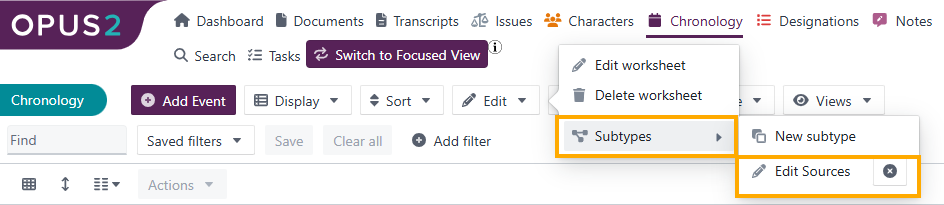
A short text field for importing sources must also be configured. In this article, a text field called Source (Text) has been set up for this purpose.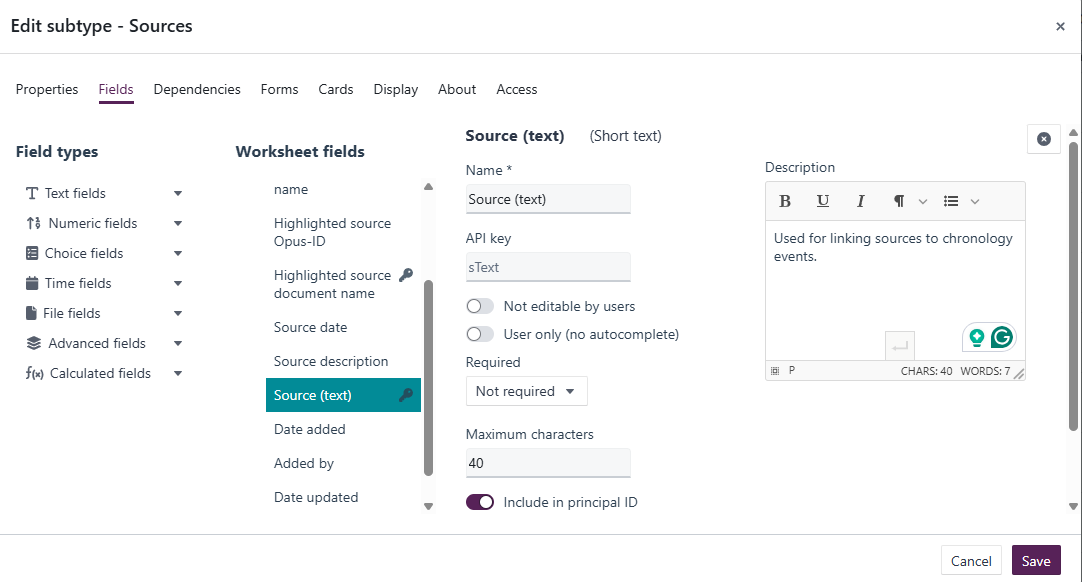
Preparing the spreadsheet
Each worksheet record requires a unique identifier before sources can be linked to it.
Note: Before importing, ensure an Import ID field exists in the Chronology worksheet. If it does not already exist, create it as a new metadata field before proceeding. This field is required to link sources to the correct events during import.
- Open the Excel or CSV spreadsheet containing your worksheet records.
- Insert a new column at the start of the columns called Import ID. This ID is used later to link sources to the correct records.
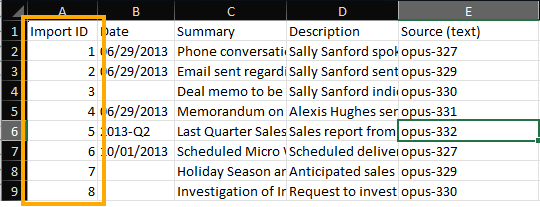
Tip: Any unique field can be used to import sources — for example, the Chron ID in the Chronology worksheet.
Importing chronology events
Note: These steps assume there are no existing records in the worksheet. If records already exist, export them first via Export > Spreadsheet to obtain a spreadsheet containing the existing records and their unique IDs. Add the Import ID column to that exported spreadsheet and proceed to the Linking sources to worksheet records section — you do not need to re-import the records.
- Navigate to the relevant worksheet (for example, Chronology) in Opus 2.
- Select Manage > Import items.

- Browse for the spreadsheet or drop it into the Import dialog.
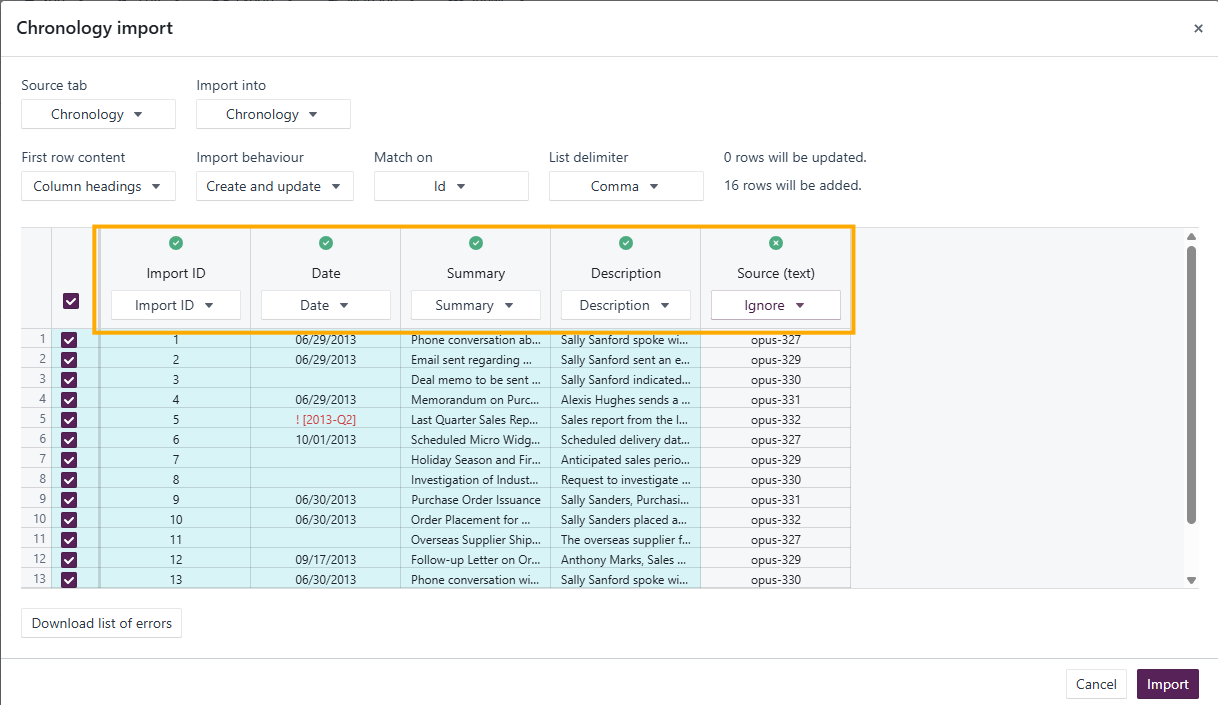
- In the Import dialog, map the columns to the correct destination fields. The Import ID, Date, and Description fields are typically matched automatically. Set the Sources column to Ignore — sources are not linked to records at this stage.
- Select Import.
The records are imported into the worksheet.
Linking sources to chronology entries
Separating document sources with semicolons or commas does not work for this import method. To import multiple sources for each record, the spreadsheet must reference the Import ID (or whichever unique field is being used) multiple times — once per source.
- Create a new spreadsheet with two columns: Import ID and Sources (Text).
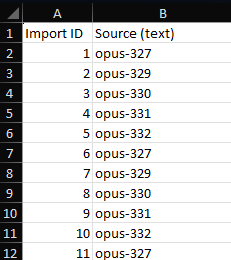
- Map each source to its Import ID. For example, if Exhibit 58 relates to events 1, 2, and 6 in the Chronology worksheet, it should appear on three separate rows, each referencing the corresponding Import ID. Exhibit 62, linked to events 1 and 5, would appear on two rows.
- Navigate to the relevant worksheet in Opus 2 and import this spreadsheet via Manage > Import items.
- In the Import dialog, configure the following settings::
- Set Import into to the Sources subtype.
- Set Identify parent by to Import ID.
- Change the selection under Import ID to Parent.
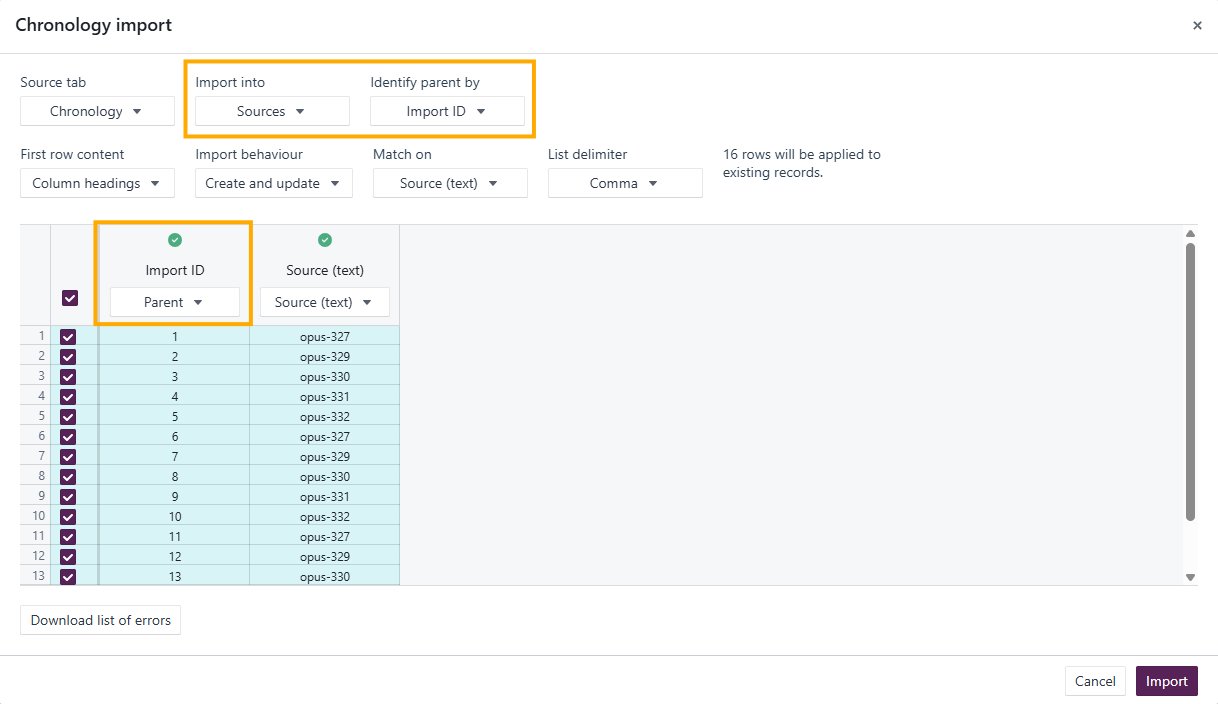
- Select Import.
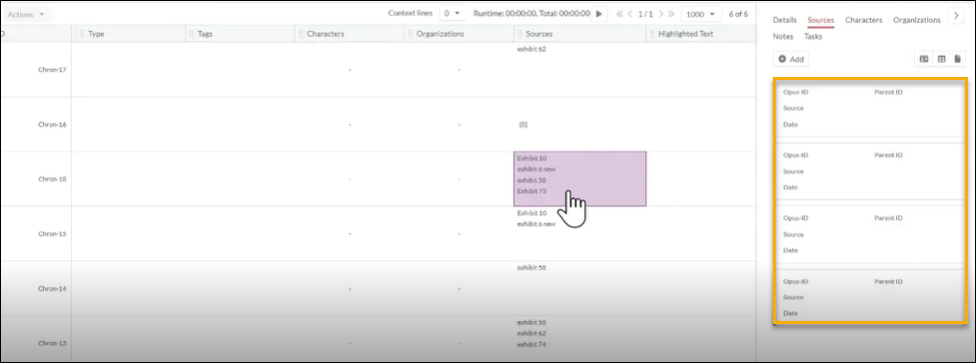
Rows are created for the existing records as sub-records, with the appropriate links as specified in the spreadsheet.
- Return to the worksheet to view the sources now associated with each record.
Creating links between imported sources and project documents
After importing sources, the Opus 2 platform recognises that a source should be present, but the link between the source text and the actual document in the project still needs to be created. Use the Autolink feature to establish these connections.
- Select all records by ticking the checkbox at the top of the left-hand column.
- Select Actions > Autolink.
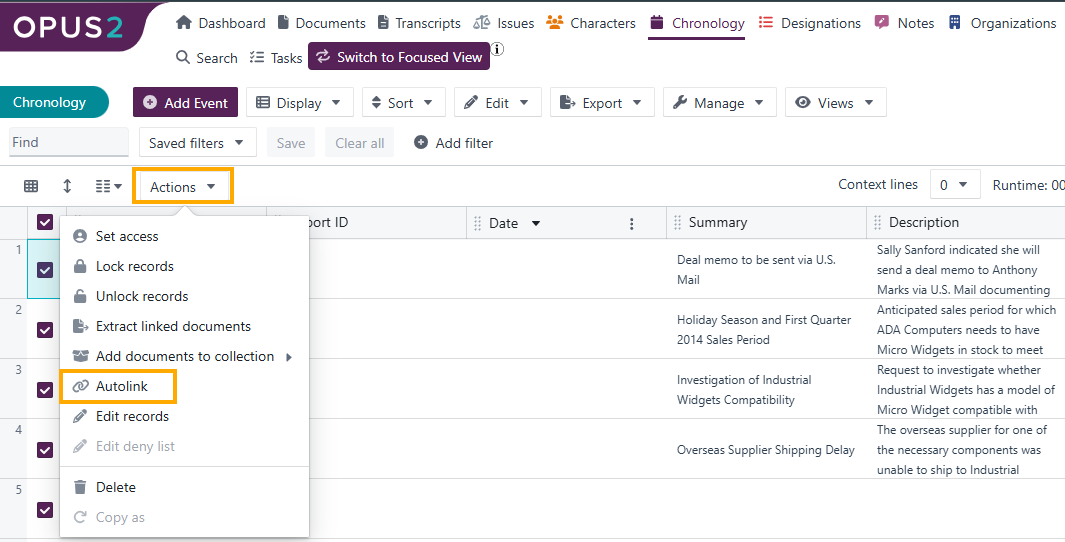
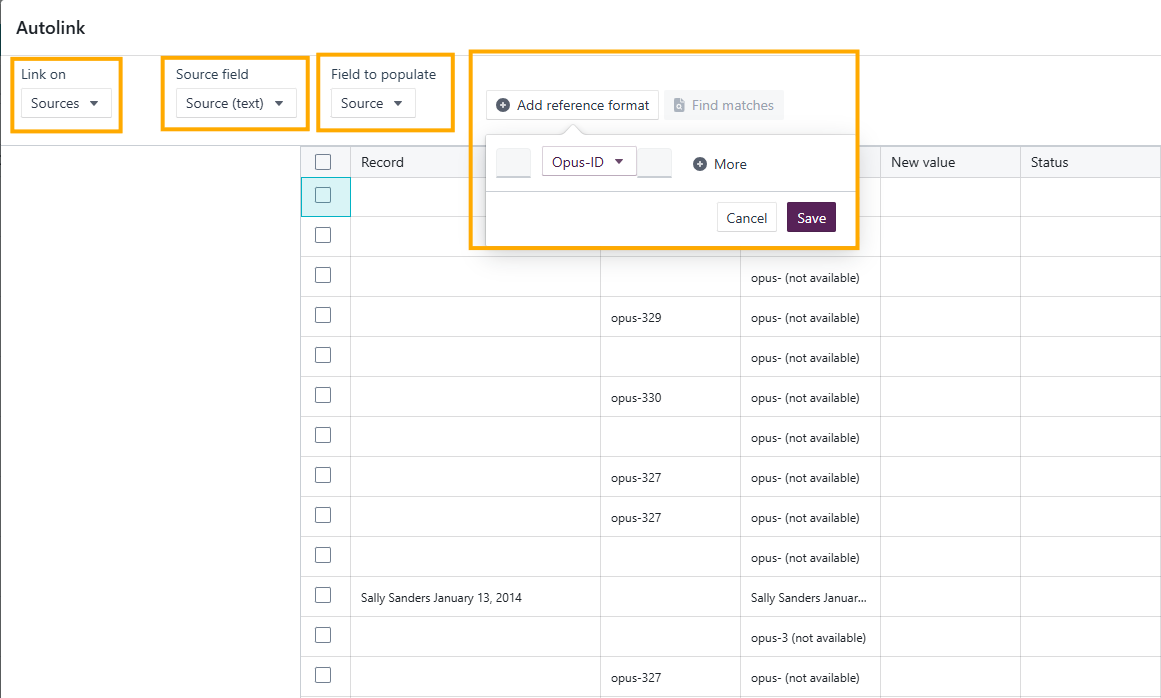
- In the Autolink dialog, configure the following settings:
- Set Link on to Sources.
- Set Source field to Sources (Text).
- Set Field to populate to Source.
- Set Add reference format to any unique field, in this example we used Opus-ID.
- Select Find matches.
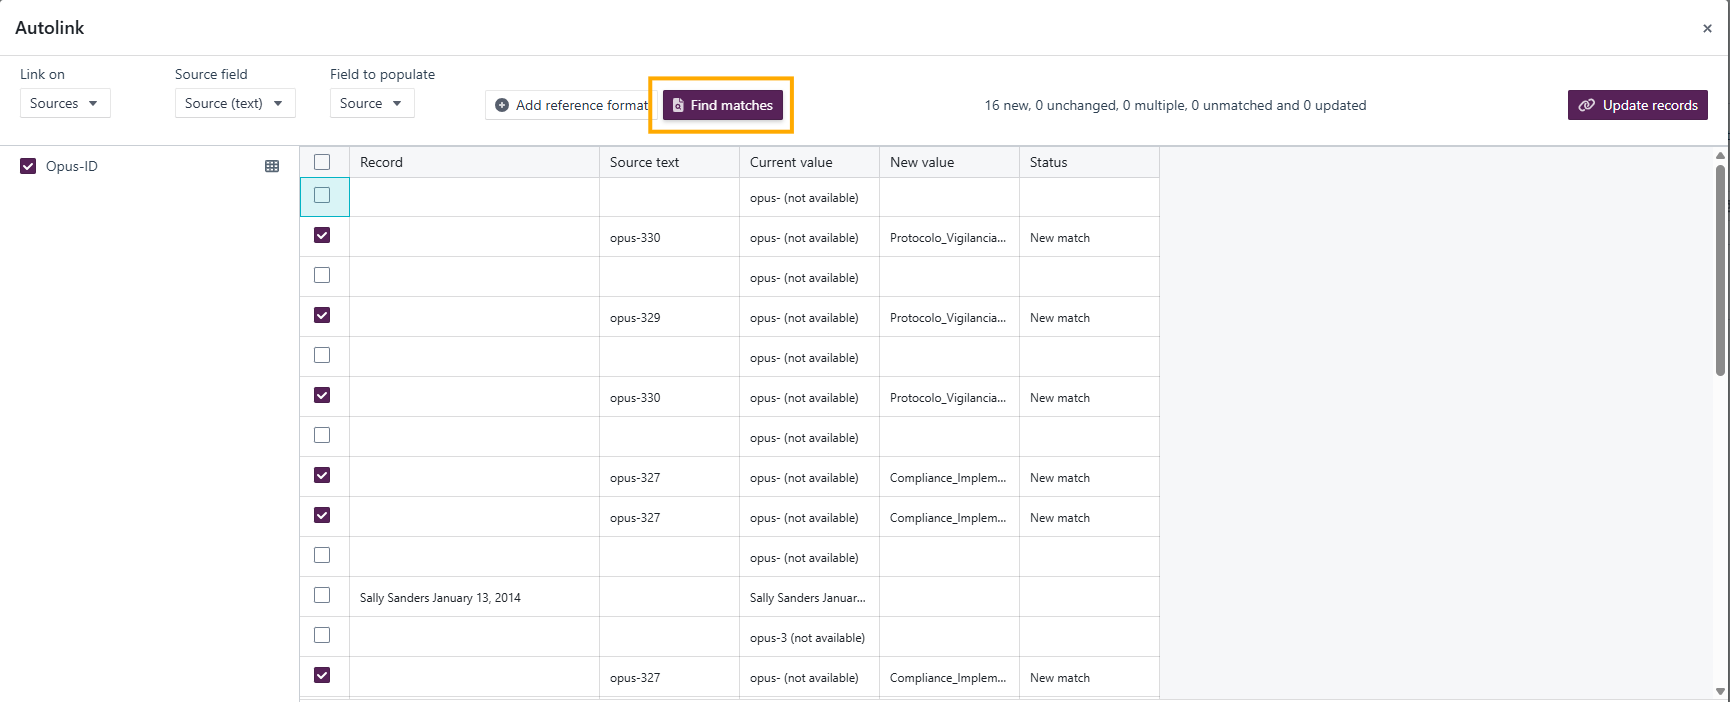
- Review the matches found.
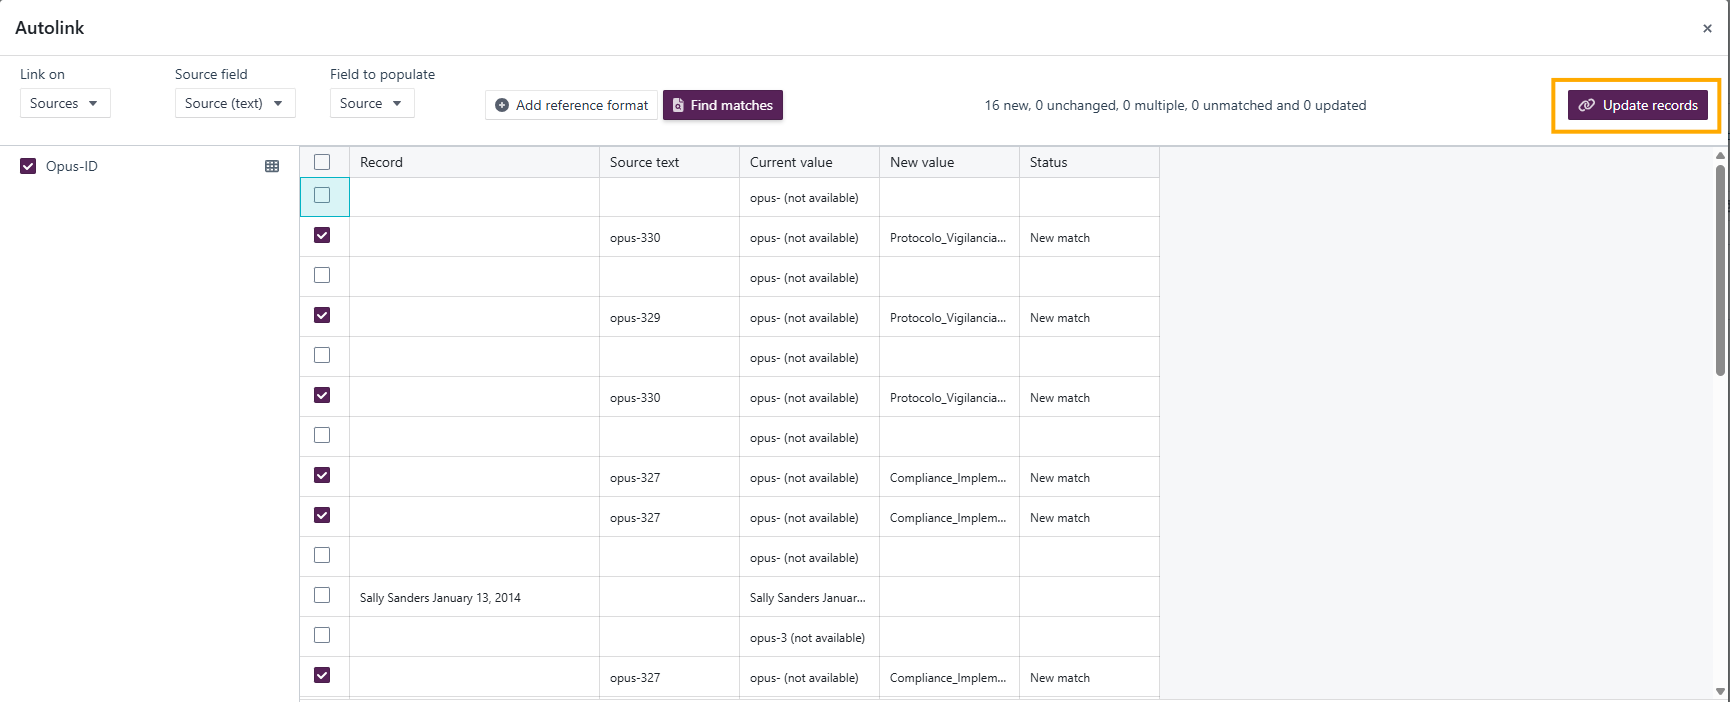
- Once confirmed, select Update records.
Return to the worksheet and scroll right to view the linked sources and their associated documents in the Sources tab.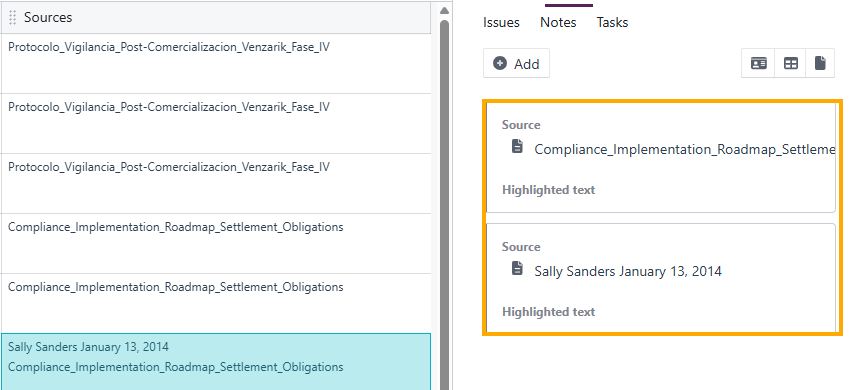
Related links
- Linking chronology facts to characters
- How to edit chronology event information
- Importing chronologies from Excel or CSV
Related documentation
Opus 2 has help information accessible within the application; click the question mark and then select Documentation in the upper-right area of the platform. You can also access the documentation at: Opus 2 Support.
How to contact us
To contact us about the documentation, or if you have any other questions or issues about Opus 2 solutions, contact Opus 2 Platform Support by emailing Opus 2 Platform Support.