
| Minimum Software Version | 8.14 |
| Solution(s) | Cases International ✓ Cases US ✓ Institutions ✓ |
You can customise the cards that summarise worksheet records, and choose which card appears in each part of the application.
Cards display worksheet fields where a record needs to be shown with a limited number of fields instead of its full detail. You can configure a card to choose which fields appear, and map each card to the locations where it is used. You manage both from the Edit worksheet dialog.
Why customise cards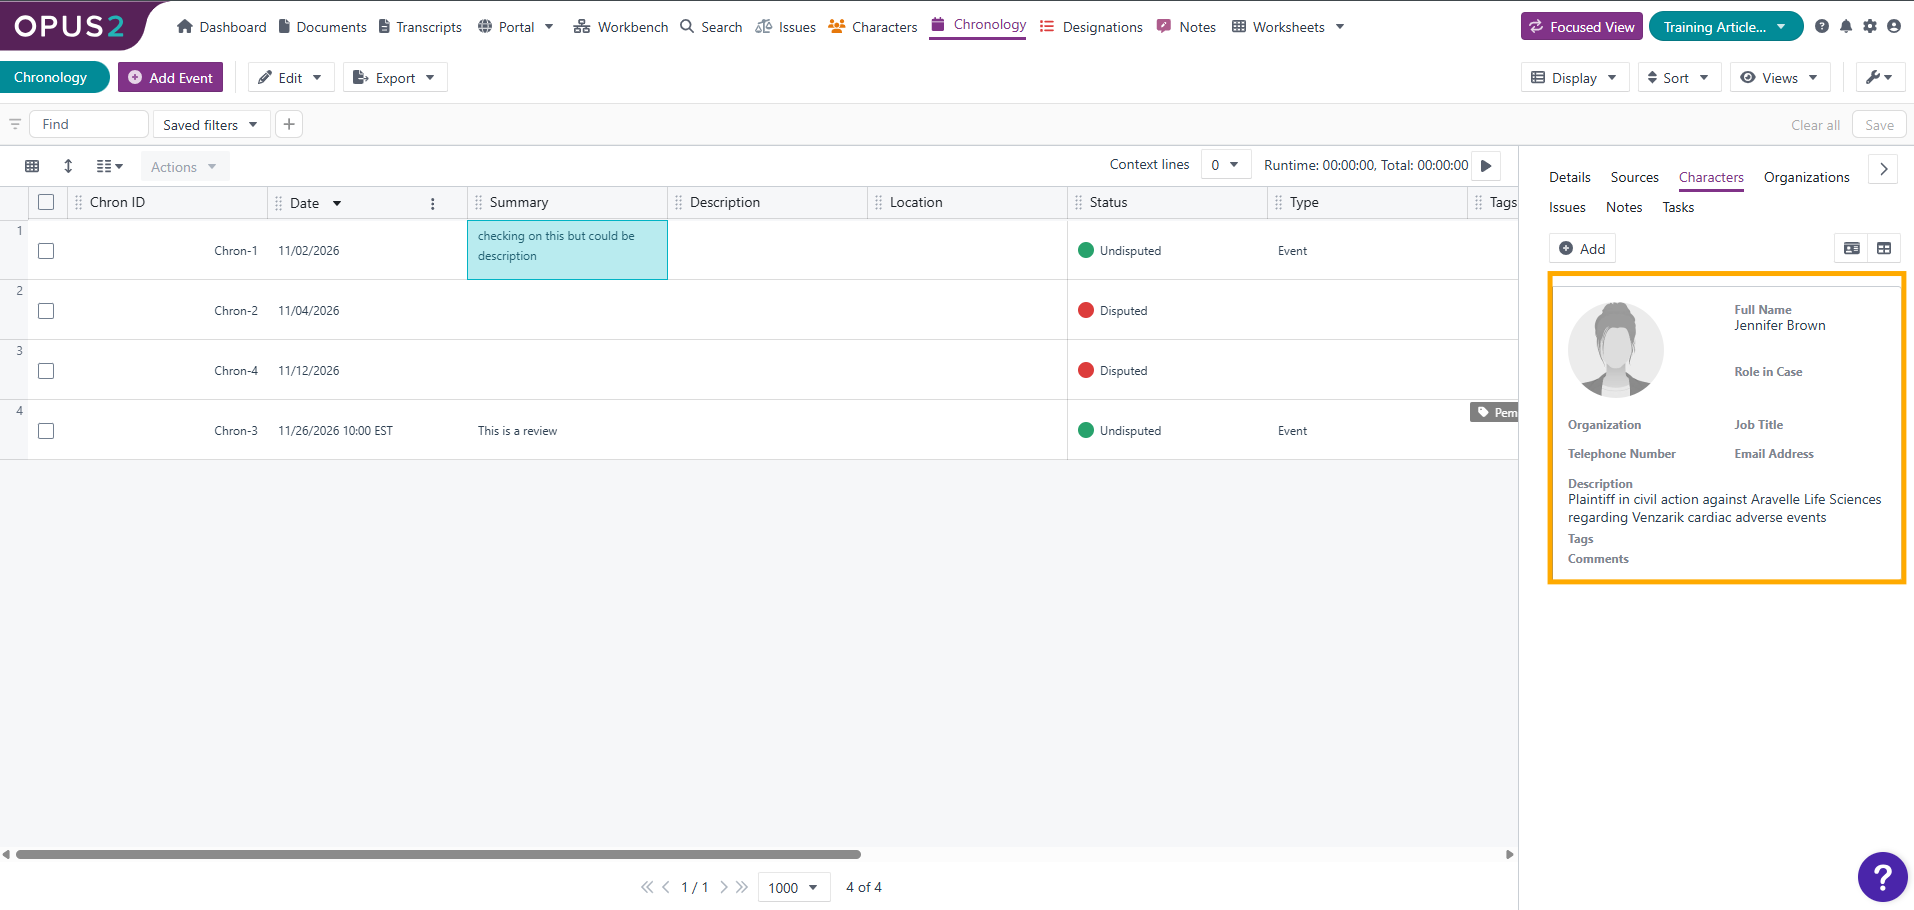
Cards summarise a record by showing only its most important data points. For example, when you view the characters attached to a note, a card can show each character record with just the key details, instead of displaying the full character form. By customising cards, you control which fields appear in each place a worksheet record is shown as a card.
Accessing card settings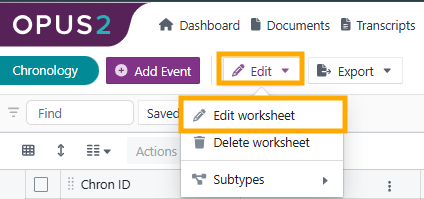
- In the worksheet, select Edit.
- Select Edit worksheet.
The Edit worksheet dialog opens. You configure card locations on the Display tab and create and edit cards on the Cards tab.
Mapping cards to locations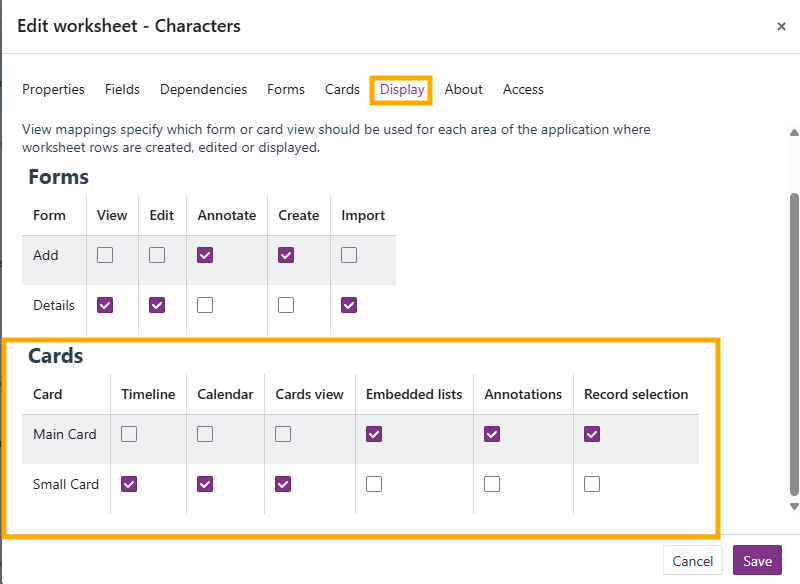
If a worksheet has more than one card, use the Display tab in the Edit worksheet dialog to choose which card appears in each location. The card locations are listed along the top of the card display options.
[Image: Card display options on the Display tab]
| Location | Description |
|---|---|
| Timeline | The card used when you change the display of the worksheet to the timeline. The timeline arranges the worksheet records in time order, as long as every record has a date. A card summarises the key information of each record, so records can be shown clearly without all of the available information.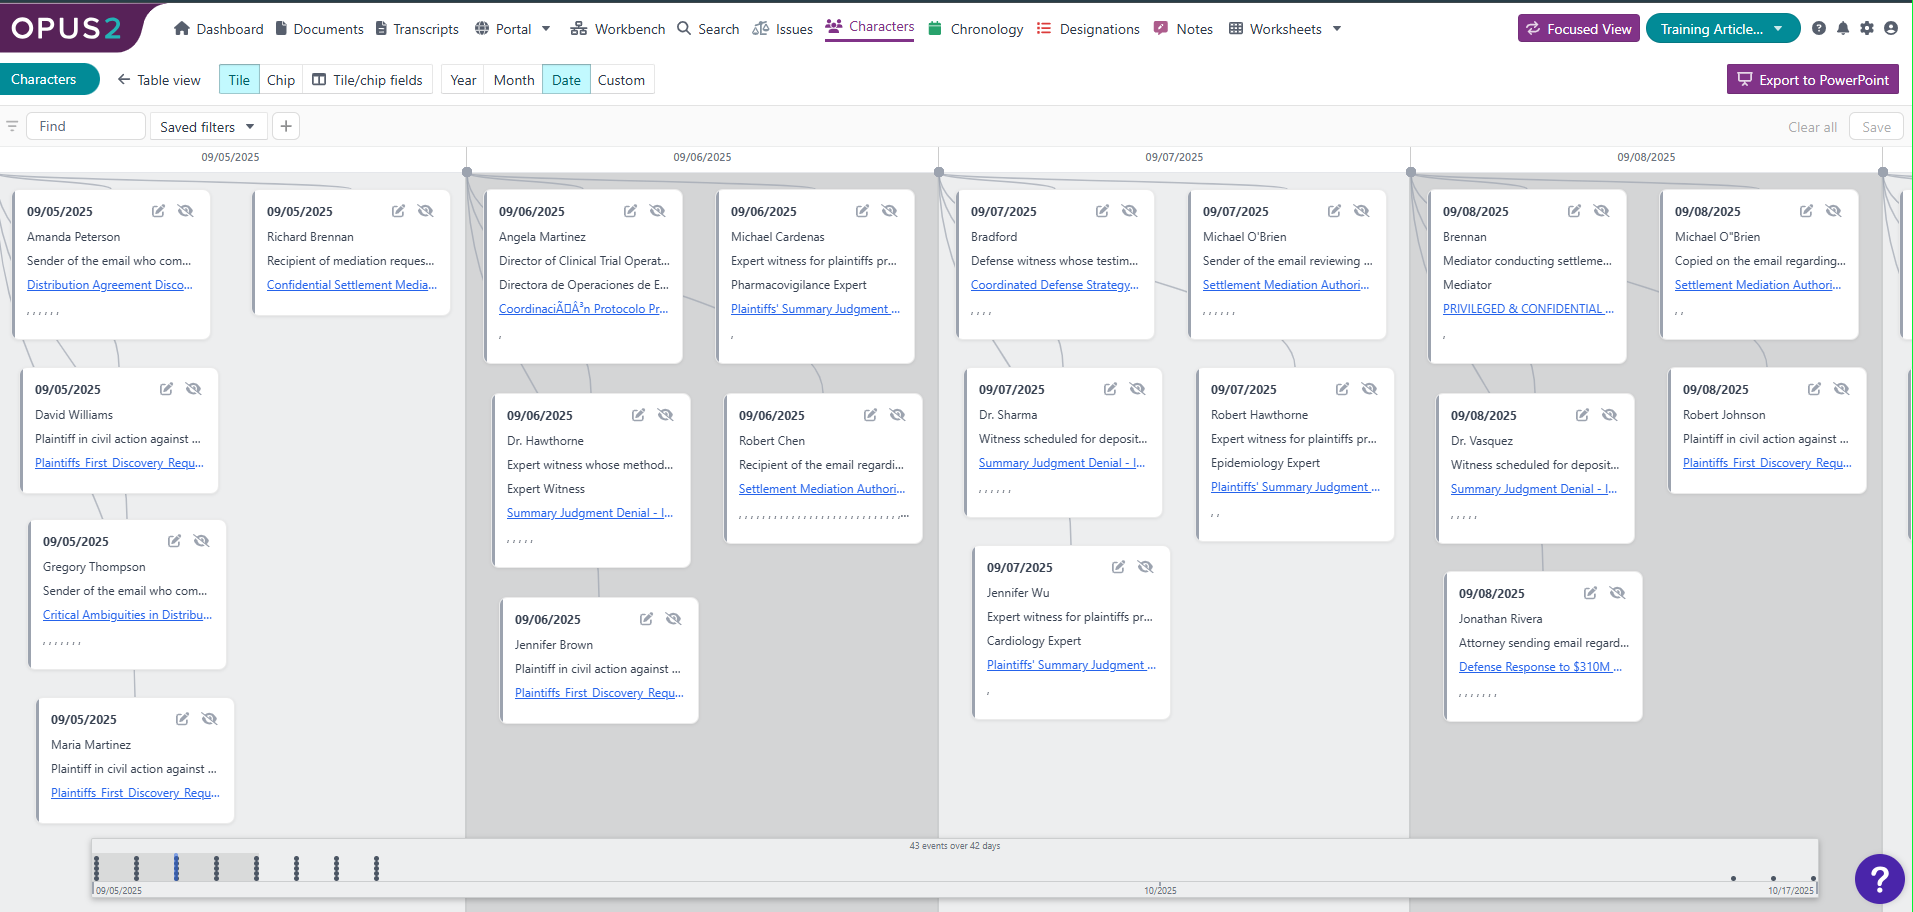 |
| Calendar | The card used when you change the display of the worksheet to the calendar. The calendar arranges the worksheet records by date, as long as every record has a date. A card summarises the key information of each record. Space is limited, especially when several records have the same date, so the card is particularly compressed here. Hover over the card icon to see the full set of information configured in the card assigned to this location.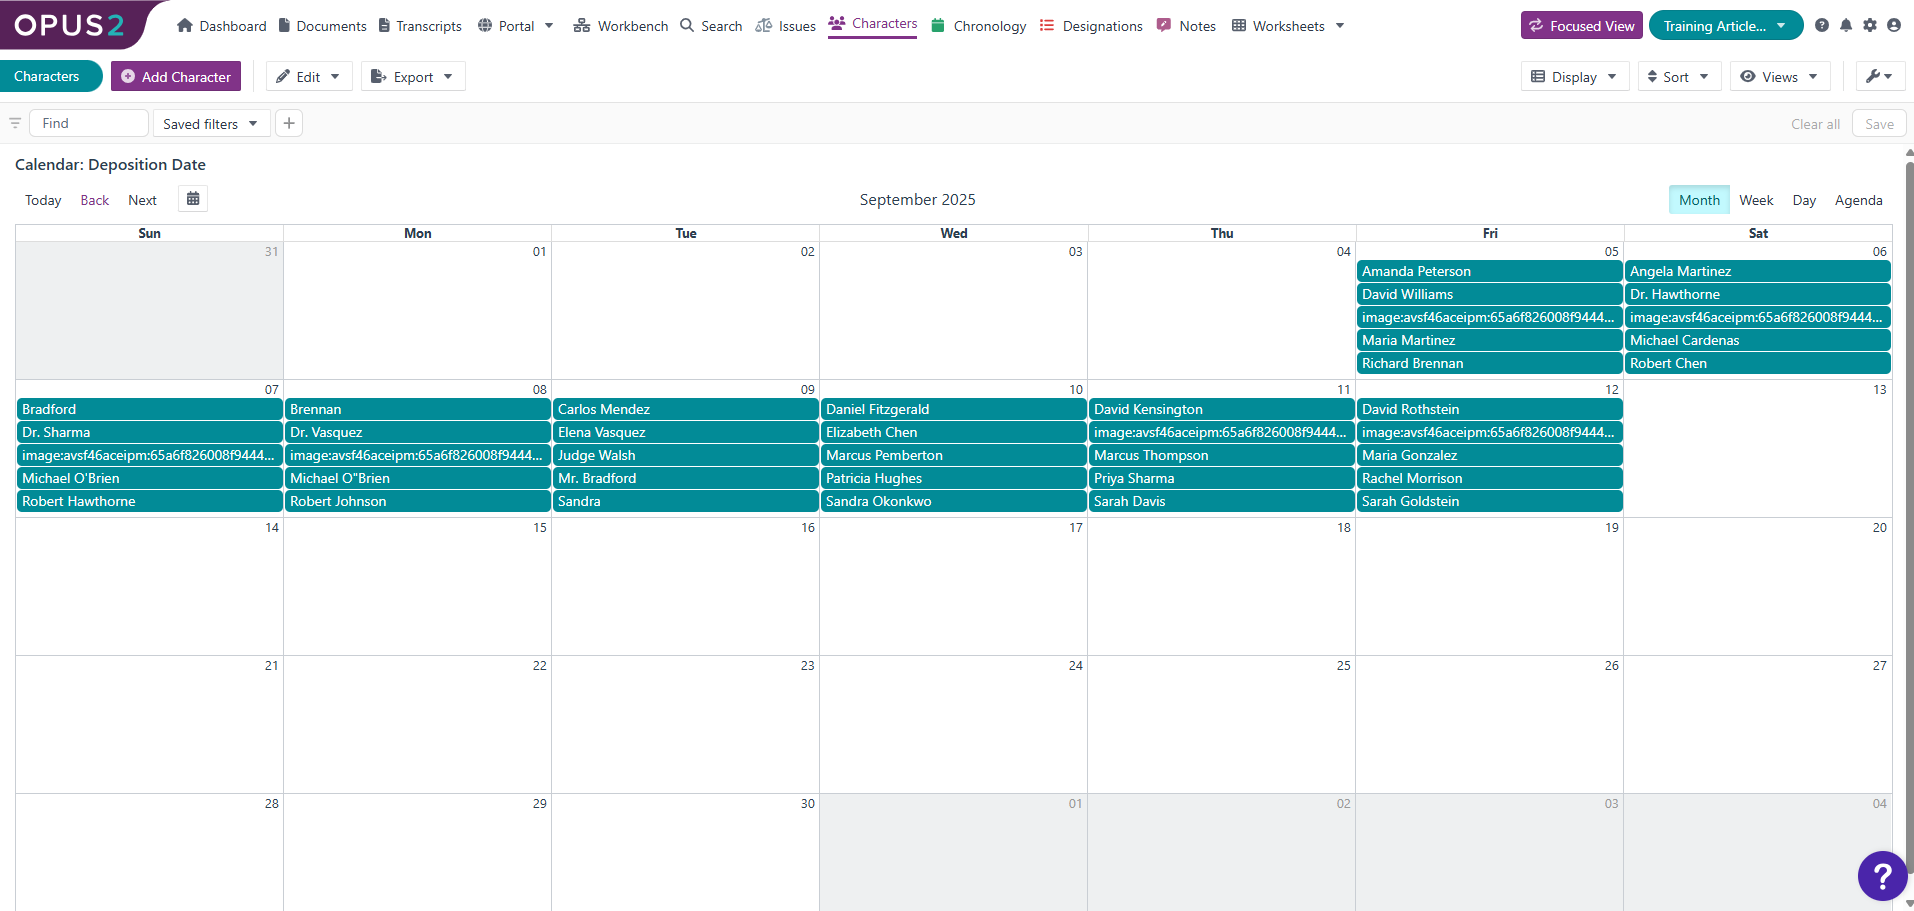 |
| Cards view | The card is used when you change the display of the worksheet to cards. This arranges the records in a signboard, or Kanban, view for any choice field in the worksheet. Records are displayed as cards to save space. Example: If the chronology has a choice field that flags records as disputed or undisputed between the parties, you can display all records as cards for this field. You can then change a record's value by dragging its card into the relevant column. 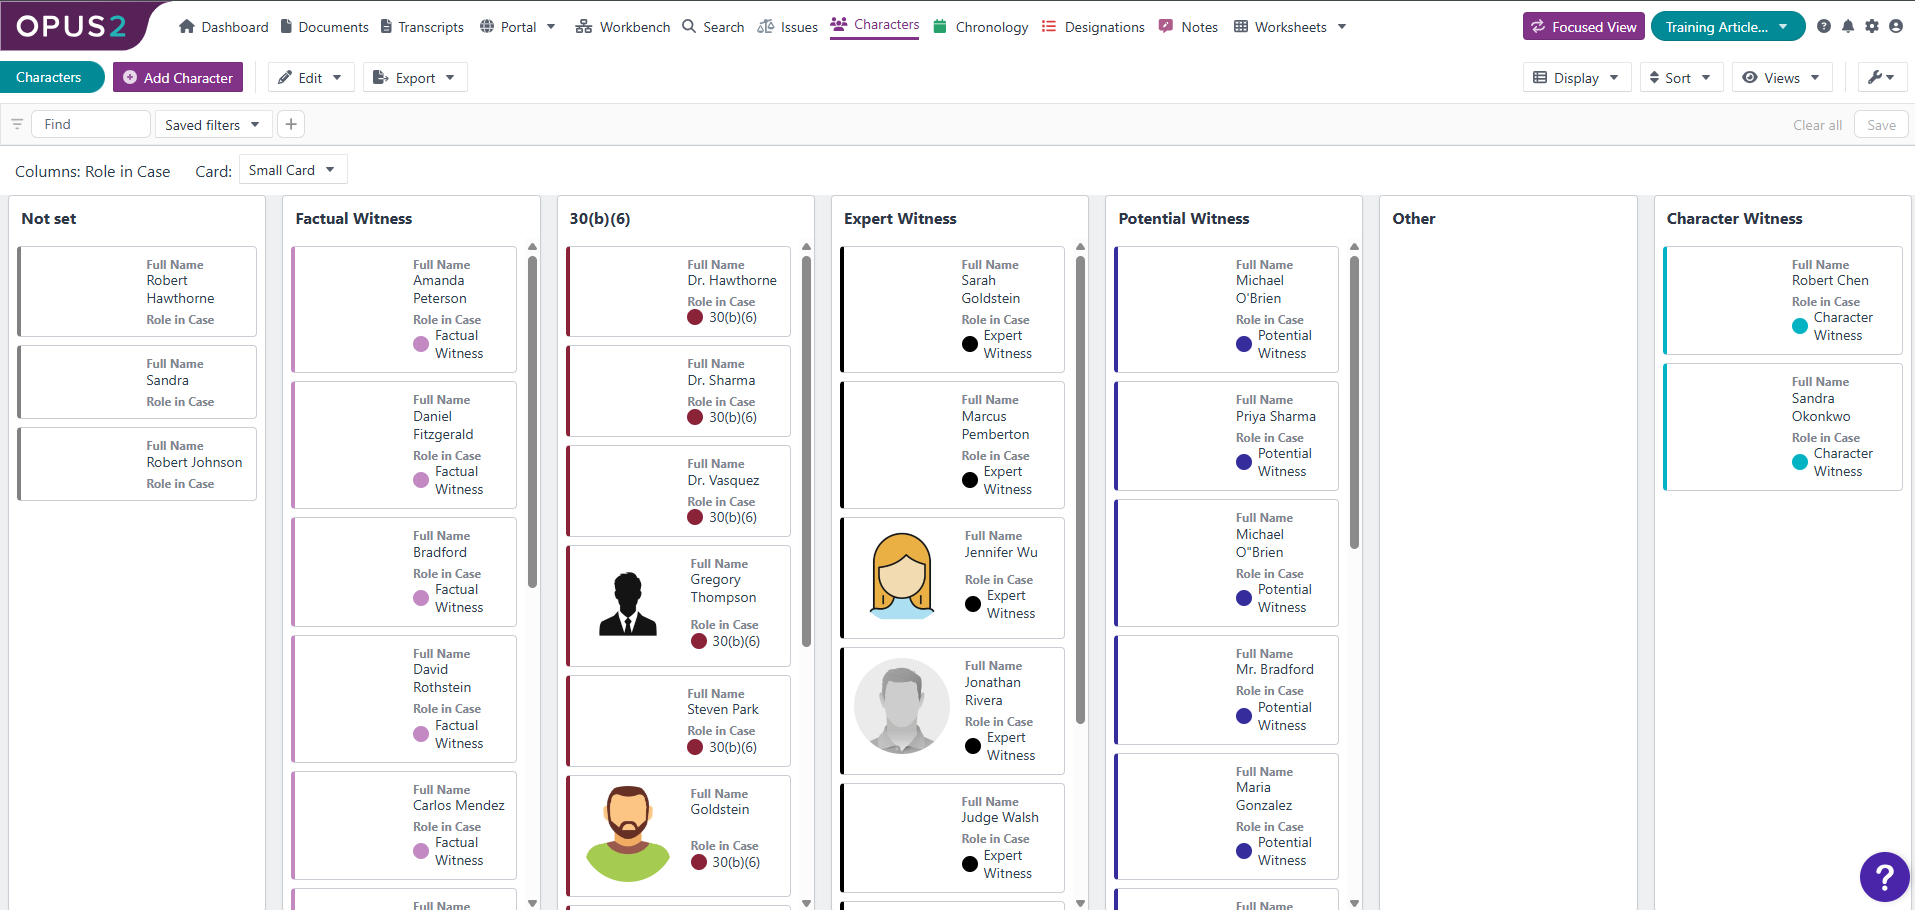 |
| Embedded lists | The card used when you select a worksheet record and view the linked records from other worksheets. Example: When you create a chronology record, you can link it to character records from the Characters worksheet. When you select the chronology record, select the Characters tab in the right panel to see the linked records as cards, each giving a summary of the character. 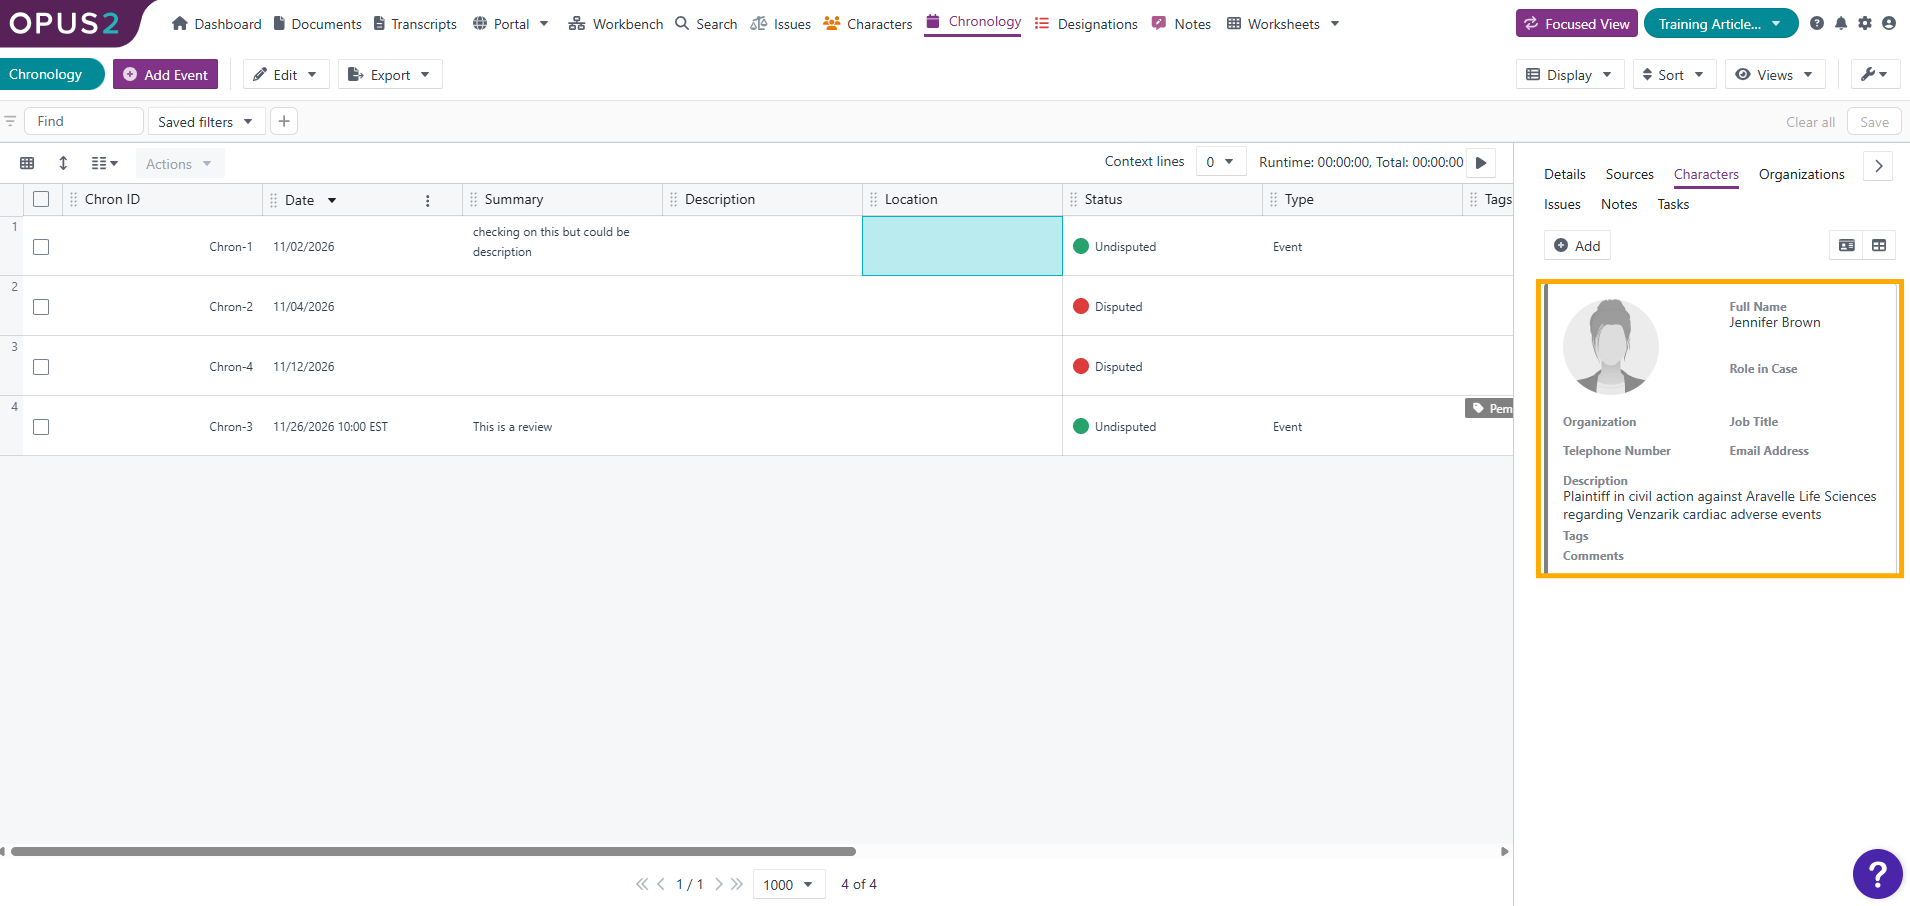 |
| Annotations | The card used when you create a worksheet record from an annotation in a document or transcript, for example, when you highlight a passage and select Create event to create a chronology record, or Create note to create a note record. After you complete the form, the right panel of the document viewer shows a card for the record instead of the full set of fields.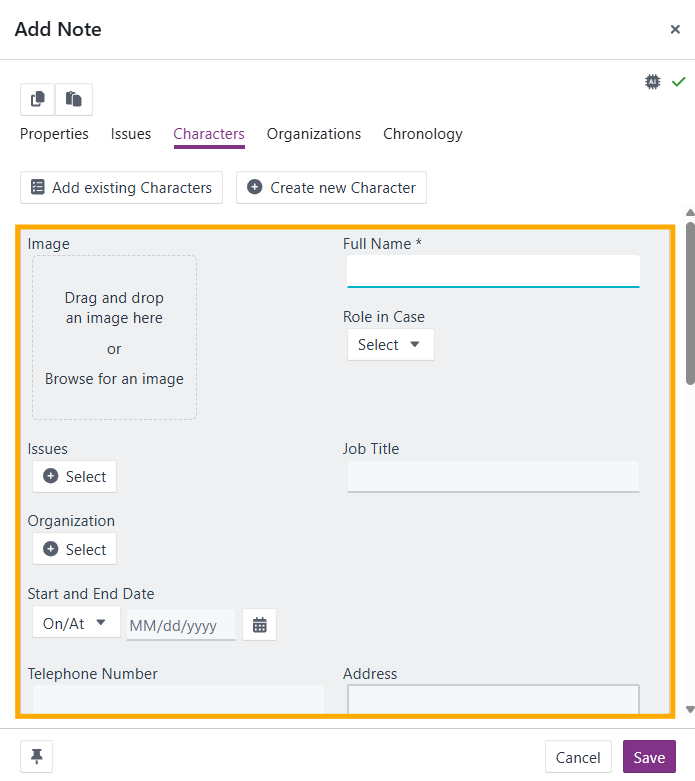 |
| Record selection | The card used when you add documents to a worksheet from the Documents page. If you select the Add to existing record option, the system shows all records in the worksheet in a table. You can also choose to view the records as cards.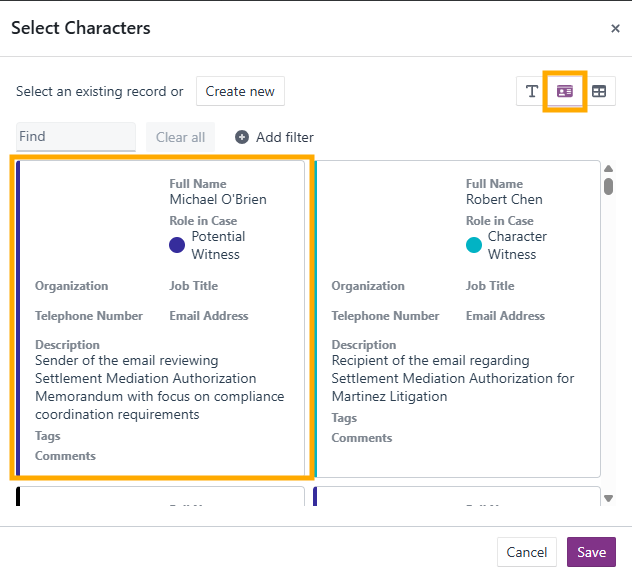 |
Creating and editing cards
You create and edit cards on the Cards tab of the Edit worksheet dialog.
- In the Edit worksheet dialog, select the Cards tab. The worksheet's cards are listed as tabs along the top.
- Select the tab of the card you want to edit, or select + Add to create a new card. If the worksheet has no cards, select the button to create one.
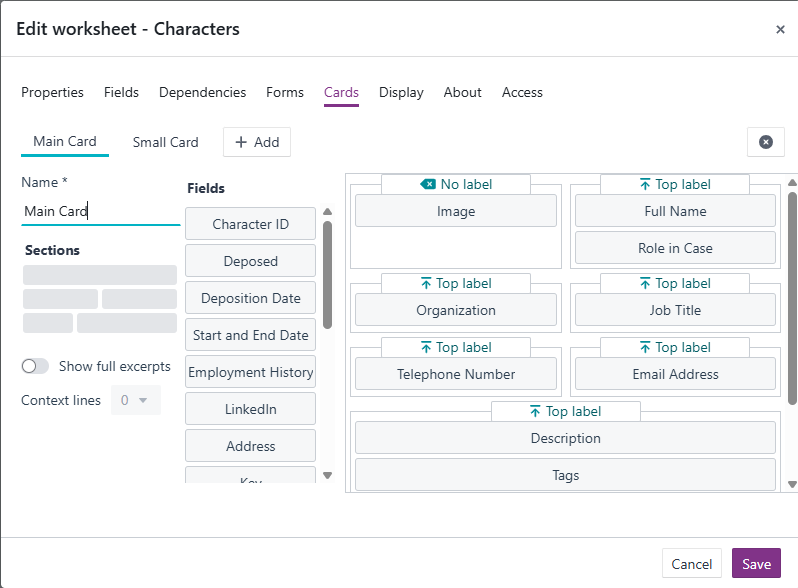
- In Name, enter or edit the name of the card. The name is required.
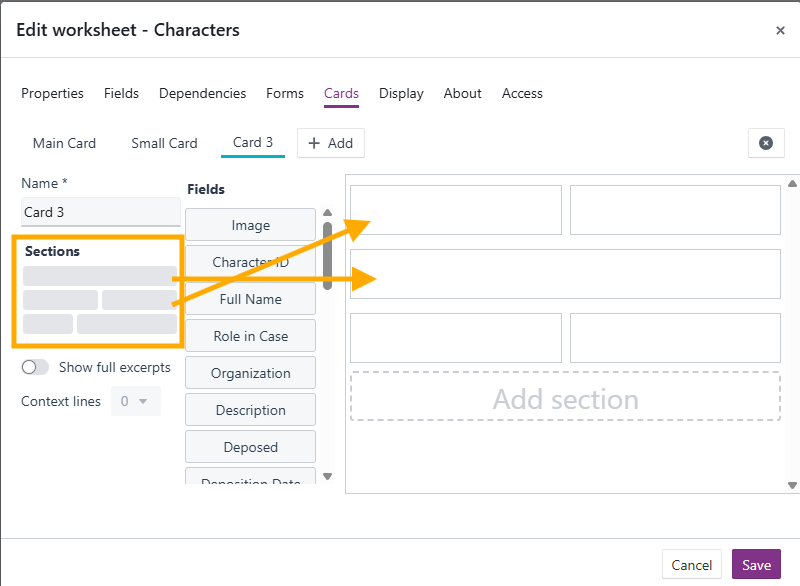
- Use the section layouts on the left, under Sections, to build the structure of your card. Drag the section layout you want into the card builder on the right. You can add as many fields to a section as you need, and you can change the layout of the card in different parts by using different section layouts.
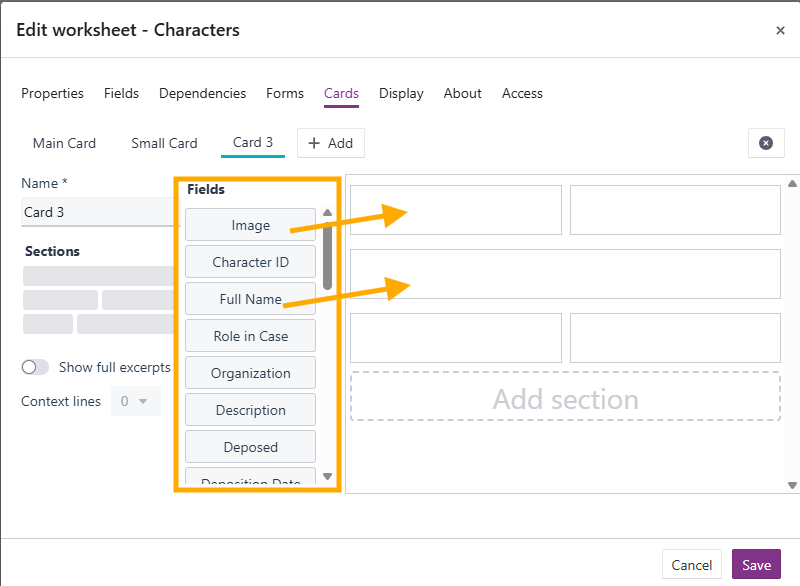
- Add the fields you want to display. The Fields list shows every field available in your worksheet. A card only shows the fields you add to it, wherever it is used.
- Choose how the label appears for each field in a section: top label, side label, or no label.
- If the worksheet has a highlighted text field, optionally turn on Show full excerpts to display the entire highlighted passage instead of the first few lines. Use Context lines to include lines on either side of the passage.
- Select Save.
Deleting a card
- On the Cards tab, select the tab of the card you want to delete.
- Select the x icon in the right-hand corner, above the card builder.
Related documentation
Opus 2 has help information accessible within the application; click the question mark and then select Documentation in the upper-right area of the platform. You can also access the documentation at: Opus 2 Support.
How to contact us
To contact us about the documentation, or if you have any other questions or issues about Opus 2 solutions, contact Opus 2 Platform Support by emailing Opus 2 Platform Support.