
| Minimum Software Version | 8.18.10 |
| Solution(s) | Cases International ✓ Cases US ✓ Institutions ⨉ Counsel ✓ |
Explains how video clips are created automatically for transcript designations and how to export those clips from either the Transcript Viewer or the Designations worksheet.
When a video file is uploaded and linked to a transcript in .MDB format, the video automatically synchronises with the transcript. Any designation created on the transcript also automatically generates a video clip based on the timeline of the highlighted text. These clips can be exported without the highlighted transcript text, either from the Transcript Viewer or from the Designations worksheet.
Exporting designation video clips from the Transcript Viewer
- Open the transcript in the Transcript Viewer.
- Select the three-dot (more options) icon in the top-right corner of the viewer.
- Select Export clips from the dropdown menu.
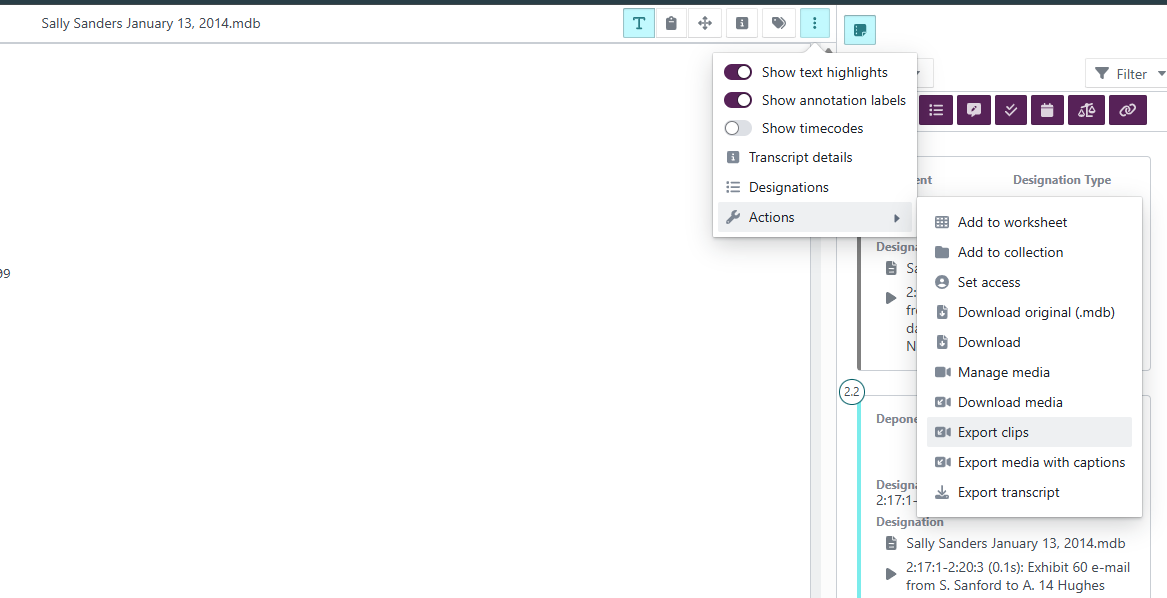
- In the Export clips dialog, choose what to include in your export. The title card displays the filename and time frame for each clip.
- Confirm the export.
Note: This method exports all designation video clips associated with the transcript.
Accessing the export
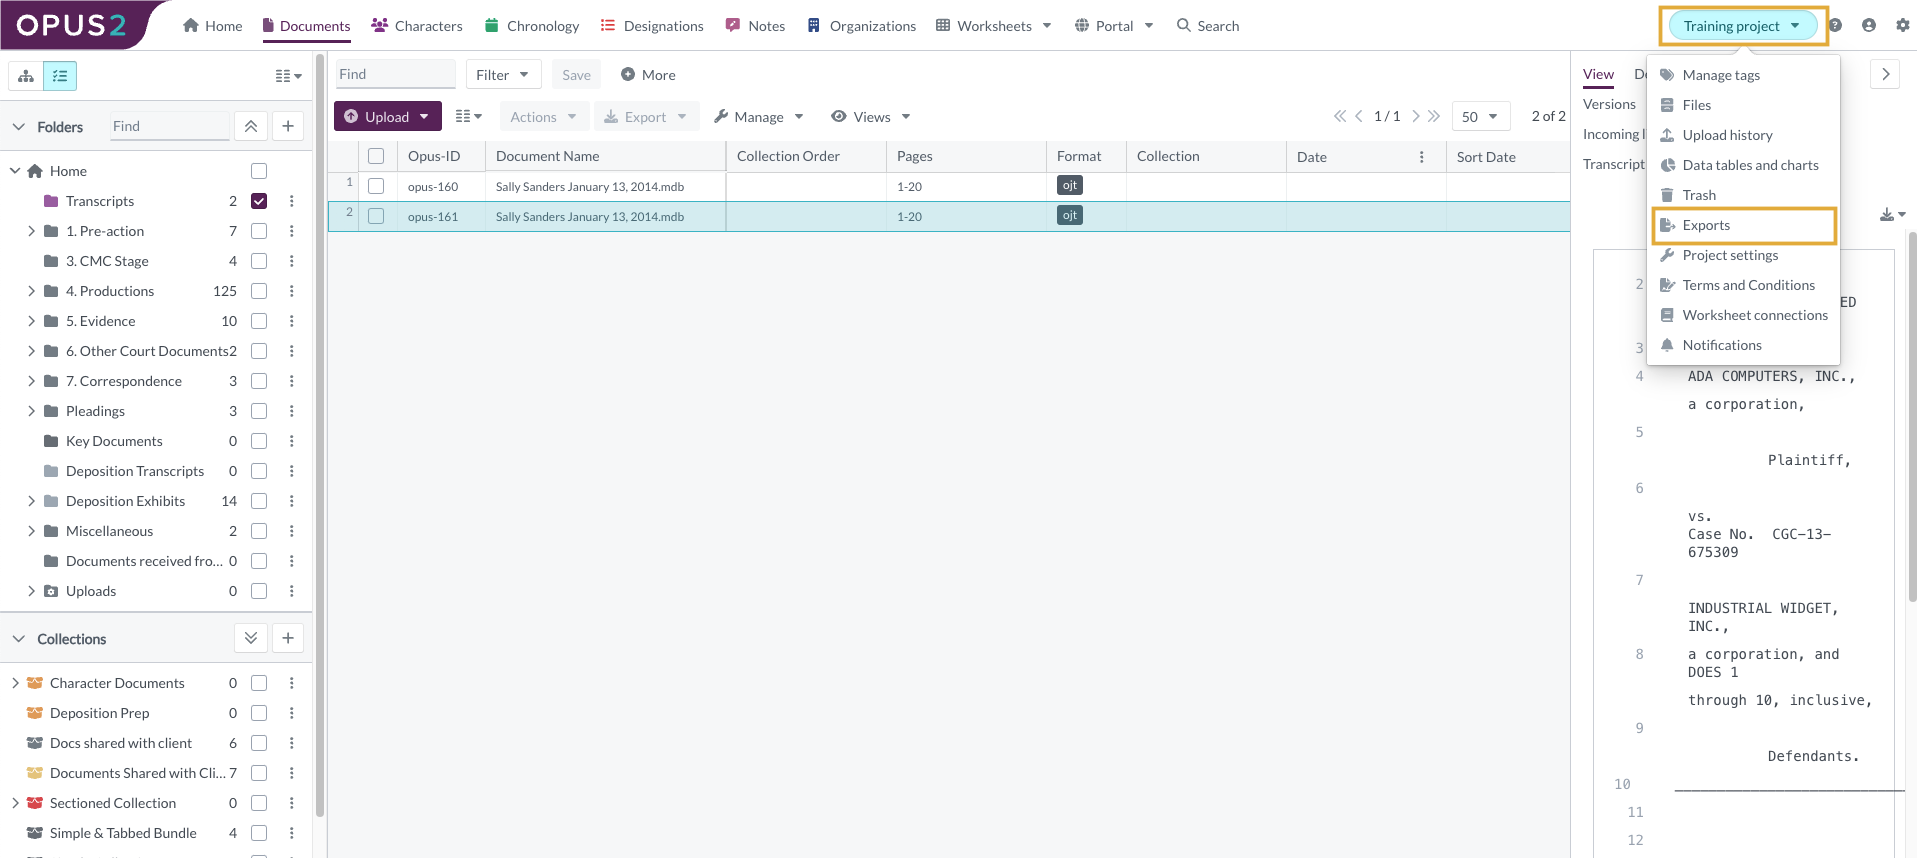
- Select the Project button (showing the project name) in the top-right corner.
- Select Exports from the dropdown.
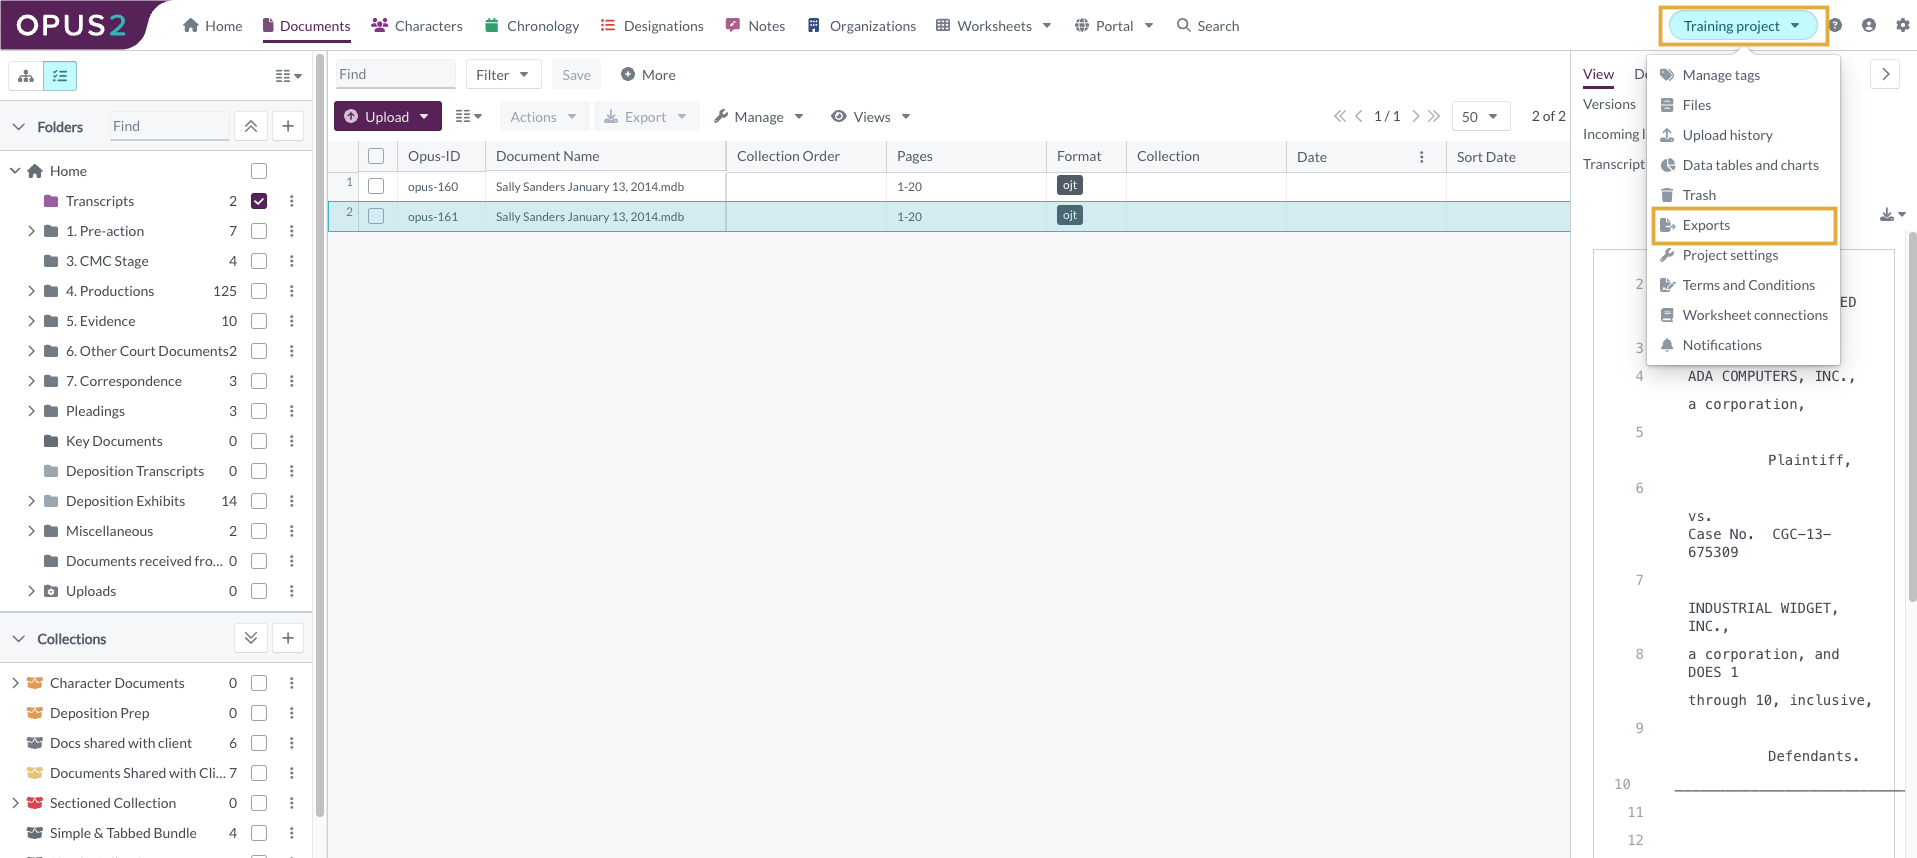
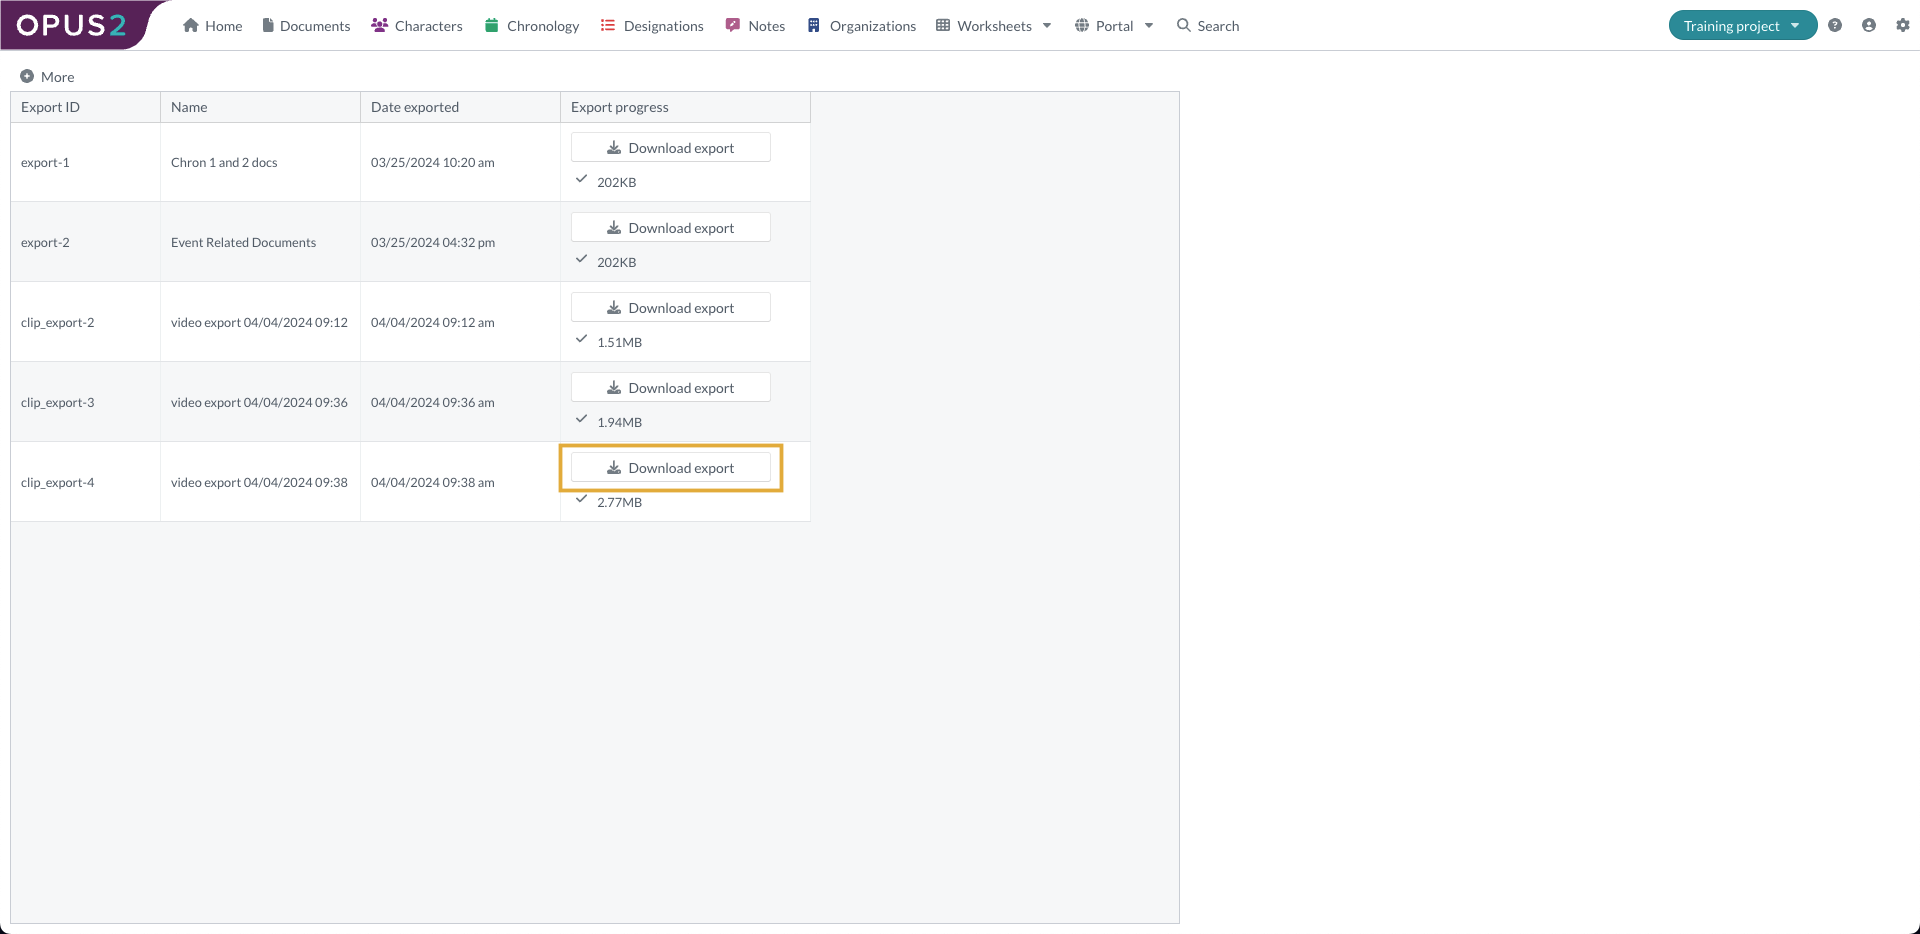
- Locate the generated video export.
- Select Download export.
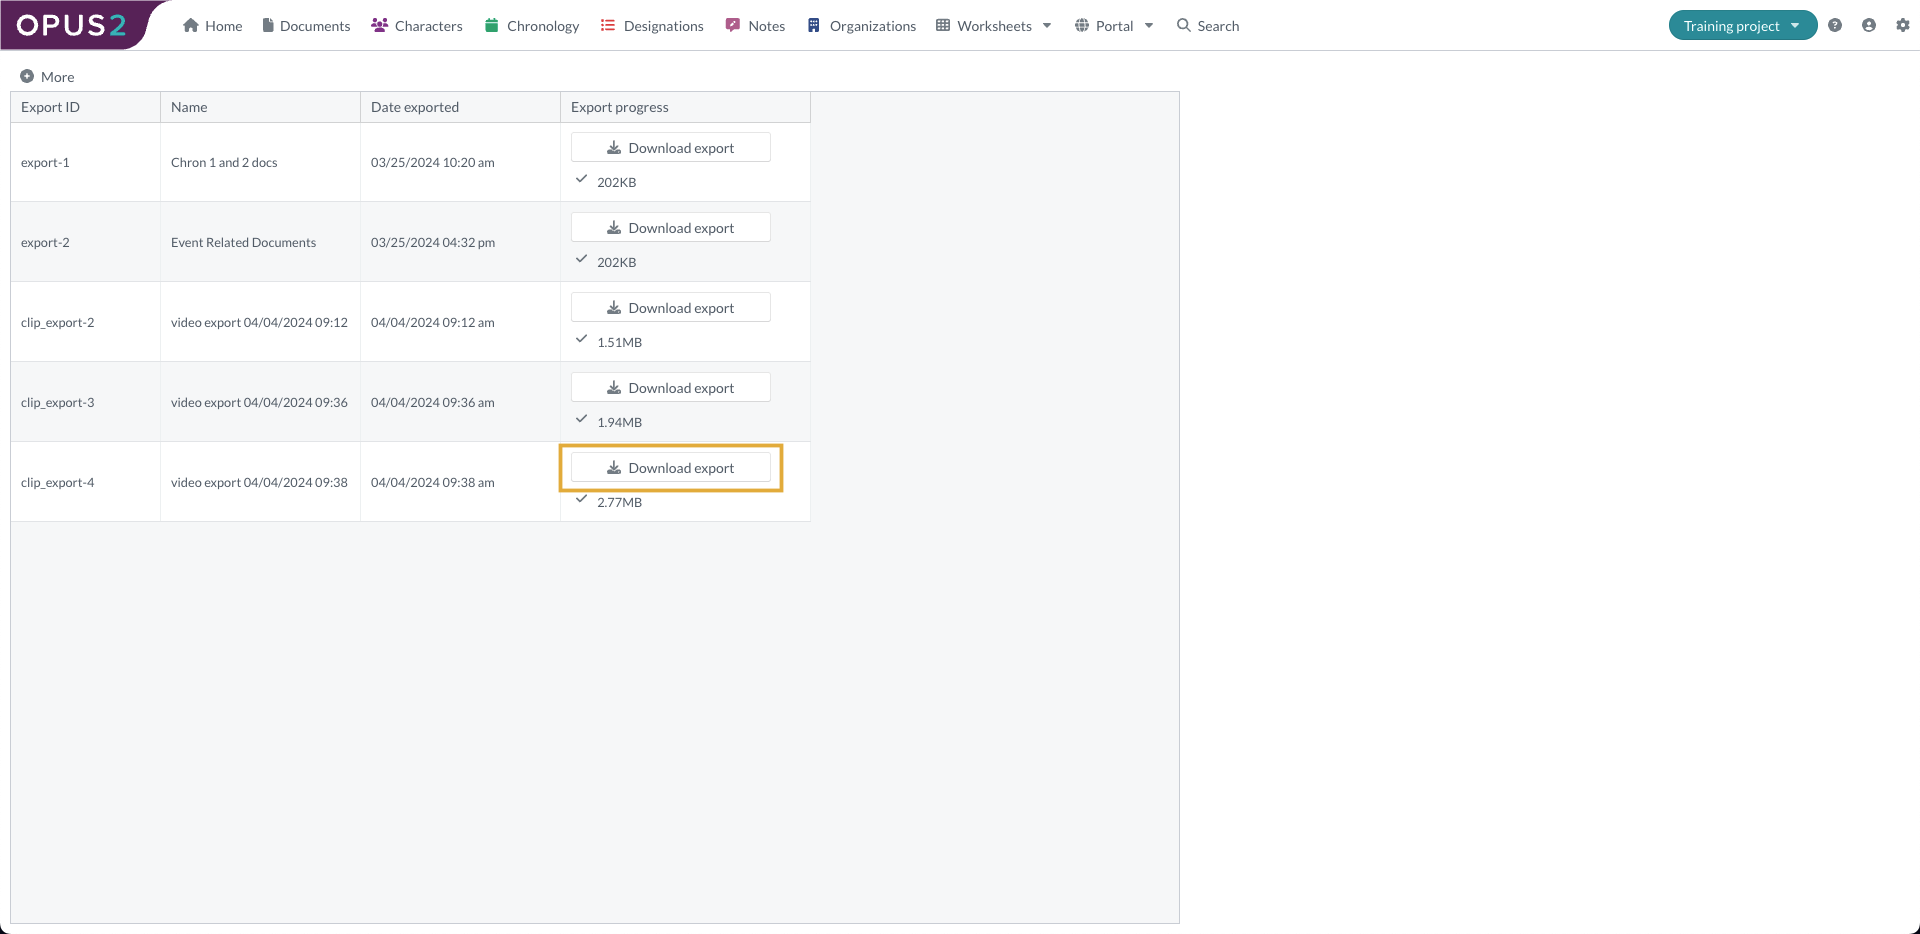
The video file downloads to your computer's default Downloads folder.
Exporting designation video clips from the Designations worksheet
- Open the Designations worksheet.
- Select one or more designations that include video clips. A play icon next to a designation indicates that a video clip is available.

- Select Actions in the top-left corner.
- Select Export clips from the dropdown.
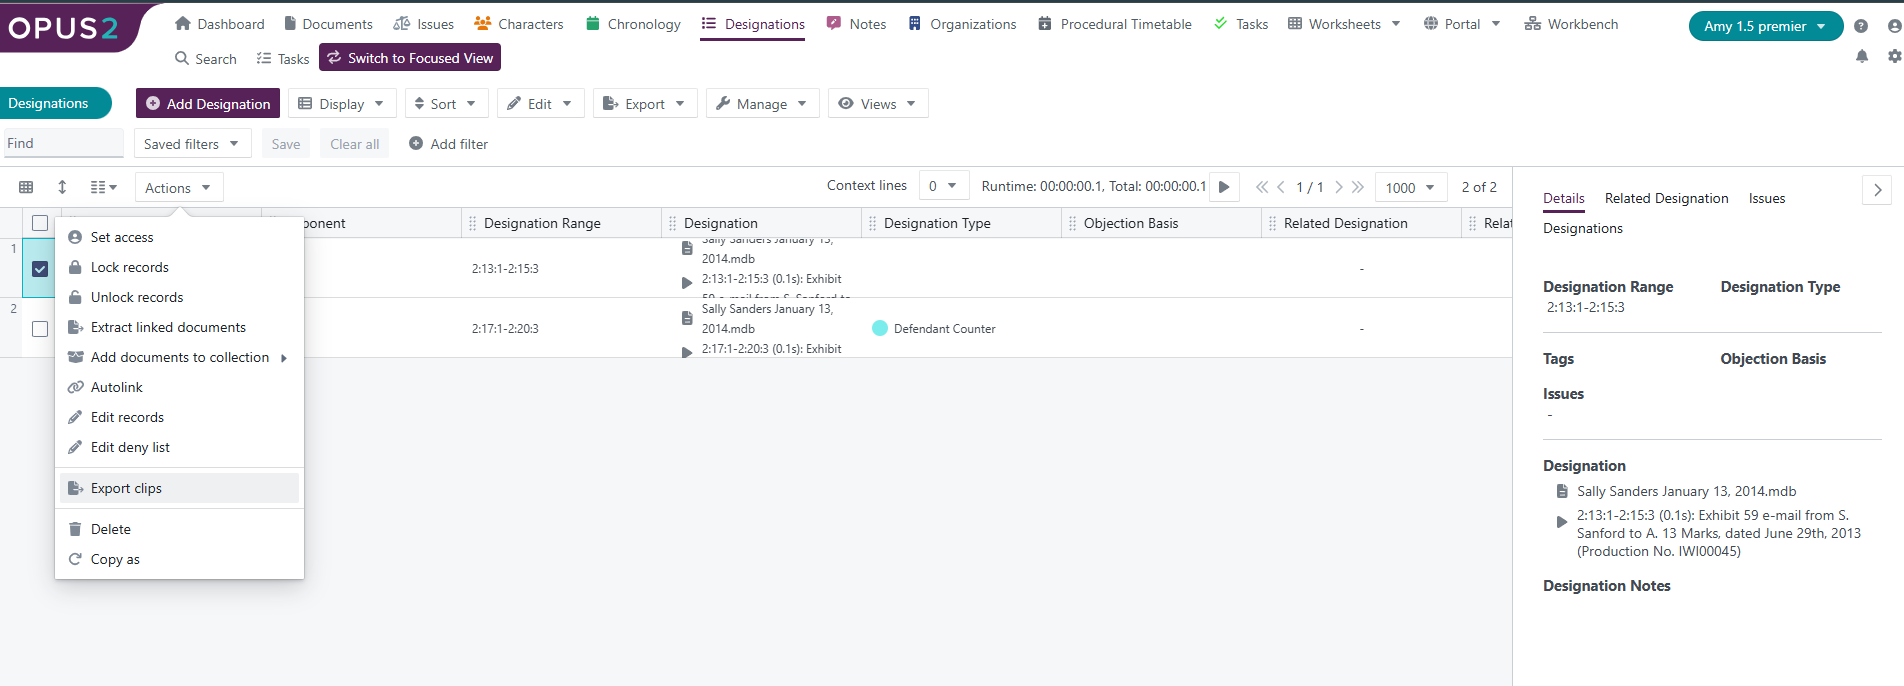
- In the Export clips dialog, choose what to include in your export.
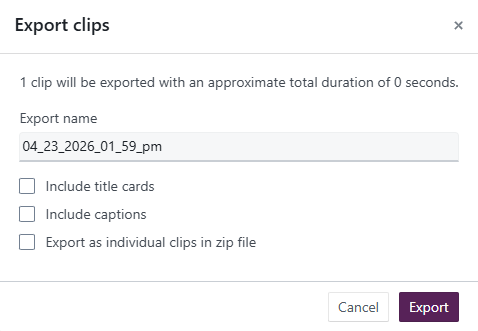
Note: If multiple clips are selected and the Include title card option is enabled, all clips are exported as a single video with each clip separated by its own title card.
Accessing the export
- Select the Project button (showing the project name) in the top-right corner.
- Select Exports from the dropdown.
- Locate the generated video export.
- Select Download export.
The video file downloads to your computer's default Downloads folder.
Related links
Related documentation
Opus 2 has help information accessible within the application; click the question mark and then select Documentation in the upper-right area of the platform. You can also access the documentation at: Opus 2 Support.
How to contact us
To contact us about the documentation, or if you have any other questions or issues about Opus 2 solutions, contact Opus 2 Platform Support by emailing Opus 2 Platform Support.