
| Minimum Software Version | 8.18.10 |
| Solution(s) | Cases International ✓ Cases US ✓ Institutions ⨉ Counsel ✓ |
Explains how to add and configure the Worksheet component in the Portal Builder, including worksheet and form preparation, visible columns, editable fields, and the portal user experience.
The Worksheet component presents data from an existing worksheet in a tabular format within the portal. It is ideal for sharing structured records such as procedural steps, statuses, or tracked events. Administrators control which worksheet is displayed, which metadata columns are visible, and which fields portal users are permitted to edit.
Portal users can view individual records in more detail and edit only the fields explicitly enabled, ensuring controlled collaboration while preserving data integrity.
Preparing a worksheet and form
Before configuring the Worksheet component, ensure the following exist in the platform:
- The required worksheet has been created.
- At least one form view has been created if record detail display is required.
Important: A worksheet is mandatory. A form must exist before it can be selected for use.
Example: Create a worksheet named Procedural Steps with fields for step name, responsible party, and status.
Adding a Worksheet component
- Open the Portal Builder.
- Add the Worksheet component to the desired location on the page.
- Open the Properties tab to begin configuration.
Configuring Worksheet properties
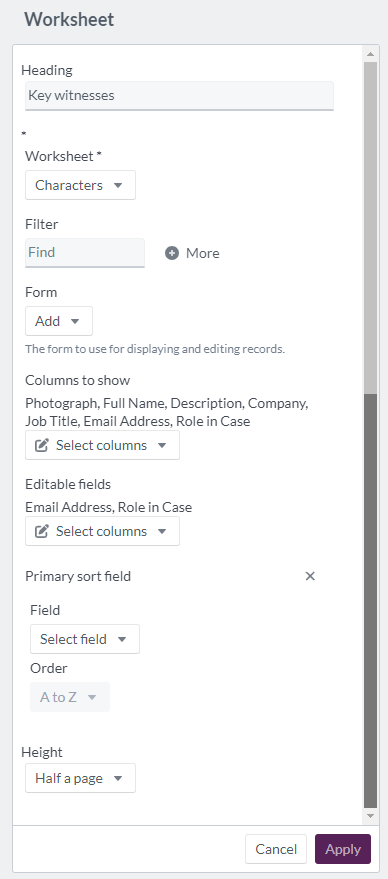
Configure the following options in the Properties tab:
| Option | Description |
|---|---|
| Heading | Header text for the Worksheet component (maximum 100 characters). |
| Worksheet | Required. Select the source worksheet for the displayed data. |
| Filter | Apply filters such as date, party responsible, procedural step, status, date added, added by, date updated, or updated by. |
| Form | Select the form used to display detailed record views. |
| Columns to show | Select the metadata fields to display as columns in the portal. All metadata columns are available for selection. |
| Editable fields | Select the fields that portal users are permitted to edit. |
| Primary sort field: Field | Choose a field for primary sorting. |
| Primary sort field: Order | Set sorting order to A–Z or Z–A. |
| Height | Set the display area to fit to content, at least half a page, or at least a full page. |
Example: Configure a Worksheet component titled Case Status Tracker showing step name and status, with status set as an editable field.
How the Worksheet component appears to portal users
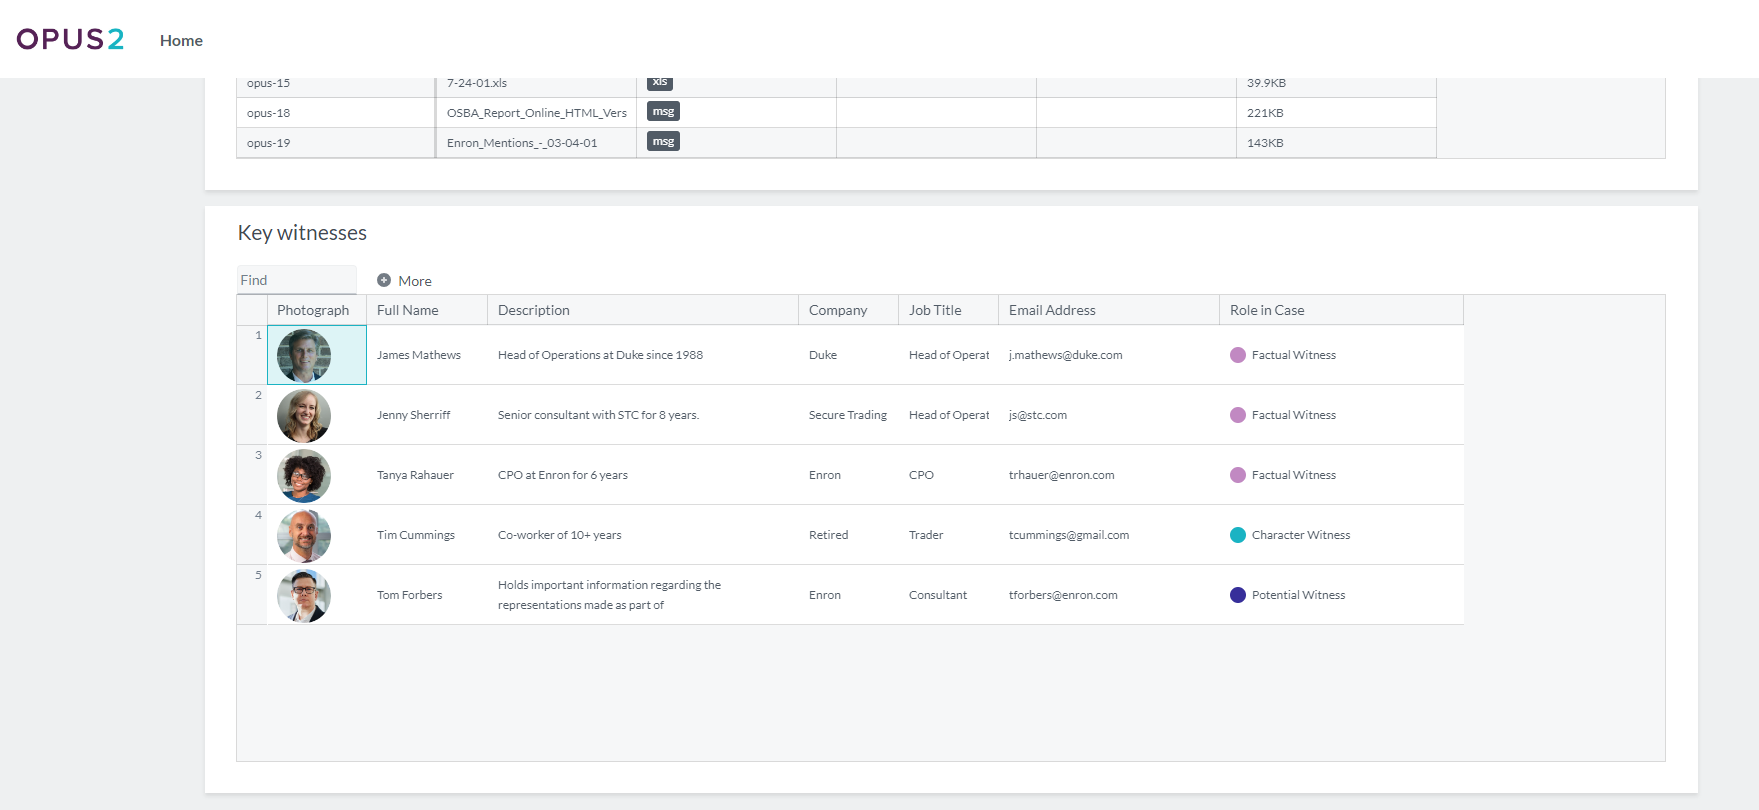
When viewed by portal users, the heading appears at the top of the component and worksheet records are displayed in a table. Only the selected columns are visible, and sorting and filtering rules determine the order and visibility of records.
Portal users can:
- Select a record to view its details using the configured form.

- Select Edit to update fields that have been enabled as editable.

Related links
Related documentation
Opus 2 has help information accessible within the application; click the question mark and then select Documentation in the upper-right area of the platform. You can also access the documentation at: Opus 2 Support.
How to contact us
To contact us about the documentation, or if you have any other questions or issues about Opus 2 solutions, contact Opus 2 Platform Support by emailing Opus 2 Platform Support.