
| Minimum Software Version | 8.14.3 |
| Solution(s) | Hearings ⨉ Cases International ✓ Cases US ✓ Institutions ✓ Counsel ✓ Focused View⨉ |
Explains how to import designations into a case, either in bulk via a spreadsheet or individually by pasting designation ranges into a single transcript.
Designations can be imported via a spreadsheet rather than entered manually, supporting both bulk imports across multiple transcripts and targeted updates to a single transcript. Both methods support creating new designations and updating existing ones.
During collaborative designation review, importing from a spreadsheet allows you to add responses to designations across multiple transcripts in a single operation. For targeted updates to a single transcript, designation ranges can be pasted directly into the transcript view without needing a spreadsheet.
At a minimum, your spreadsheet must include the Opus ID and Designation Range columns. Including a Designation Type column is best practice, though this value can be edited manually after import.
Page, line, and word ranges can be structured either as separate columns (start page, start line, start word; end page, end line, end word) or as a single column with values separated by colons. For example, to designate page 12, line 1, word 2 through page 12, line 5, word 5, enter 12:1:2-12:5:5. The word value is optional but useful for partial-line designations.
Importing designations from a spreadsheet
Accepted file formats: .xls, .xlsx, .csv.
- Select Designations from the top of the screen.
- Select Manage > Import items. The Designations import dialog opens.
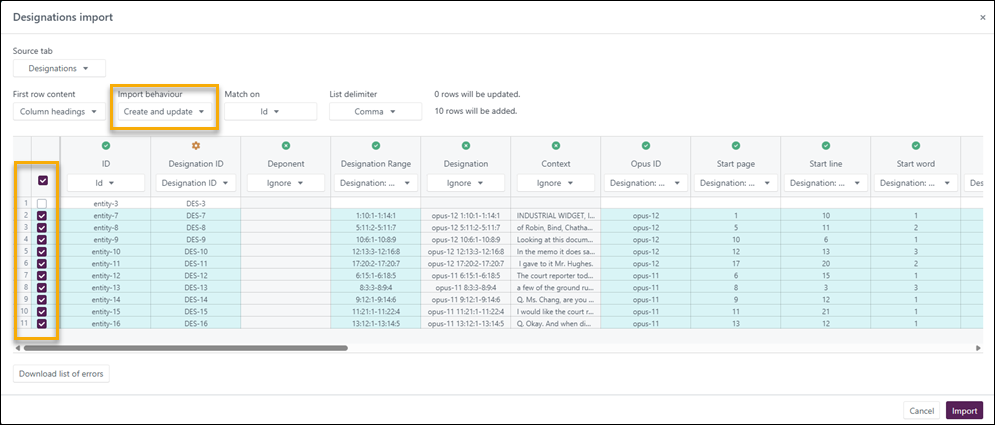
- Drag or browse to your spreadsheet in the dialog. The dialog expands to display the spreadsheet contents.
- Select the checkbox alongside any row you do not want to import to exclude it.
- Ensure the Opus ID column is mapped to Designation: Opus ID from the dropdown list. The Opus ID is used to match each incoming designation to the correct transcript. Each transcript has a unique Opus ID assigned at the time of upload — this must match the Opus ID on the corresponding transcript.
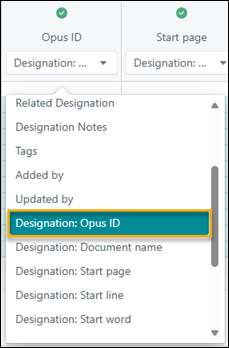
Note: Columns with a green tick at the top are matched between the current worksheet and the imported spreadsheet. If your spreadsheet does not include a header row, change First row content to Data. Map the Opus ID and page/line fields to the corresponding fields prefixed with Designations.
- Select your chosen Import behaviour from the dropdown list:
- Create and update – Create new designations and update existing ones.
- Create – Create new designations only.
- Update – Update existing designations only.
- Review the table preview. Only columns with a tick at the top are included. Field status is indicated by background colour:
| Colour | Meaning |
|---|---|
| Blue | The field will be added. |
| Orange | The field will be partially added, as only part of the field has matched. |
| Red | The field will not be added, as the formats do not match. |
- Select Import to complete the process.
Importing designations into a single transcript
Use this method to add or update designation ranges for an individual transcript by pasting ranges directly into the transcript view.
- Open the transcript from the transcript worksheet or the Documents page.
- Select the preview on the right side of the page to open the Transcript Viewer.
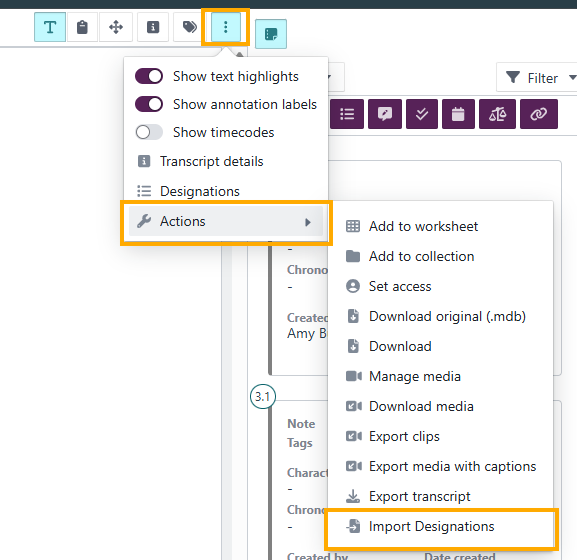
- Select the kebab menu (three dots) in the upper-right corner.
- Select Actions > Import designations.
- Copy the designation ranges from your source and paste them into the dialog box.
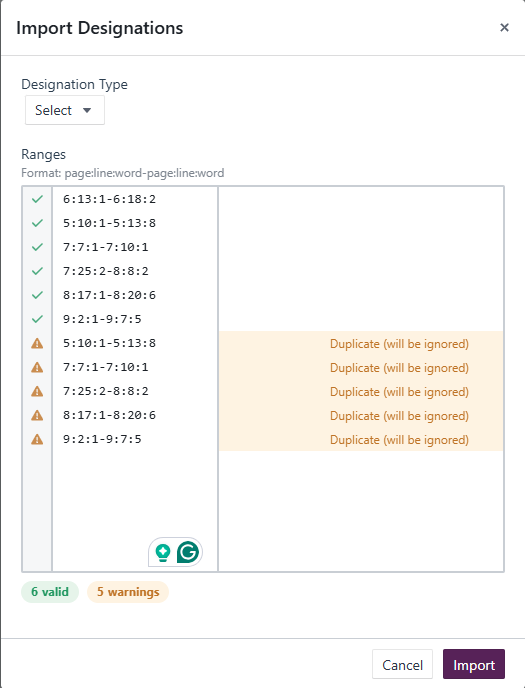
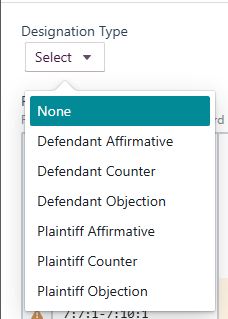
- Select the Designation Type at the top of the dialog box — this applies a single designation type to all pasted ranges.
- Review any warnings before importing:
- Designations with warnings will still import.
- Designations marked as invalid will not import until corrected.
- Ranges can be edited directly in the dialog box before importing.
- To remove a flagged range before importing, select the red X next to the error message.
- Select Import to complete the process.
Related links
Related documentation
Opus 2 has help information accessible within the application; click the question mark and then select Documentation in the upper-right area of the platform. You can also access the documentation at: Opus 2 Support.
How to contact us
To contact us about the documentation, or if you have any other questions or issues about Opus 2 solutions, contact Opus 2 Platform Support by emailing Opus 2 Platform Support.