
| Minimum Software Version | 8.18.10 |
| Solution(s) | Hearings ⨉ Cases International ✓ Cases US ✓ Institutions ⨉ Counsel ✓ |
Transcript annotation in Opus 2 allows users to create structured worksheet records directly from highlighted transcript content. Unlike standard documents, transcripts support specialized annotation behavior that enhances review and analysis workflows.
An annotation is created as a worksheet record, meaning:
- The worksheet must be configured in advance
- It must include a “text in a document” field
- When configured correctly, users can create records directly from highlighted transcript text
Note: Transcript management is a licensed feature. If transcripts are not available in your environment, contact Support.
What is a Transcript Annotation?
A transcript annotation is a worksheet record created from highlighted transcript content.
When a worksheet includes a “text in a document” field configured for transcripts:
- Highlighting text in the Transcript Viewer triggers the New Record dialog
- A worksheet record is created and linked to that transcript excerpt
This enables users to:
- Capture key testimony
- Link transcript passages to structured data
- Build analysis workflows based on transcript content
Using the “Text in a Document” Field Type for Transcripts
To enable transcript annotation:
- Configure a worksheet field of type Text in a Document
- Enable the option Apply to transcripts
Once enabled:
- The worksheet becomes available when highlighting transcript text
- Users can create annotations directly from transcripts
Highlight-Style Transcript Annotation
Highlight-style is the default annotation mode.
Behavior
- Functions the same as document annotation
- Highlighted text appears directly in the transcript
- A corresponding annotation appears in the right-hand margin
Use Case
- Simple highlighting of transcript passages
- Creating straightforward annotations
Bar-Style Transcript Annotation
Bar-style annotation is designed for more complex transcript review scenarios.
Behavior
- Highlights are represented as bars in the margin, not colored text overlay
- Multiple annotations can overlap without obscuring text
- Each annotation is visually distinct using different colors
Benefits
- Clearer visibility when annotations overlap
- Better handling of long transcript excerpts
- Improved readability in dense transcript analysis
Additional Features
Displays:
- Page number
- Line number
- Word range
Start and end positions can be adjusted directly in the dialog
(without re-highlighting text)
Bar-Style Annotation for Synchronized Media Files
If a transcript has an associated synchronized media file:
- Creating a bar-style annotation will automatically generate a media clip
- The clip corresponds to the selected transcript excerpt
Accessing Media Clips
Media clips can be viewed:
- In the Edit Record dialog (via media icon)
- In the associated worksheet record
Use Case
- Reviewing video or audio tied to testimony
- Extracting precise clips for evidence or presentation
Configure Worksheet for Transcript Annotation
Navigate to the desired worksheet
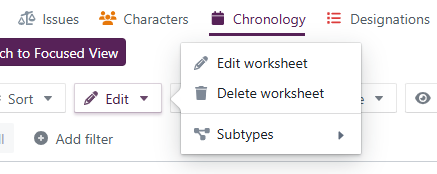
Click Edit → Edit Worksheet
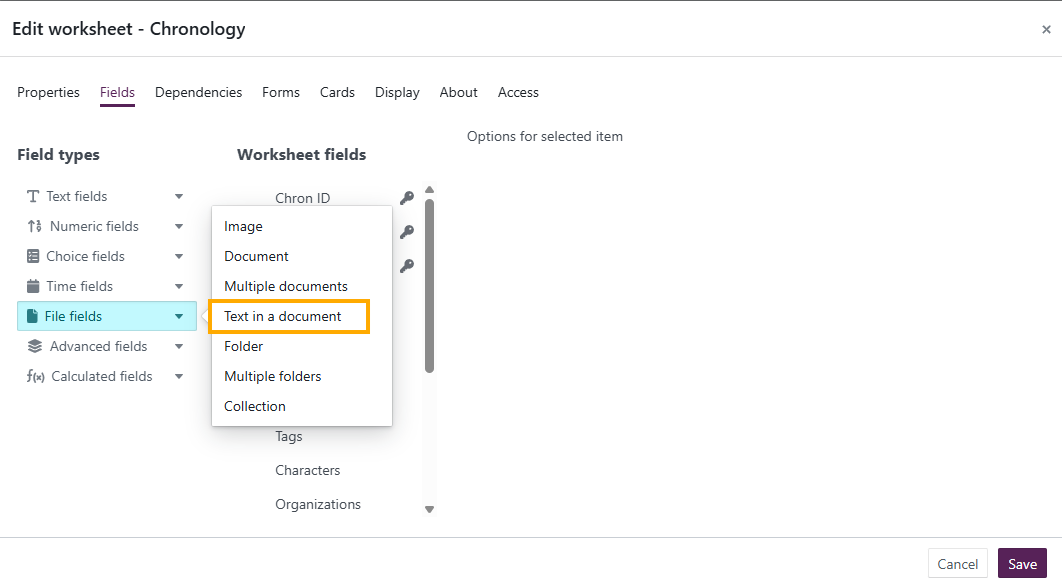
Go to the Fields tab
Add a field of type Text in a Document
Enable:
- Apply to transcripts
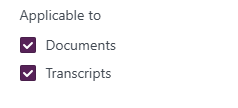
- Apply to transcripts
Choose annotation style:
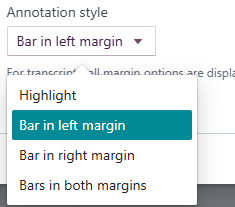
- Highlight
- Bar In...
Click Save
Create an Annotation from a Transcript
- Open a transcript in the Transcript Viewer
- Highlight the desired text
- Select Create ...
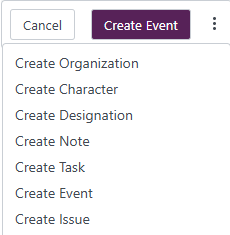
- Complete the worksheet record details
- Click Save