
| Minimum Software Version | 9.58.3 |
| Solution(s) | Hearings ⨉ Cases International ⨉ Cases US ✓ Institutions ⨉ Counsel ⨉ |
The Transcript tab gives users a single, focused view for accessing and working with transcripts uploaded into a case. It displays standard metadata fields alongside links to notes, auto links, designations, and chronology entries associated with each transcript.
Previously, transcripts were managed entirely within the Documents page. The Transcript tab surfaces transcript-specific information in a dedicated view, making it faster to locate and work with transcript content without navigating through the full document set.
Note: for projects configured for large document sets, the Transcript tab will not be displayed. Transcripts for those projects remain accessible via the Documents page.
Viewing the Transcript tab
The Transcript tab is available from the main navigation once transcripts have been uploaded into a case. The following standard metadata fields are displayed by default:
- Opus ID
- Document name
- Date
- Deponent — displayed only when the deponent field has been completed on the Documents page
- Links — includes notes, auto links, designations, and chronology
- Media — displayed when a video has been added to the transcript
- Deposition type
Adding custom fields to the transcript worksheet
Additional fields can be surfaced in the transcript worksheet by configuring them on the Documents page.
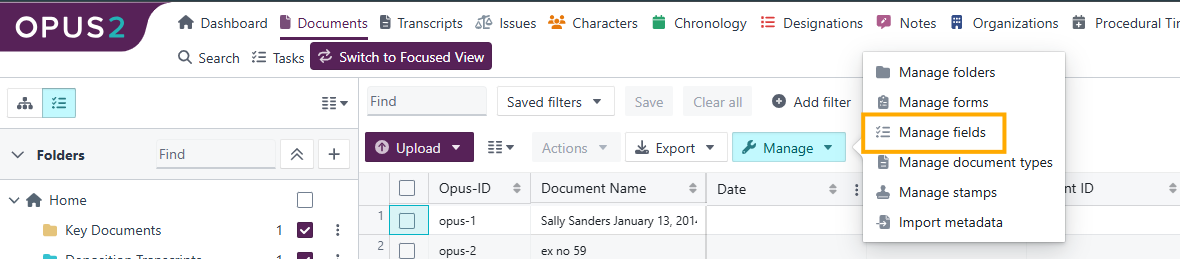
- Go to Manage.

- Select Manage fields.
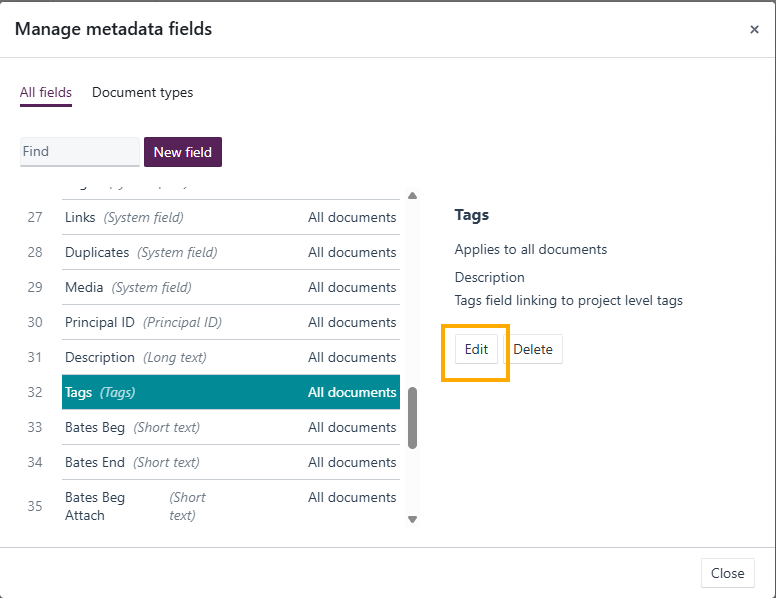
- Search or scroll to find the field you want to add.
- Select the field to open the edit panel.
- Change the Applies to setting from All documents to Document types.
- Under Applied document types, select the document types you want the field to apply to.
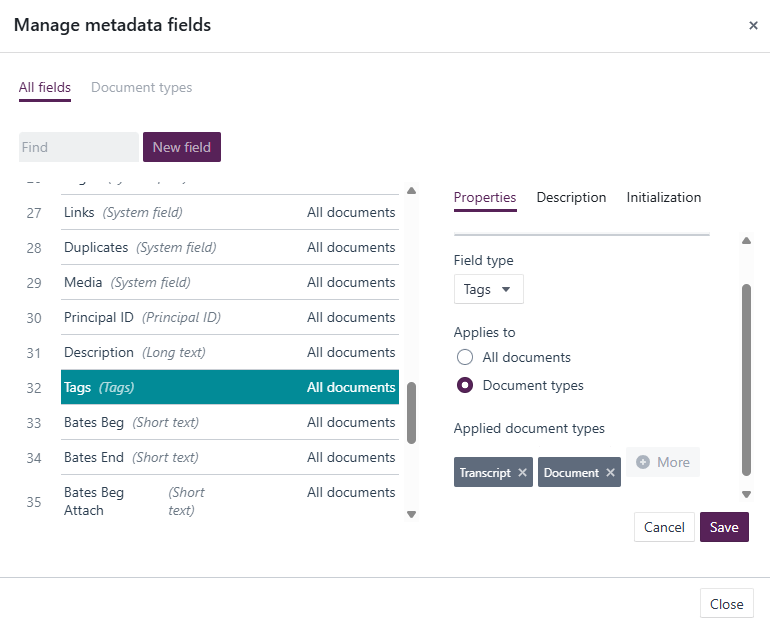
The selected fields will then appear in the transcript worksheet.
Uploading a single transcript
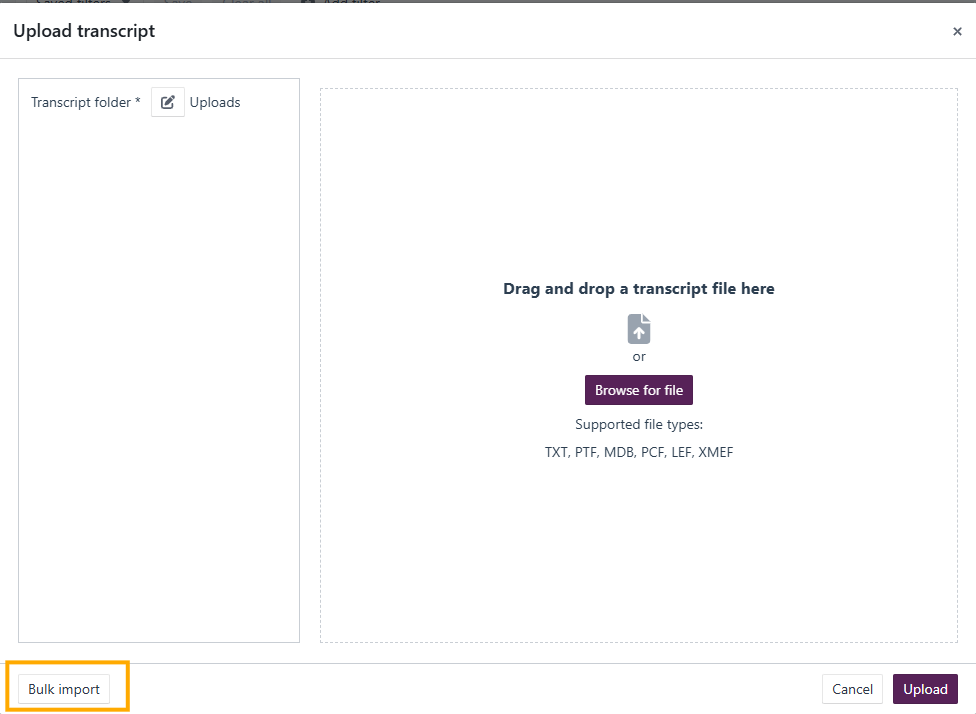
- Select Uploads.
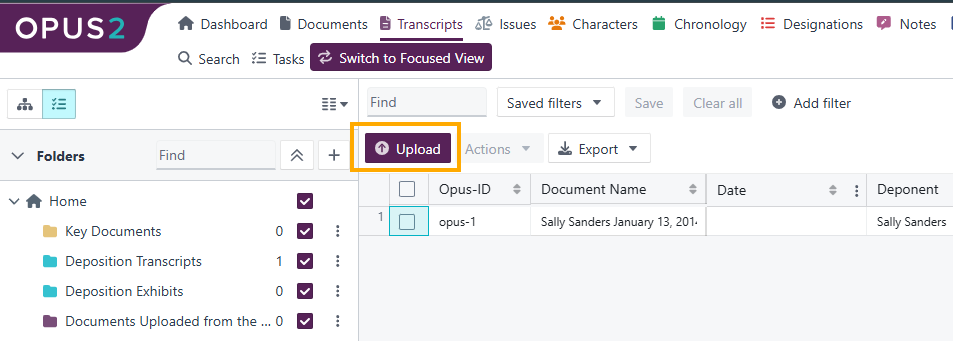
- In the upload dialogue, select the destination folder, or leave it to upload into an Uploads folder that will be created automatically if one does not already exist.
- Drag and drop the transcript file, or browse to select the file you want to import.
- Once the file has been added, you can enter metadata before uploading:
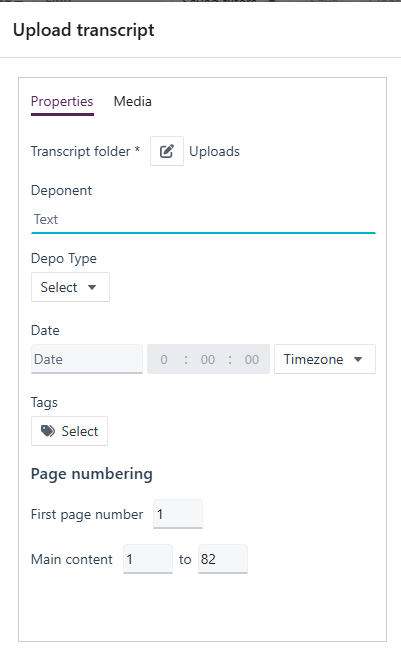
- Deponent
- Deposition type
- Date
- Add any associated transcript media at this stage if required.
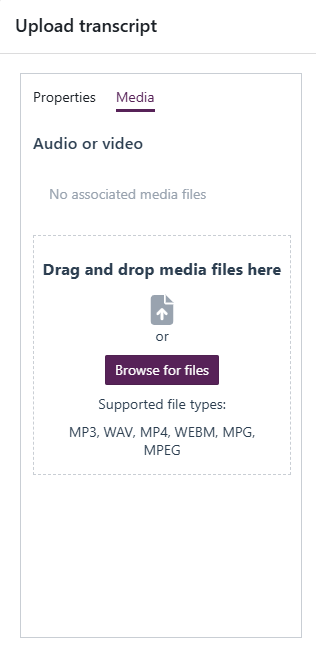
- Once you have completed the metadata, select Upload.
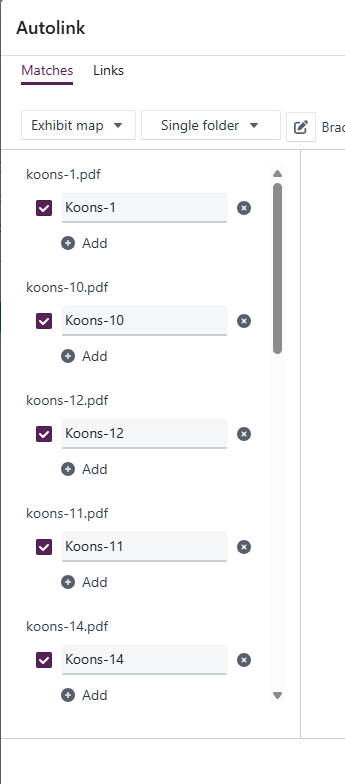
- If the file includes exhibits (LEF and XMEF files), you can link those exhibits after the upload.
Bulk importing transcripts (TXT and MDB files only)
- Select Uploads.
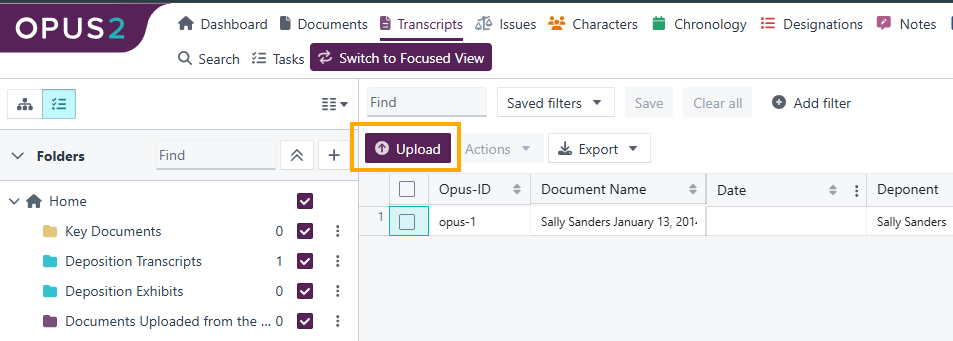
- Select the Bulk import at the bottom
- Drag and drop the transcript files, or browse to select the files you want to import.
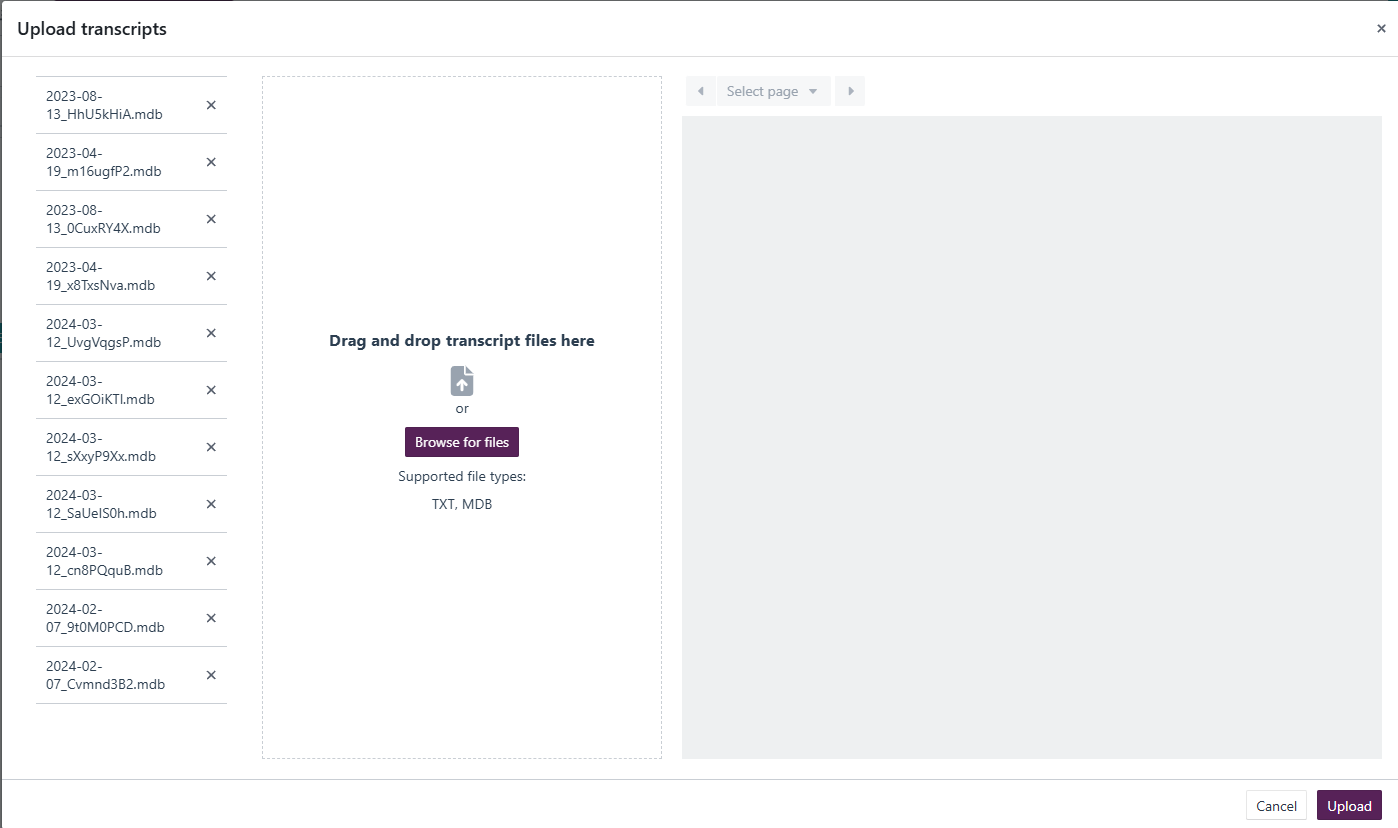
- Files are added to an Uploads folder, which is created automatically if one does not already exist.
- Once all files have been selected, select Upload.
Note: To update metadata prior to uploading when using bulk import, you will need to click on each transcript.Related links
- Downloading documents and files
- Adding/editing document metadata fields
- How to Create a Designation
- How to Upload and Synchronize a Media File to a Transcript