
| Minimum Software Version | 8.14.0 |
| Solution(s) | Cases International ✓ Cases US ✓ Institutions ⨉ |
You can link a character to documents, transcripts, and folders, such as a folder of exhibits.
You can link a character in the Characters worksheet to documents, transcripts, and folders. To do this, you add new fields to the worksheet, add the fields to the Characters card view, and then link the items to the character. The example in this article links a character to transcripts and to the folder of their exhibits.
Overview
There are three stages to linking a character to documents, transcripts, and folders:
- Add new fields to the Characters worksheet.
- Add the new fields to the Characters card view.
- Link the documents, transcripts, and folders to the character.
The type of field you add decides what you can link:
| Field type | What it links |
|---|---|
| Multiple documents | One or more documents or transcripts. |
| Folder | A folder, such as a folder of exhibits. |
The example in this article uses a Transcripts field and an Exhibits folder field. You can give your fields any names that suit what you are linking, for example, Documents.
Adding new fields to the Characters worksheet
Adding a field for documents or transcripts
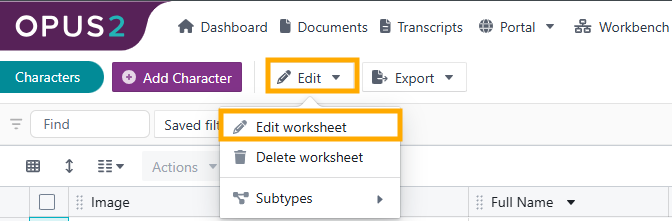
- In the Characters worksheet, select Edit, then select Edit worksheet.
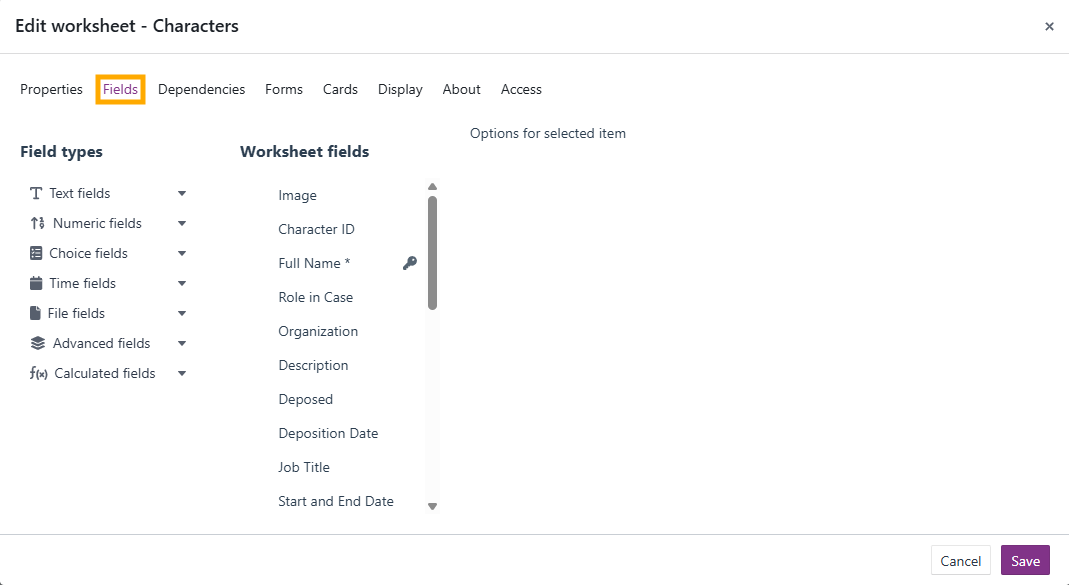
- In the Edit worksheet - Characters dialog, select the Fields tab.
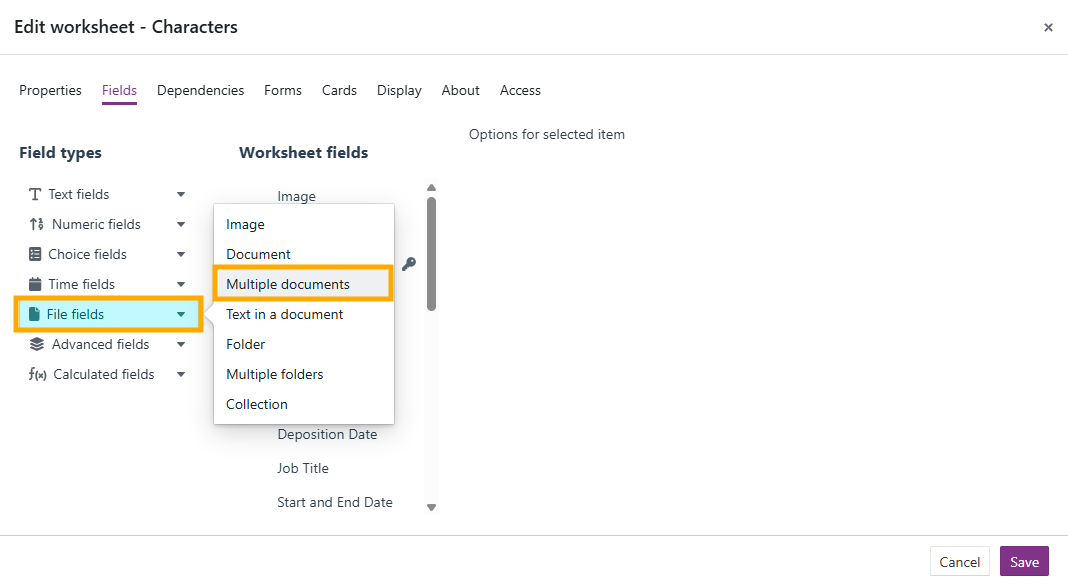
- Select File Fields, then select Multiple documents.
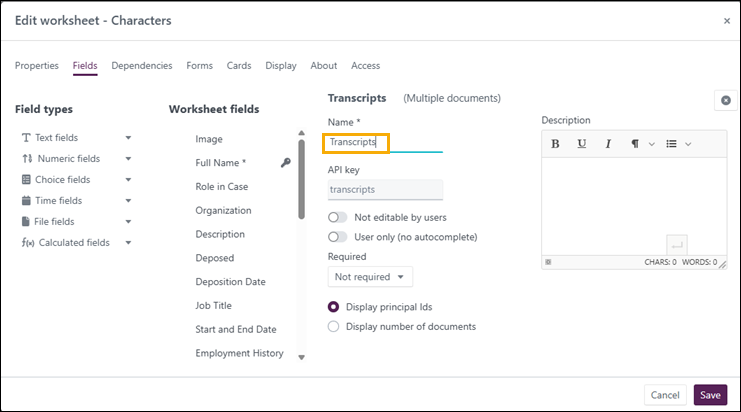
- Enter a name for the field. In this example, enter Transcripts.
- Select Save.
Adding a field for a folder
- In the same Edit worksheet - Characters dialog, select File Fields, then select Folder.
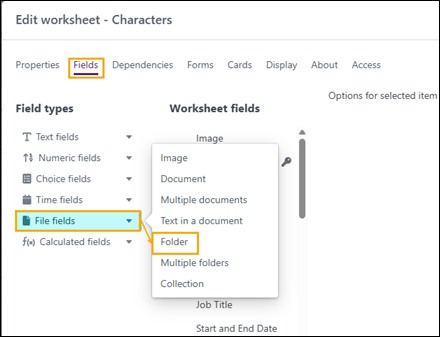
- Enter a name for the folder field. In this example, enter Exhibits.
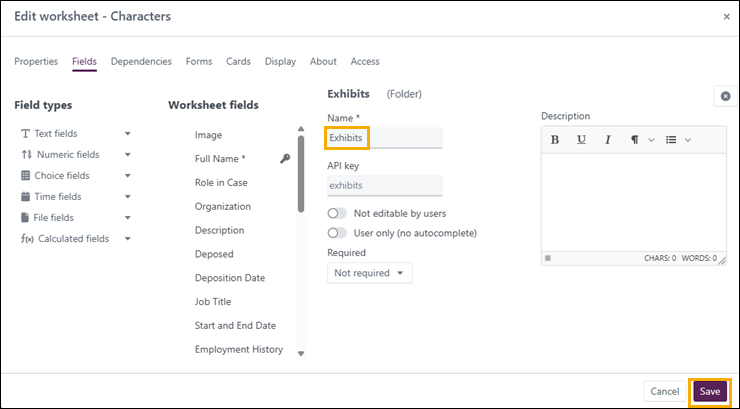
- Select Save.
Adding the new fields to the Characters card view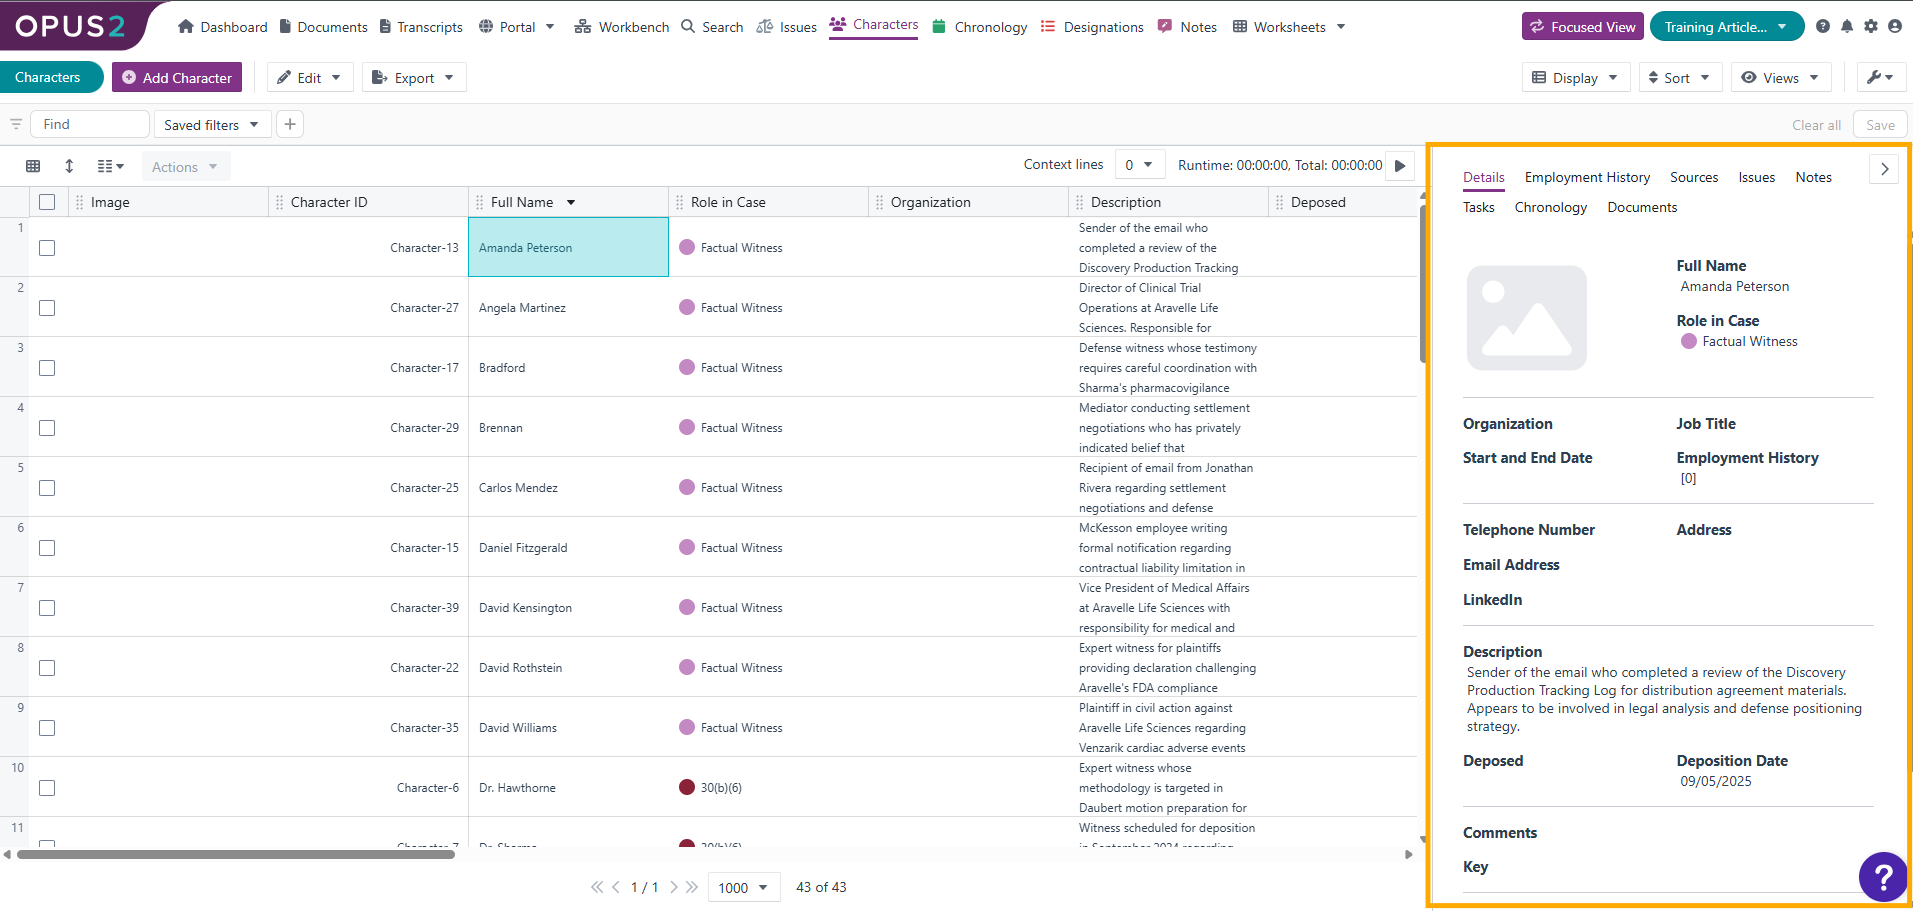
The card view appears on the right of the screen when you select a character in the worksheet. It is built from the fields in a form.
- In the Characters worksheet, select Edit, then select Edit worksheet.
- In the Edit worksheet - Characters dialog, select the Forms tab, then select Details. The new Transcripts and Exhibits fields appear in the Fields list.
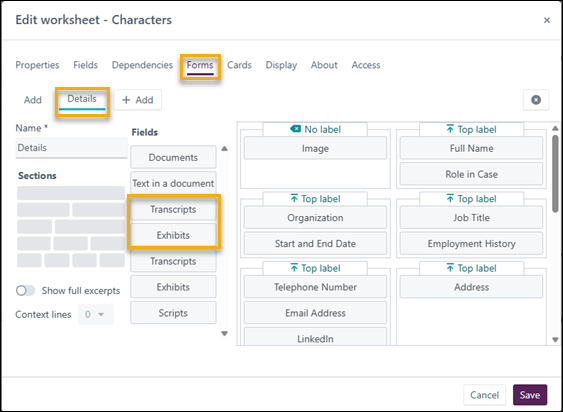
- Drag a two-field section into the form and place it under Tags, as shown in this example. A new, empty two-field section appears in the form.
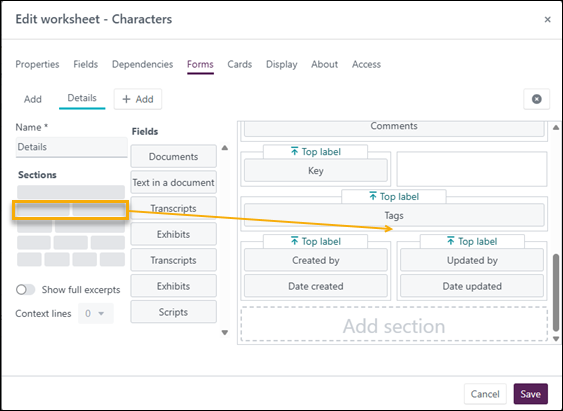
- Drag the Transcripts and Exhibits fields from the Fields list into the empty spaces, one at a time.
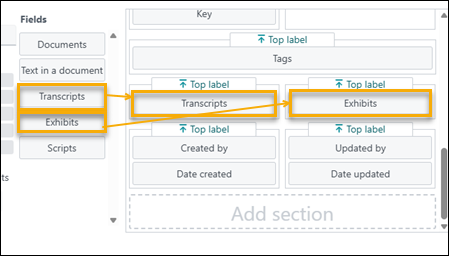
- Select Save.
Tip: You can place the new fields wherever you choose in your own system's card view.
The setup of the Transcripts field and the Exhibits folder field is now complete.
Linking transcripts and exhibits to a character
- In the Characters worksheet, select a character. The card view opens.
- Select the card view once to enter edit mode.
- Scroll down the card view to find the new Transcripts and Exhibits fields.
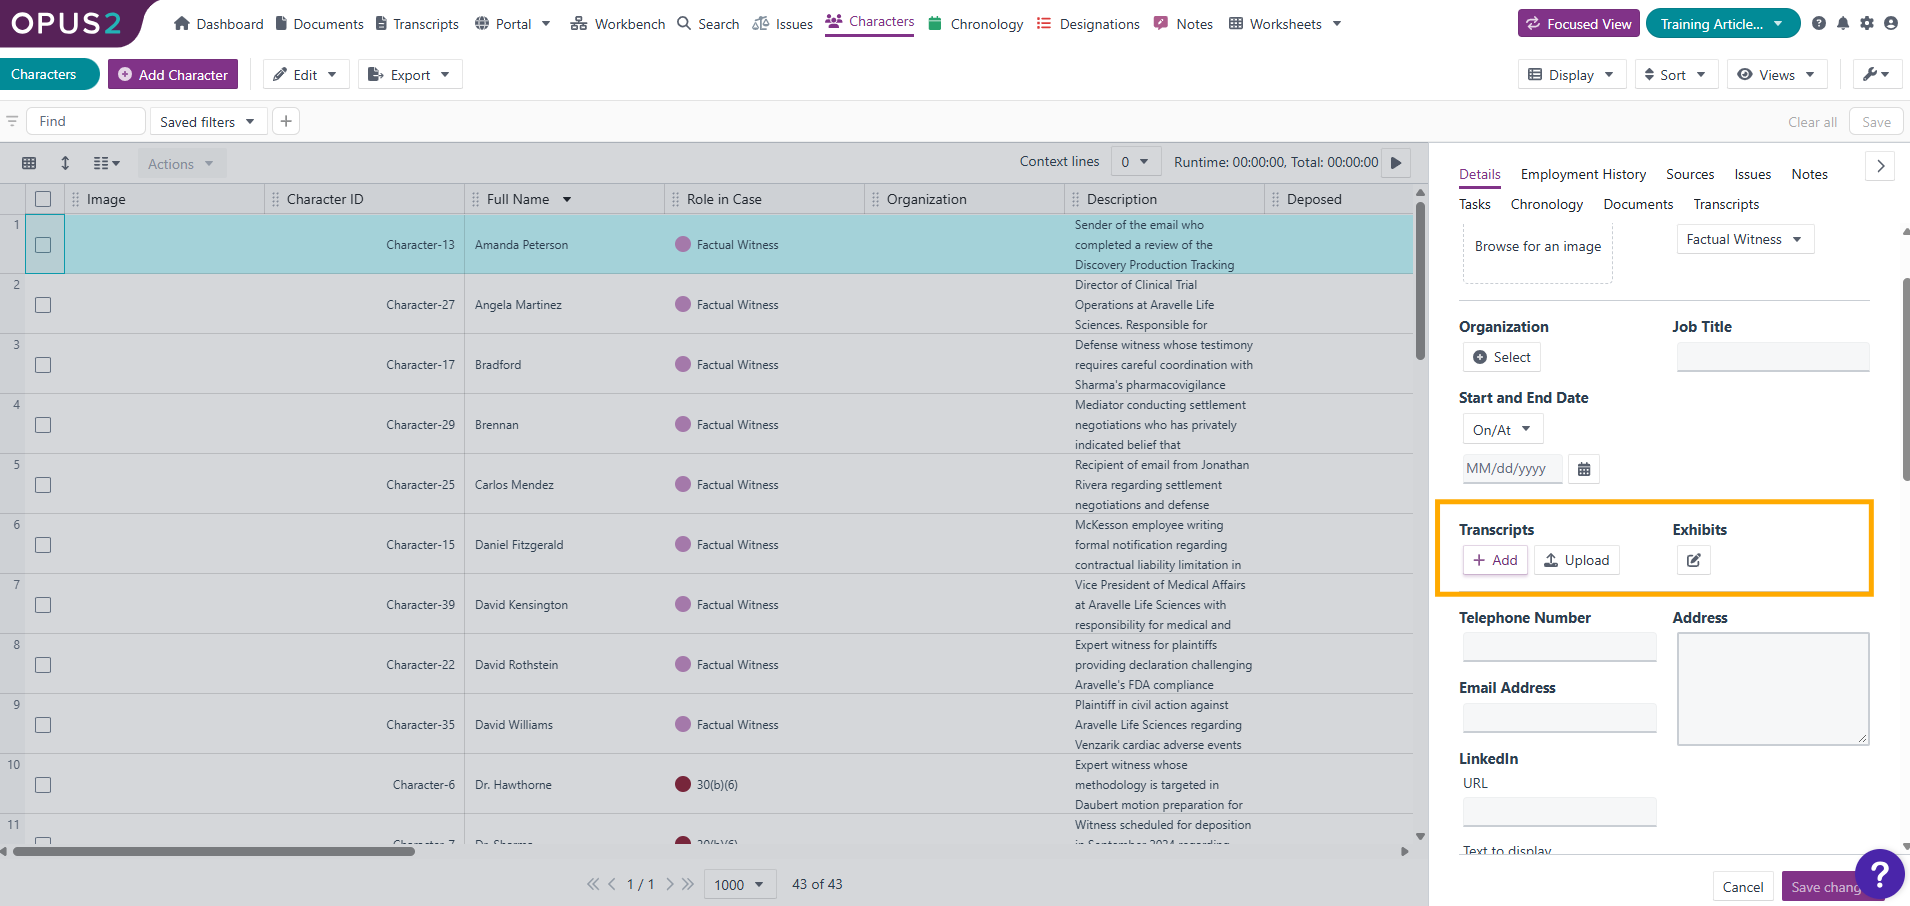
- To link transcripts to the character, select + Add under Transcripts.
- In the Select documents dialog, use the checkboxes to select one or more transcripts to link.
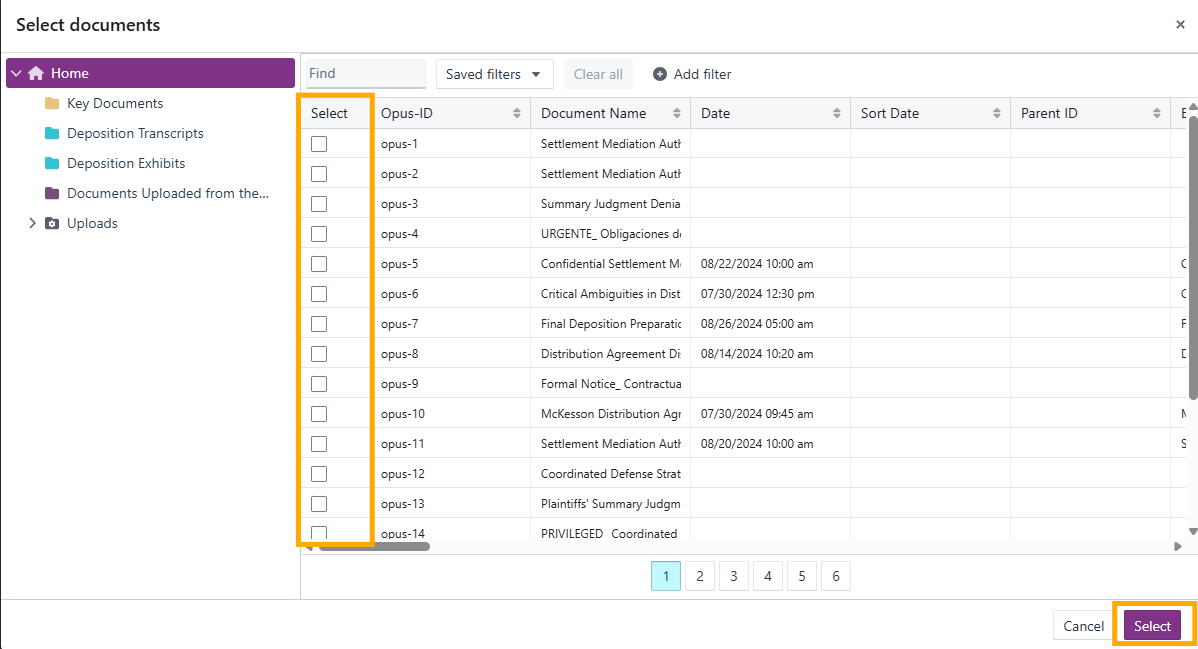
- Select Select.
- To link the folder of exhibits, select the pen icon under Exhibits.
- In the Select folder dialog, drill down to the exhibits folder you want to link to the transcripts.
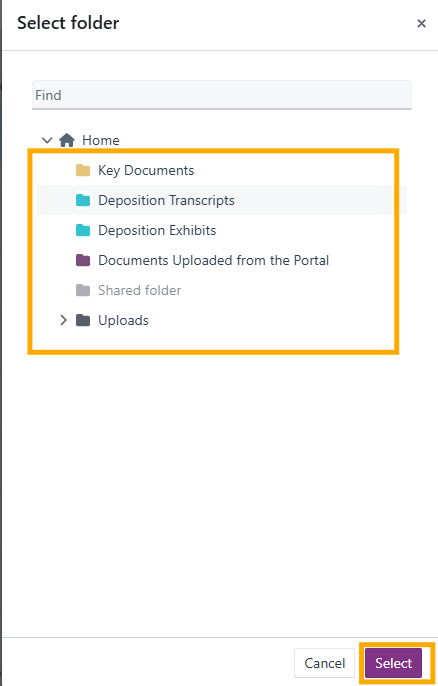
- Select Select.
- Select Save to save your changes to the Characters worksheet.
The linked transcripts and exhibits folder appear next to the character in the Characters worksheet.
Related links
Related documentation
Opus 2 has help information accessible within the application; click the question mark and then select Documentation in the upper-right area of the platform. You can also access the documentation at: Opus 2 Support.
How to contact us
To contact us about the documentation, or if you have any other questions or issues about Opus 2 solutions, contact Opus 2 Platform Support by emailing Opus 2 Platform Support.