
| Minimum Software Version | 8.18.10 |
| Solution(s) | Hearings ⨉ Cases International ✓ Cases US ✓ Institutions ✓ Counsel ✓ Focused View⨉ |
This article explains how to use the Characters worksheet in Opus 2. It covers how to access the worksheet, add a new character, and use the available views to manage and visualise individuals or entities involved in a case.
Characters are used within Opus 2 to represent individuals, organisations, or entities relevant to a case. Once added, characters can be referenced across worksheets, documents, and analysis tools to support structured review and issue tracking.
The Characters worksheet allows you to organise character information and view it in multiple formats to support different workflows and analysis needs. To access the worksheet, select Characters from the top toolbar within the platform.
Depending on system permissions, you may edit character details directly from the worksheet.
Adding a character
Characters are added directly from the Characters worksheet. The available input fields may vary depending on how the worksheet has been configured for your solution or project template.
- Open your project.
- Navigate to Characters from the project navigation.
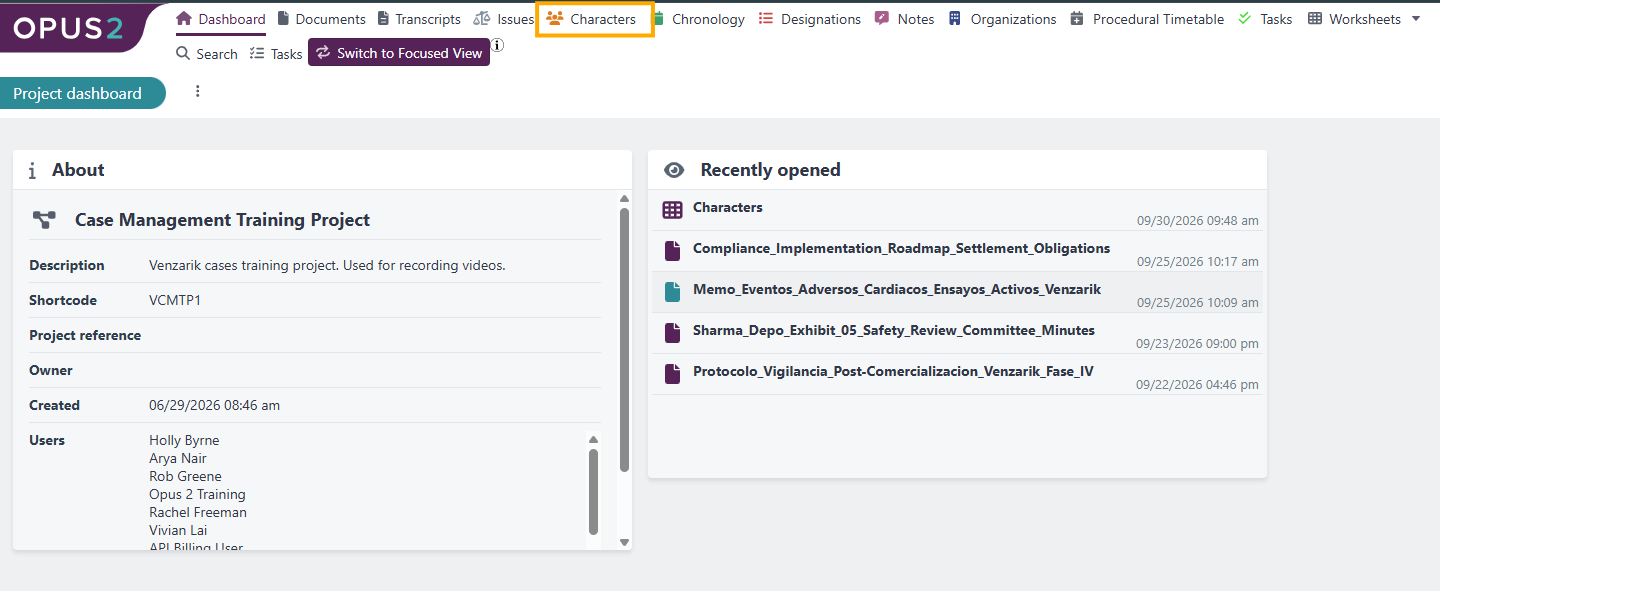
- Click Add character to open the Add character dialog.
- Complete the required fields.
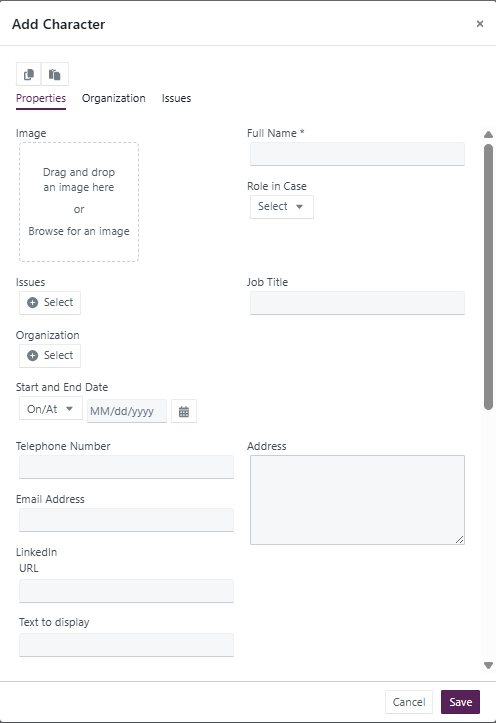
- Available fields may differ depending on your worksheet configuration.
- Click Save to add the character to the project.
Worksheet views
Characters can be reviewed, updated, and reclassified using table, card, calendar, and timeline views.
Table view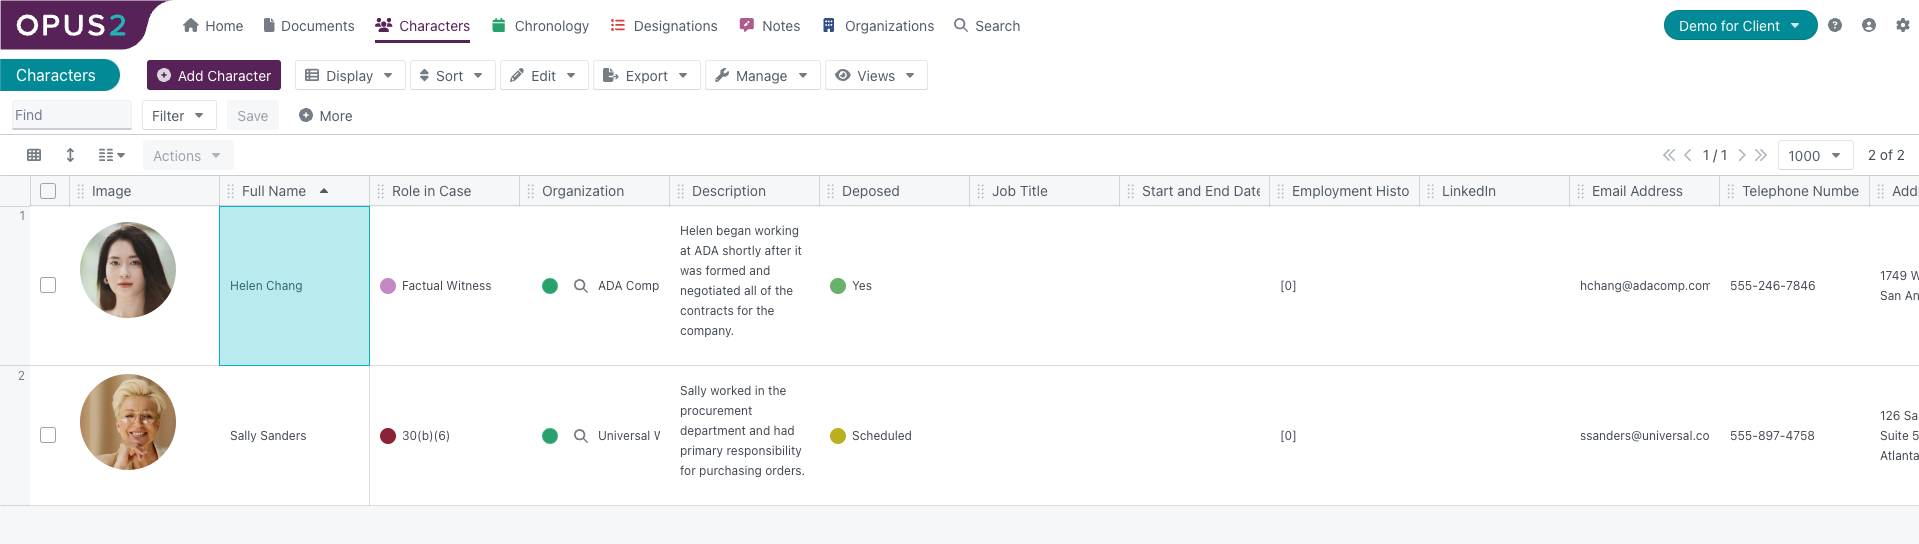
The default view of the Characters worksheet is the table view, which displays character information in a structured row-and-column format.
- Open the Characters worksheet.
- Review characters listed in the table.
- Select a character row to open the Details panel on the right-hand side.
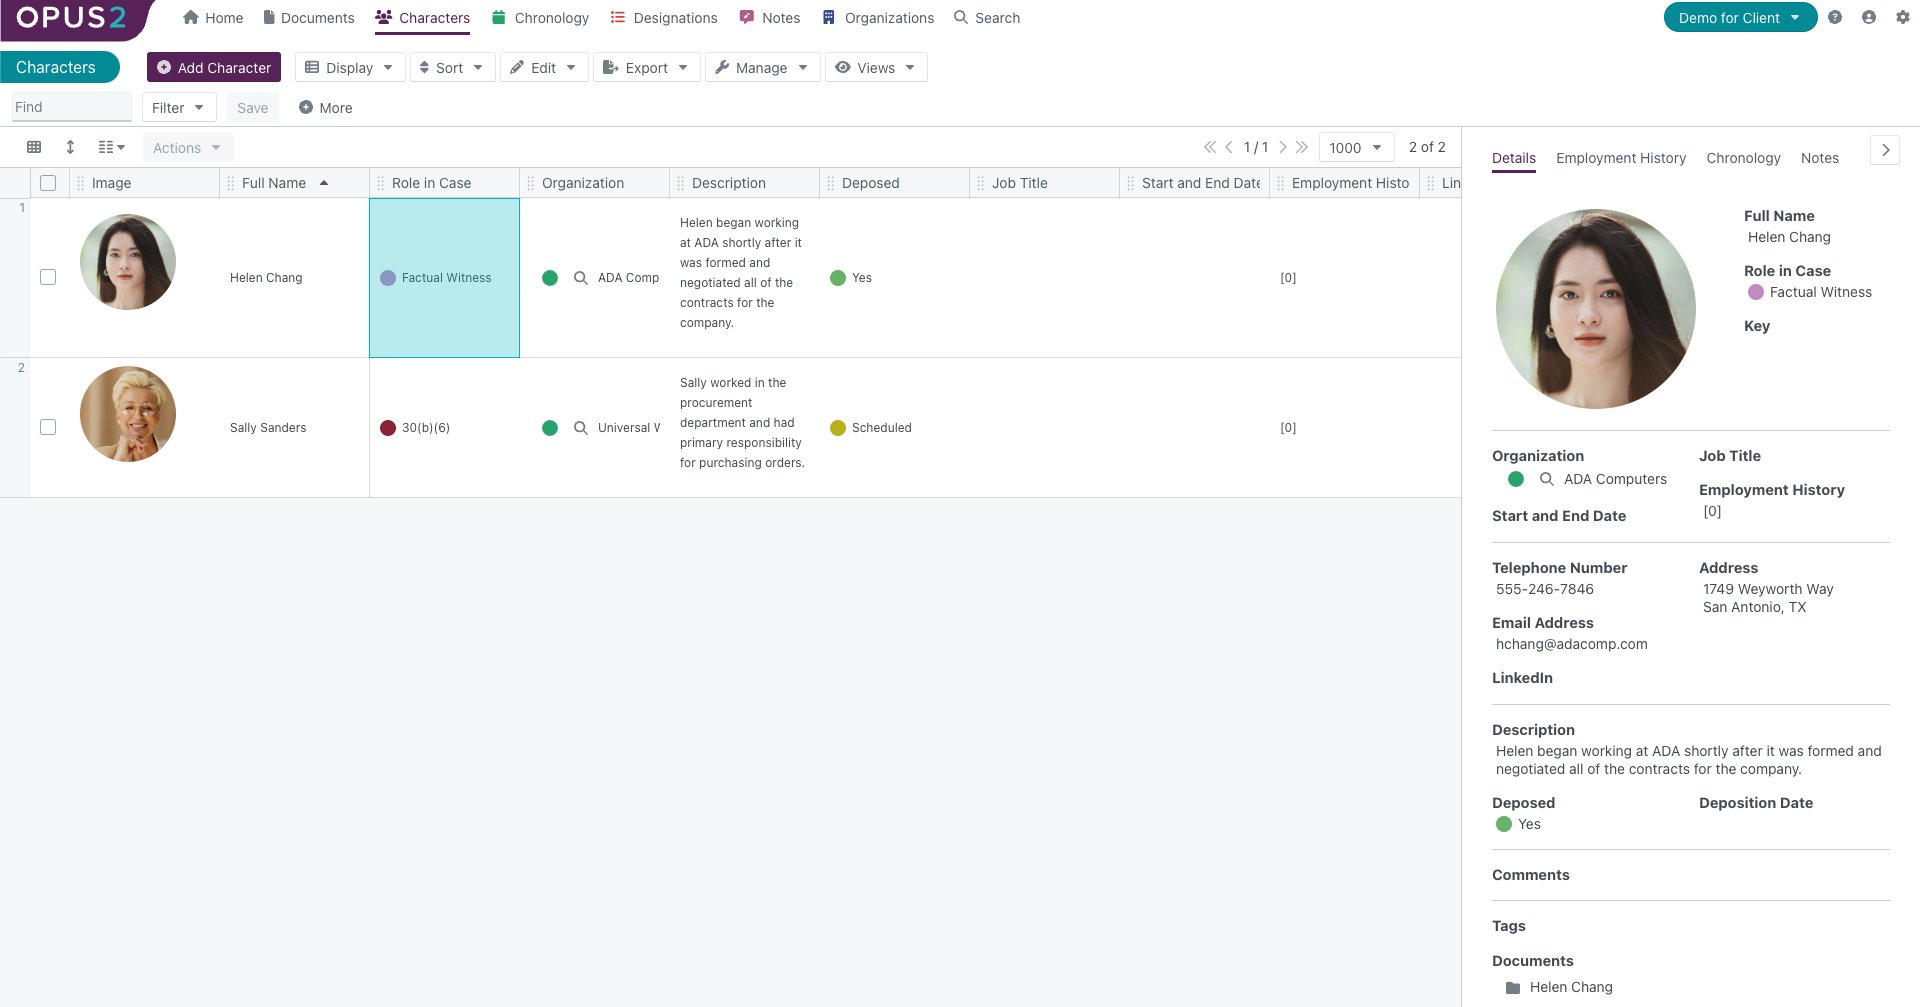
- With the appropriate privileges, click into fields in the Details panel to add or edit information.
- Click Save changes at the bottom of the panel to apply updates.
- Collapse the Details panel using the arrow in the top-right corner when finished.
Card view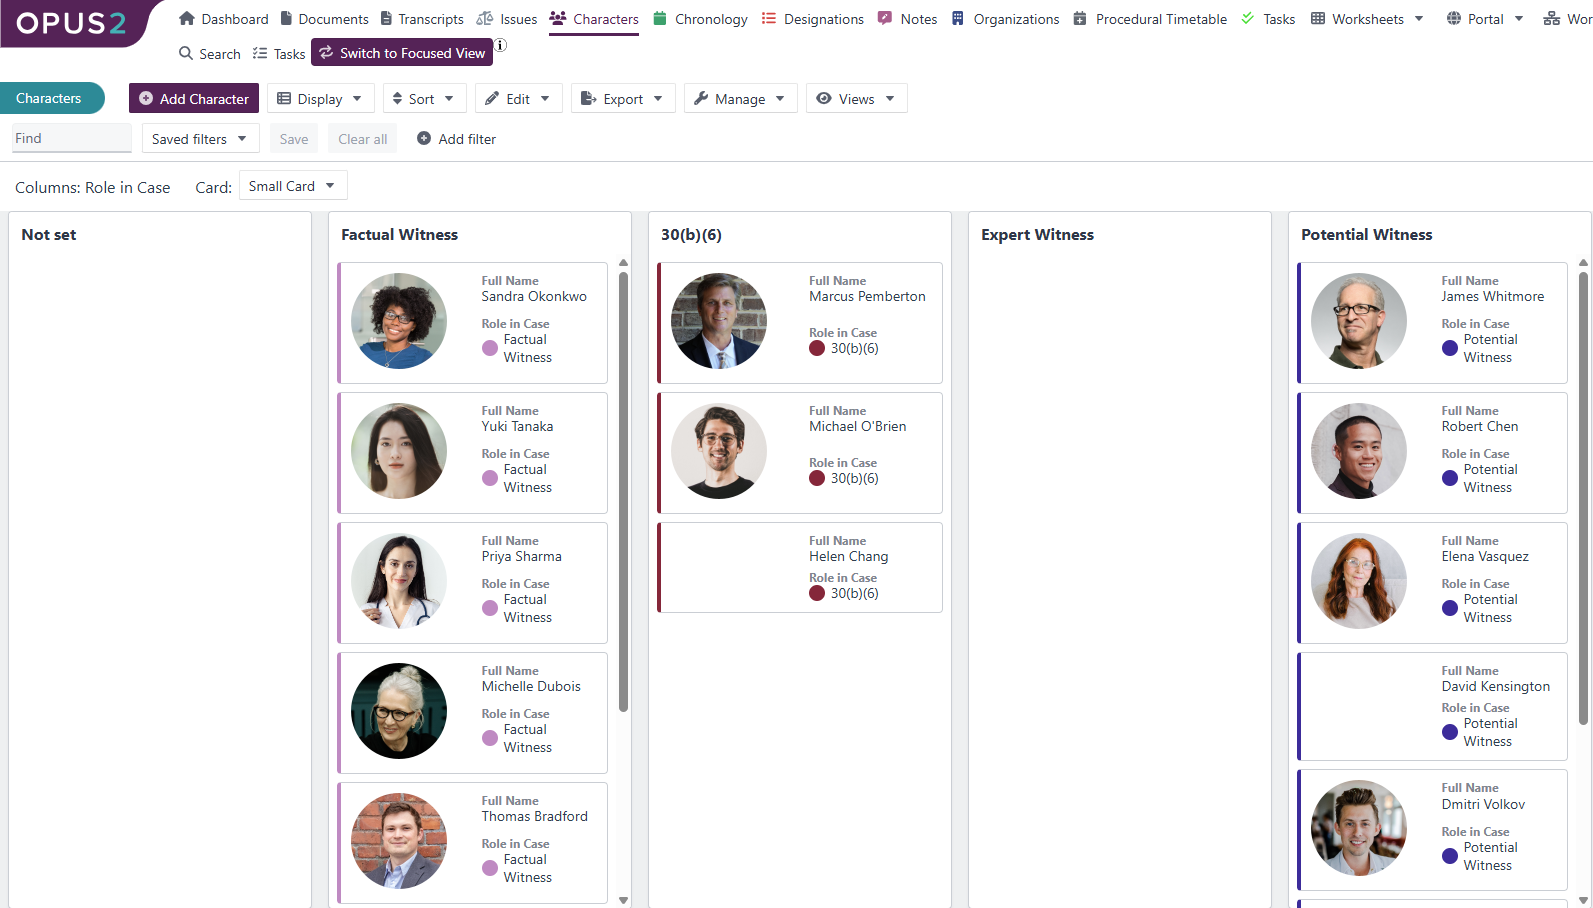
The card view provides a kanban-style board for organising and classifying characters by category.
- Open the Display dropdown menu.
- Select Card view.
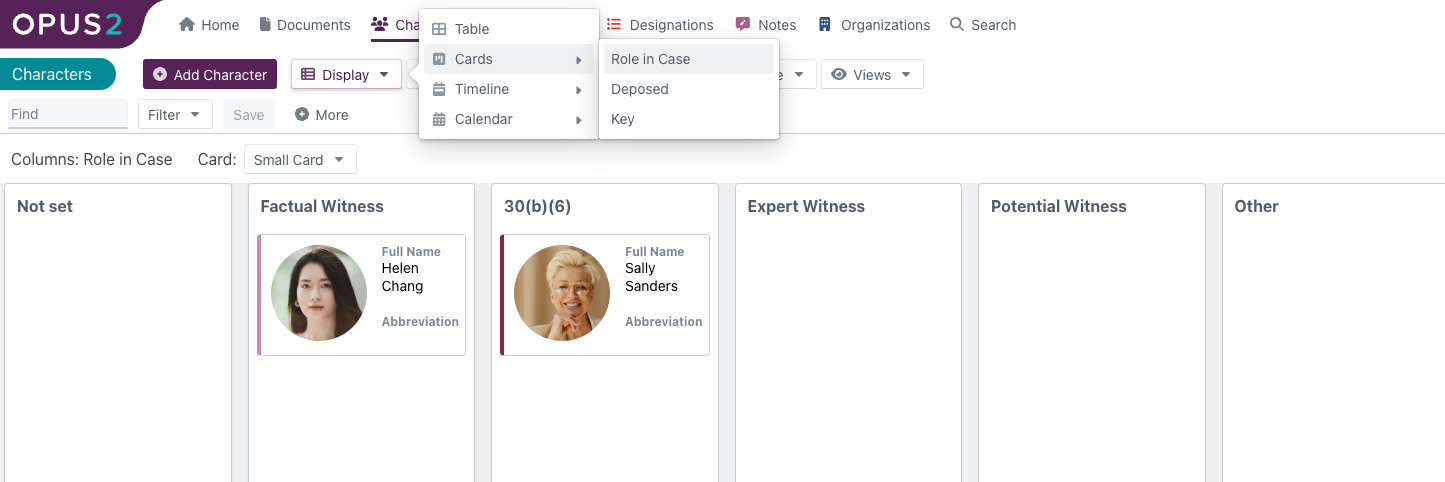
- Review character cards grouped by their assigned category.
- Drag and drop a card into a different category to reflect a status or classification change.
- Dragging a card automatically updates the value assigned to that character.
Calendar and timeline views
The calendar and timeline views display characters in relation to dates, schedules, or events.
- Open the Display dropdown menu.
- Select Calendar view or Timeline view.
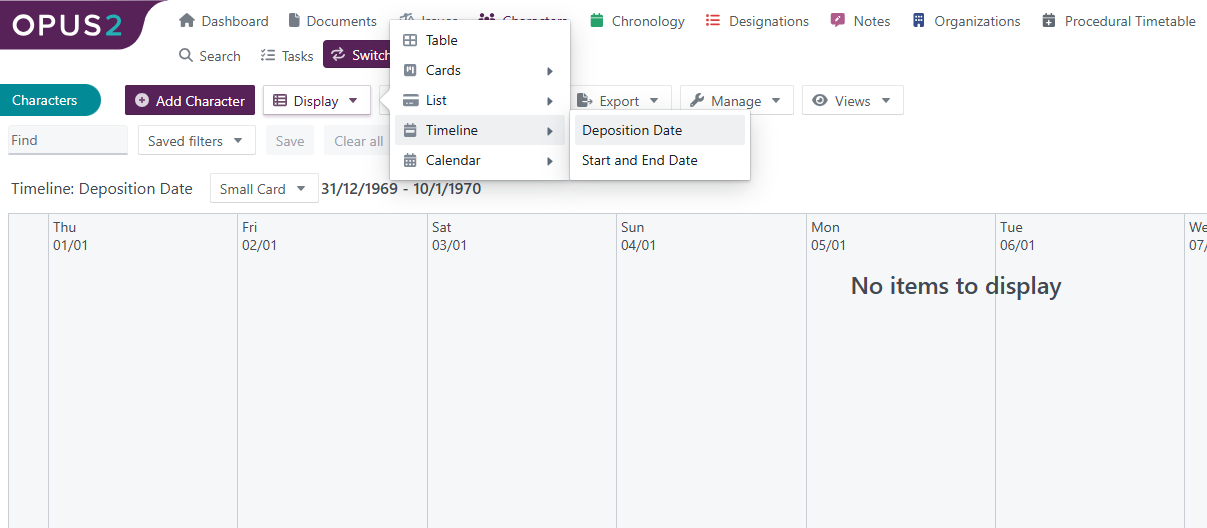
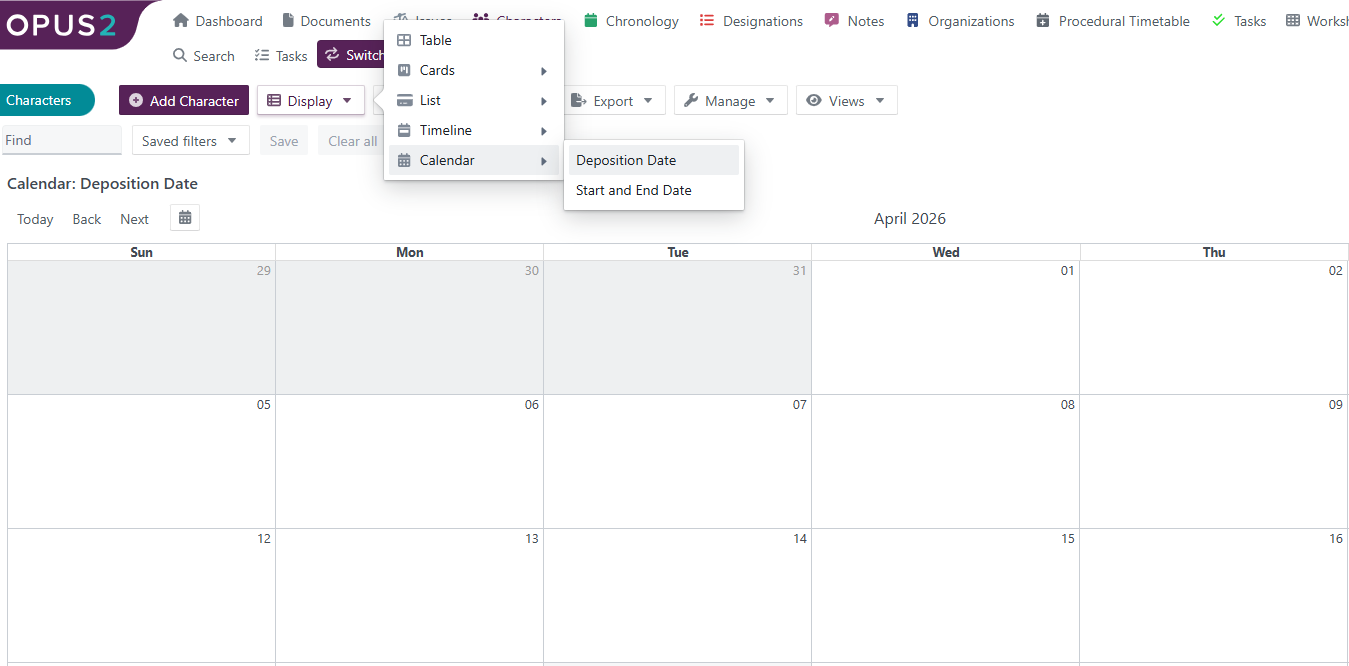
- Review character information plotted across time.
- Select a character to open the Details panel on the right-hand side.
Related links
Related documentation
Opus 2 has help information accessible within the application; click the question mark and then select Documentation in the upper-right area of the platform. You can also access the documentation at: Opus 2 Support.
How to contact us
To contact us about the documentation, or if you have any other questions or issues about Opus 2 solutions, contact Opus 2 Platform Support by emailing Opus 2 Platform Support.