
| Minimum Software Version | 8.17.X Winter25 |
| Solution(s) | Hearings X Cases International ✓ Cases US ✓ Institutions ⨉ Counsel ✓ |
Important: The accuracy, reliability, and usefulness of AI-generated output is directly influenced by the clarity and completeness of the information provided in the prompt. Like a human lawyer, the first draft is never the final version. You will need to follow up on AI output with one or more prompts to further guide, clarify, and refine your requests. Review, verify, and apply professional judgement before relying on AI-generated content.
Accessing Focused and Detailed Views
Select the Switch to Focused View button from Opus 2 Cases. To return to Cases, select the Detailed View button.
Note: Select the flag icon in the top right of the Focused View to choose your preferred date and time format.
About vectorisation
Documents uploaded to Opus 2 Cases via the Detailed View must be vectorised before they are available in the Focused View. Before vectorisation can occur, documents must first be OCR'd.
A vectorisation status column is shown in the Documents Library and when adding or removing documents in Matter Assist. A tick indicates successful vectorisation; a warning triangle indicates the document is unavailable for selection.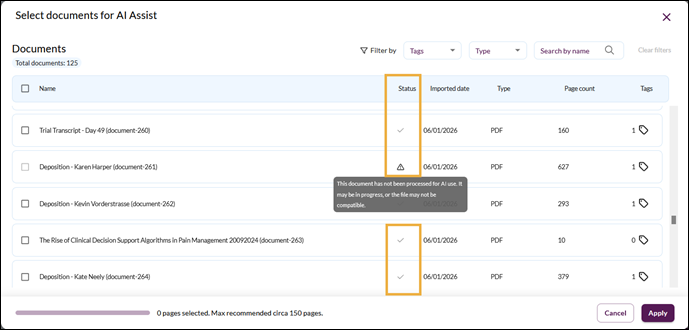
For more information, see Focused View FAQs.
Using Matter Assist
Matter Assist queries all documents within a case to answer your questions. You can filter down to a subset of documents or select individual documents using the Add/remove documents button for more focused responses.
- Select Matter.
- To see domain or industry-specific prompt examples, select one of the category buttons (for example, Corporate Law), choose a prewritten prompt, add any case-specific details, and select Send. Alternatively, write your own query and select the arrow to send it.
- The answer appears with relevant documents identified and the most relevant text snippets highlighted. Select the purple citation icons to open the source document and perform actions on it. Green circles show the percentage relevance of each document to the question.
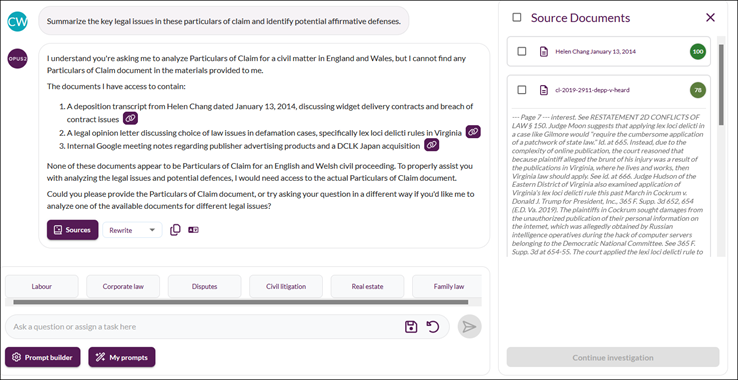
- Select Sources to see all source documents used to assemble the answer.
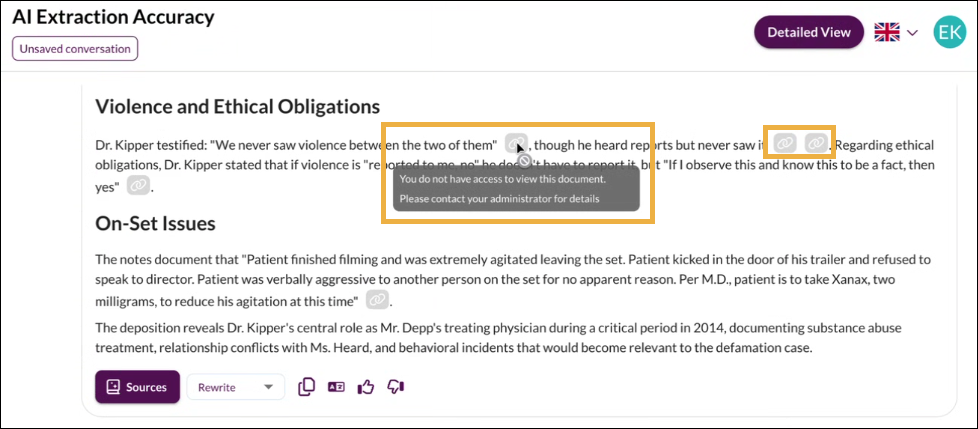
Note: If citation icons are greyed out, you do not have permission to access that document. The AI can still use it to extract citations and add context to answers.
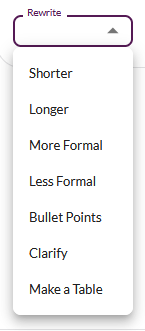
- Select the Rewrite dropdown to reformat the answer. Options include: Shorter, Longer, More Formal, Less Formal, Bullet Points, Clarify, and Make a Table.
- To continue working with a smaller selection of source documents, select one or more source documents and then select Investigate N documents.
- To refine your document selection further, select the icon in the prompt field to add or remove documents. The prompt field shows how many documents are currently being considered, for example, Ask about the 3 selected documents.
- Select the copy icon to copy your answer to the clipboard.
- Select the translate icon to translate your answer into one of the following languages: Arabic, Dutch, French, German, Portuguese, Spanish, or Turkish.
Tip: You cannot select more than 2,000 documents at once.
Prompt Library
The Prompt Library is available across all Assist tools. It contains a range of prewritten prompts created by legal experts, organised by domain — for example, employment and labour, construction, and commercial law. Select a domain to browse available prompts.
Prompt Builder
The Prompt Builder is available across all Assist tools and guides you through creating an optimised prompt using the TIDECC framework.
- Select Prompt Builder.
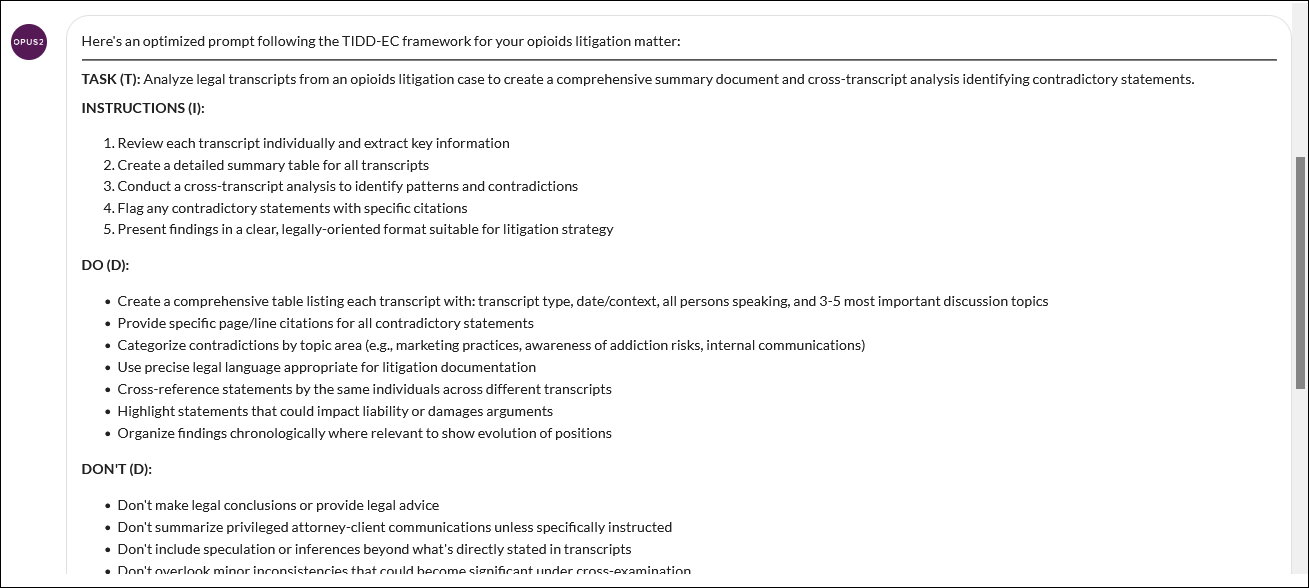
- Follow the instructions and provide the information relevant to your question. For example: I am a litigation lawyer working on an opioids litigation matter. There are transcripts in the matter. I want a list of the transcripts including the type of transcript, the persons speaking, the most important topics of the conversation, all per transcript. I also want an analysis across the transcripts and for contradicting statements to be flagged.
- Select Send. An optimised prompt is generated following the TIDECC framework.
- Optionally, save the prompt to My prompts for re-use on other cases.
Important: The entire response from TASK (T) onwards is the prompt. Copy and paste the full response when using or saving it for future use.
My prompts
My prompts allows you to save and re-use prompts across cases.
- Select My prompts.
- Enter a category name (for example, Arbitration).
- Copy, paste, or type your prompt.
- Select Save.
Saved prompts can be edited or deleted as needed.
Note: Saved prompts are private to you and are not visible to other users, project-wide, or firm-wide.
Viewing documents from Matter Assist
Select a document name to open it in the preview panel. From the preview panel you can scroll through pages, switch to full-screen view, download the document, switch to text view, or close the document.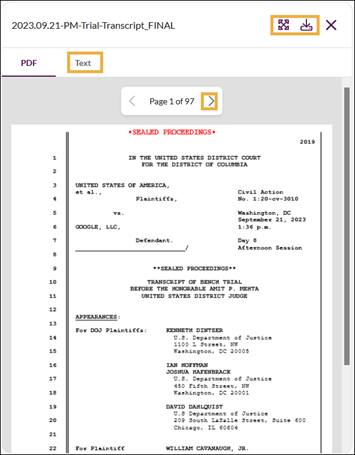
Note: If a document is unavailable for selection, you do not have permission to access it.
Using General Assist
Use General Assist to ask questions beyond the specific matter or document set, develop drafts, prepare for any stage of a case, and understand industry or domain concepts. Client data does not need to be anonymised in your questions.
Saved conversations
Conversations from any Assist tool can be saved and returned to later. Saved conversations are private to you.
To save a conversation, select the save icon in the question box. Give the conversation a title and select Save. The conversation appears under Saved Conversations in the sidebar, where you can edit the title or delete it.
Select a conversation to return to the document in the Assist tool where the conversation was created.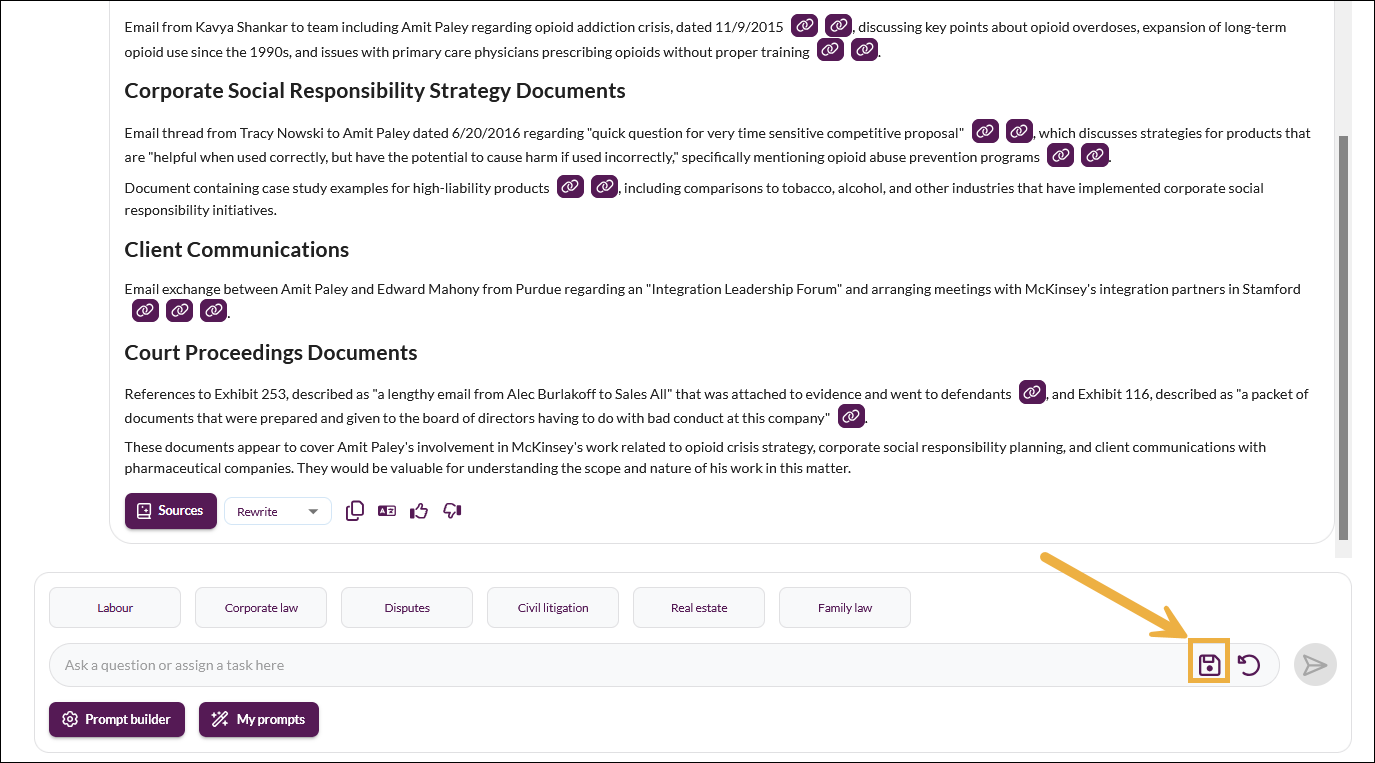
Tip: The sidebar indicates which Assist tool was used to create each saved conversation.
Using the Documents Library
The Documents Library in Focused View allows you to view, filter, tag, and act on documents, mirroring the functionality of the Documents tab in the Detailed View.
From the Documents Library, you can: 
- Select the Collections dropdown to filter by collection or collection section.
- Select the Folder dropdown to filter by folder.
- Filter documents by one or more tags.
- Filter by file type (for example, PDF, Native, or Transcript).
- Filter by date range using From and To dates.
- Search for documents by name.
- Select Clear filters to reset all active filters.
- Send selected documents to a collection, a worksheet, or download them using the Document actions menu.
- Sort by Name or Imported date by hovering over the column header and selecting the arrows.
- Add a tag to a document by selecting the tag icon on the document row.
Select a document name to open it in the preview panel. Select the viewer icon to open the document in the full Document Viewer with all its features.
Note: Any tag added in the Focused View is visible in the Detailed View, and vice versa.
Tagging documents
- In the Documents Library, select the tag icon for the document(s) to be tagged.
- In the Select tags dialog, select one or more tags. Multiple documents can be tagged at once.
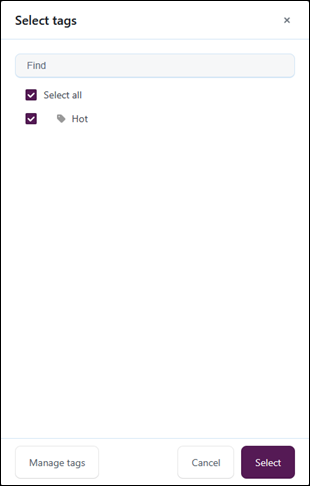
- Select Select.
- To create or import new tags, select Manage.
- To send tagged documents to Cases, select Document actions > Add to collection or Add to worksheet.
Removing a tag
- Select the tag icon for a document that already has a tag.
- In the Select tags dialog, clear the checkbox for the tag to be removed.
- Select Select. The tag is removed.
General guidance on building prompts
Start with the legal task, not the tool - Specify the legal objective, the risk or issue, and the intended use of the output (for example, internal review or client memo). Example: Summarise this contract to identify termination rights and notice periods.
Provide context up front - Include jurisdiction, practice area, role or perspective, and stage of matter. Example: You are assisting in-house counsel reviewing a SaaS agreement governed by English law for a mid-size technology company.
Be explicit about the output format - If you want structured, scannable output, ask for it — for example, bullet points, tables, headings aligned to legal issues, with or without citations, and the level of detail required. Example: Provide a table listing each indemnity clause, the risk to the customer, and suggested negotiation points.
Use legal terminology precisely - Where appropriate, use established legal terms and concepts rather than general language to align AI output with your workflow and legal reasoning. Examples: Take a risk-averse, regulator-focused approach. Assume this is a preliminary internal analysis, not legal advice.
Use constraints to reduce noise - Set boundaries for time frame, exclusions, word or page limits, and assumptions. Example: Limit the analysis to GDPR obligations and exclude national implementing laws.
Ask for reasoning, not just answers - If you need to understand why, ask for reasoning to be explained step by step, assumptions to be identified, and minority positions to be flagged. Example: Explain the reasoning behind each conclusion.
Iterate, don't overload - Avoid putting everything into a single prompt. Better results come from:
- Asking for an initial overview or summary.
- Following up with deeper questions on specific points.
- Refining tone, structure, or jurisdiction in later prompts.
How Opus 2 uses the TIDECC framework
The TIDECC framework is used in a legal context as a decision-analysis tool for evaluating actions, cases, or regulatory choices. It provides a clear, defensible structure for legal risk assessment, case analysis, and decision-making. Opus 2 has adapted it as follows:
| Letter | Element |
|---|---|
| T | Task type |
| I | Instructions |
| D | Do |
| D | Don't |
| E | Examples |
| C | User content |
The Prompt Builder works through this framework and produces an optimised prompt at the end of the process.
Related links
Related documentation
Opus 2 has help information accessible within the application; click the question mark and then select Documentation in the upper-right area of the platform. You can also access the documentation at: Opus 2 Support.
How to contact us
To contact us about the documentation, or if you have any other questions or issues about Opus 2 solutions, contact Opus 2 Platform Support by emailing Opus 2 Platform Support.