
| Minimum Software Version | Spring26 |
| Solution(s) | Hearings ⨉ Cases International ✓ Cases US ✓ Institutions ⨉ Counsel ✓ |
Explains how to create and edit legacy stamps in Opus 2, including adding metadata, fixed text, images, and page numbers, and configuring stamp layout and appearance.
The Opus 2 Platform allows for the creation of bespoke stamps. Stamps are configurable collections of document metadata that can be laid out and styled, and can be applied to individual documents or collections. All document metadata may be added to a stamp, along with fixed text and images.
Note: A new stamp builder has been introduced — the previous version is now labelled "legacy". The new stamp version is automatically enabled on all new projects and can be enabled for existing projects on a per-project basis. Stamps created in each version are preserved independently. To enable the new stamp builder on an existing project, contact your firm's system administrator.
Adding a new stamp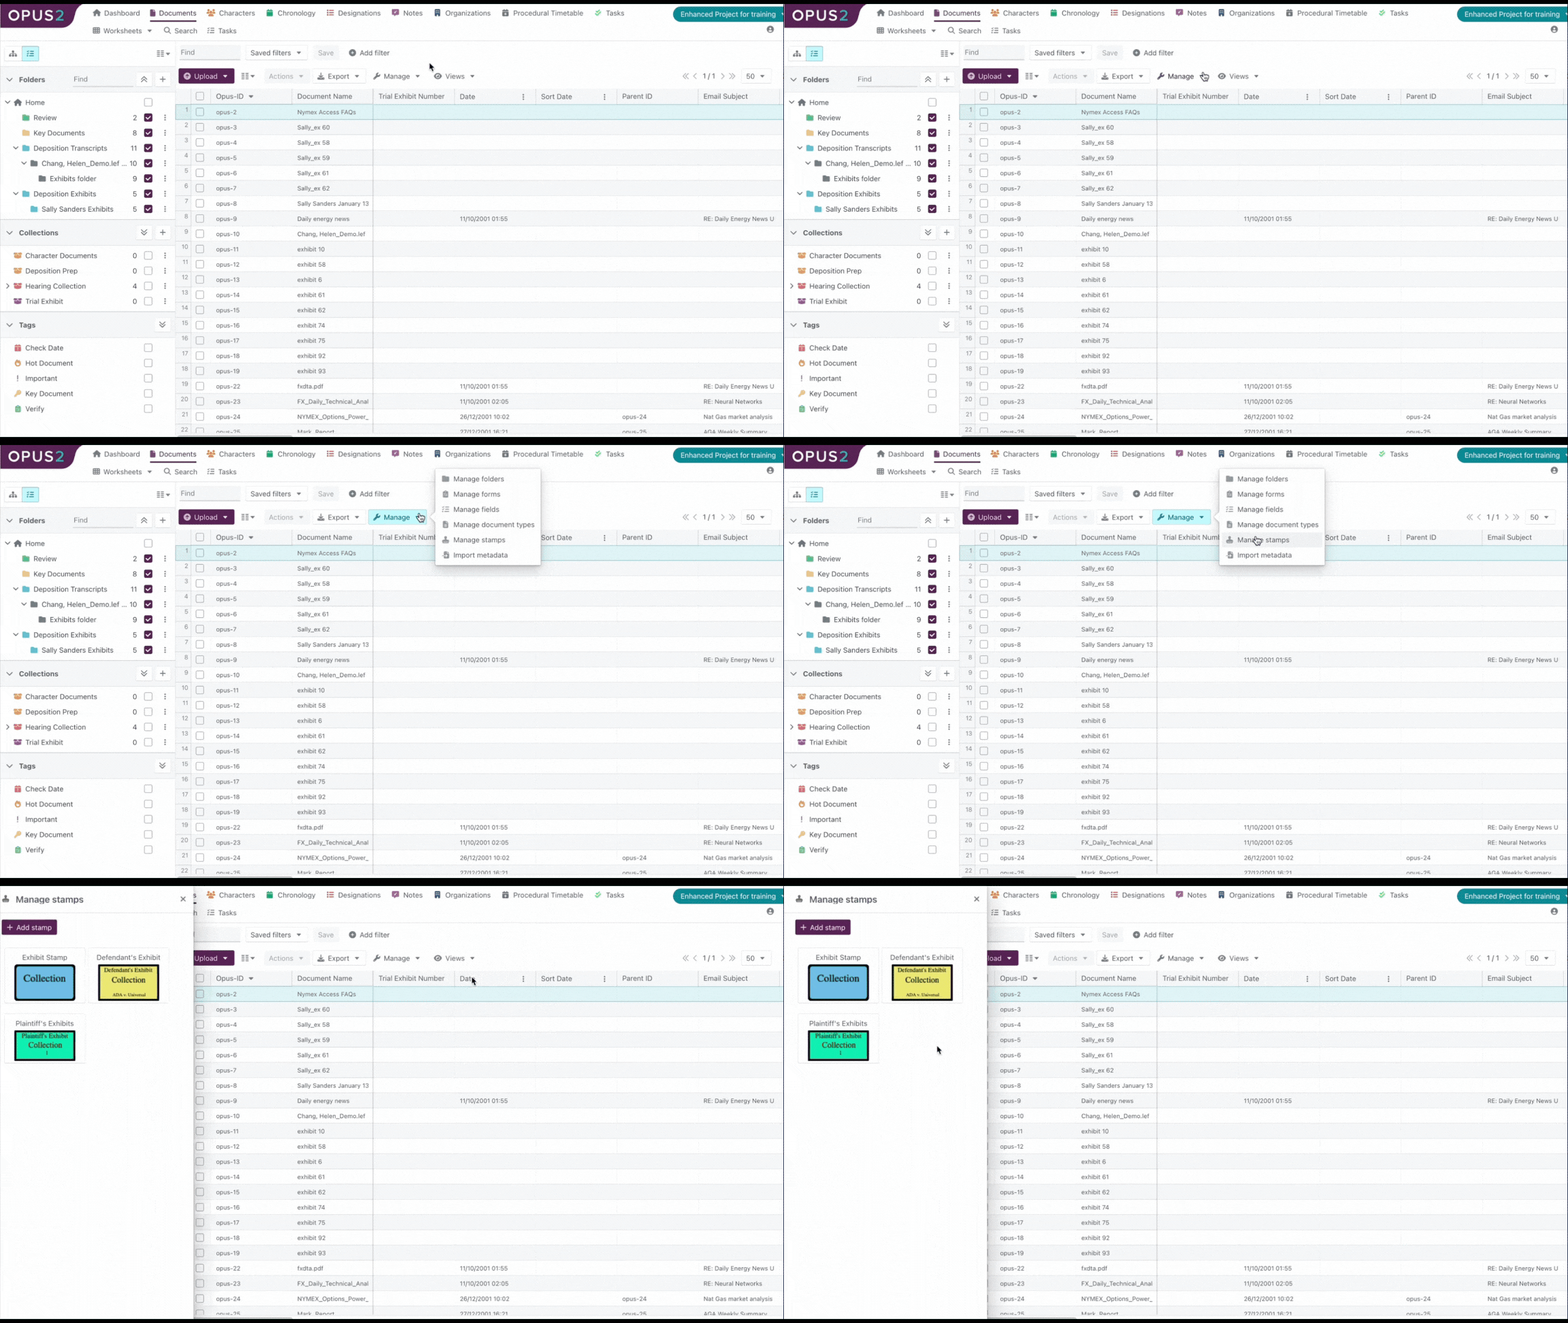
- Select the Manage dropdown.
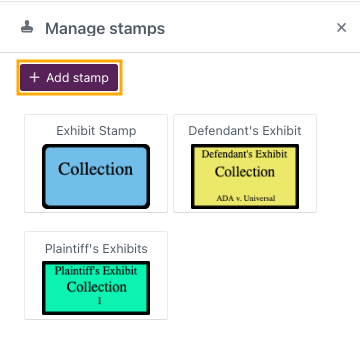
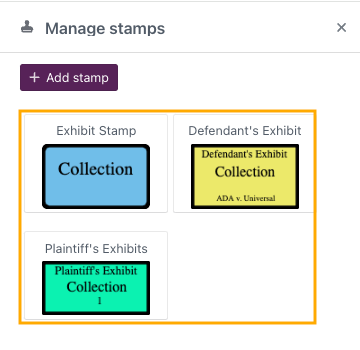
- Select Manage stamps. The Manage stamps panel opens on the left.
- Select + Add stamp. The Add stamp dialog opens with the stamp builder empty.
Stamp content options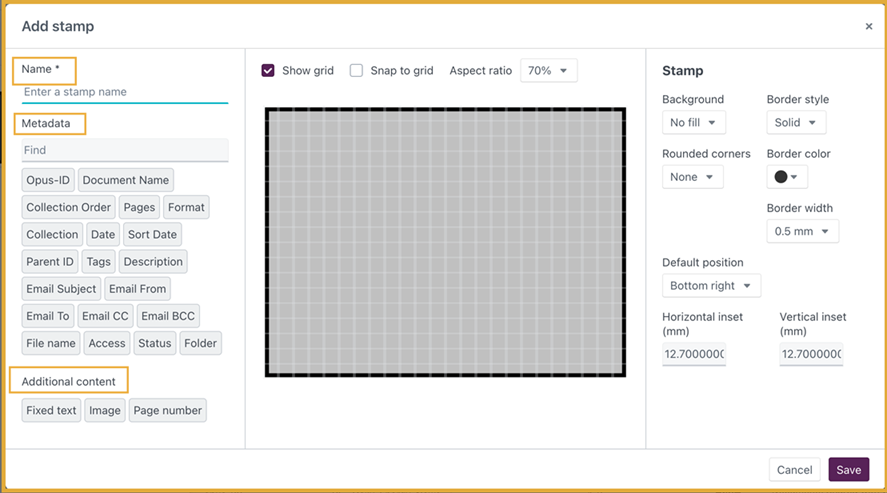
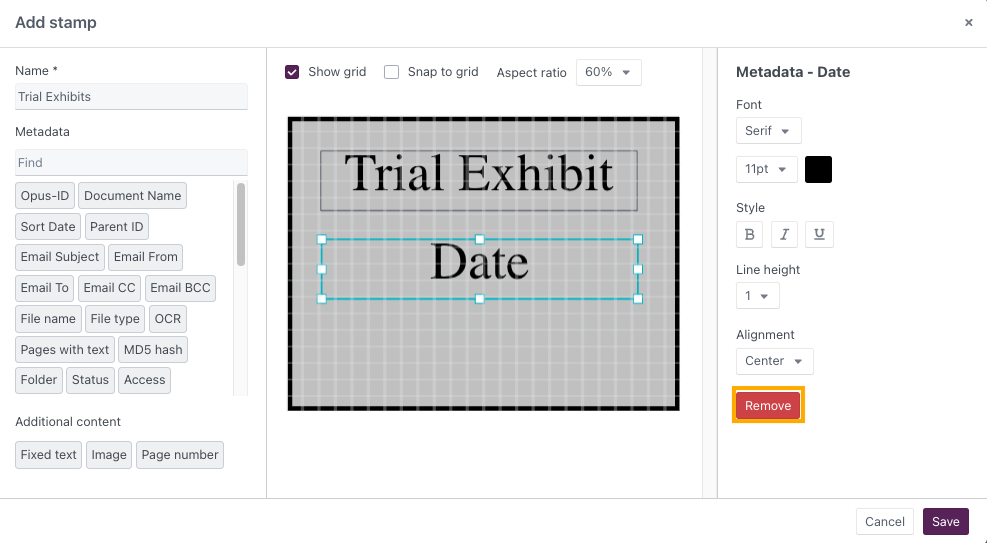
The left panel allows users to select which data should be included in the stamp.
Name: A required field. Enter a name to store and locate the stamp easily. The name does not appear in the stamp content itself.
Metadata: Use the Find feature to locate and add any metadata fields applicable to your documents. When the stamp is applied to a document, it retrieves the relevant metadata for each document.
Note: If a metadata field included in the stamp has no content recorded for a particular document, that section of the stamp will be blank when applied to that document.
Additional content
| Option | Description |
|---|---|
| Fixed text | Static text that does not change per document, unlike metadata fields. |
| Image | Select an image file (.jpg or .png) to include in the stamp, such as a company logo. |
| Page number | Numbers the pages within the document or collection. When applied to a collection, pages are numbered as one continuous series rather than per document. |
Building the stamp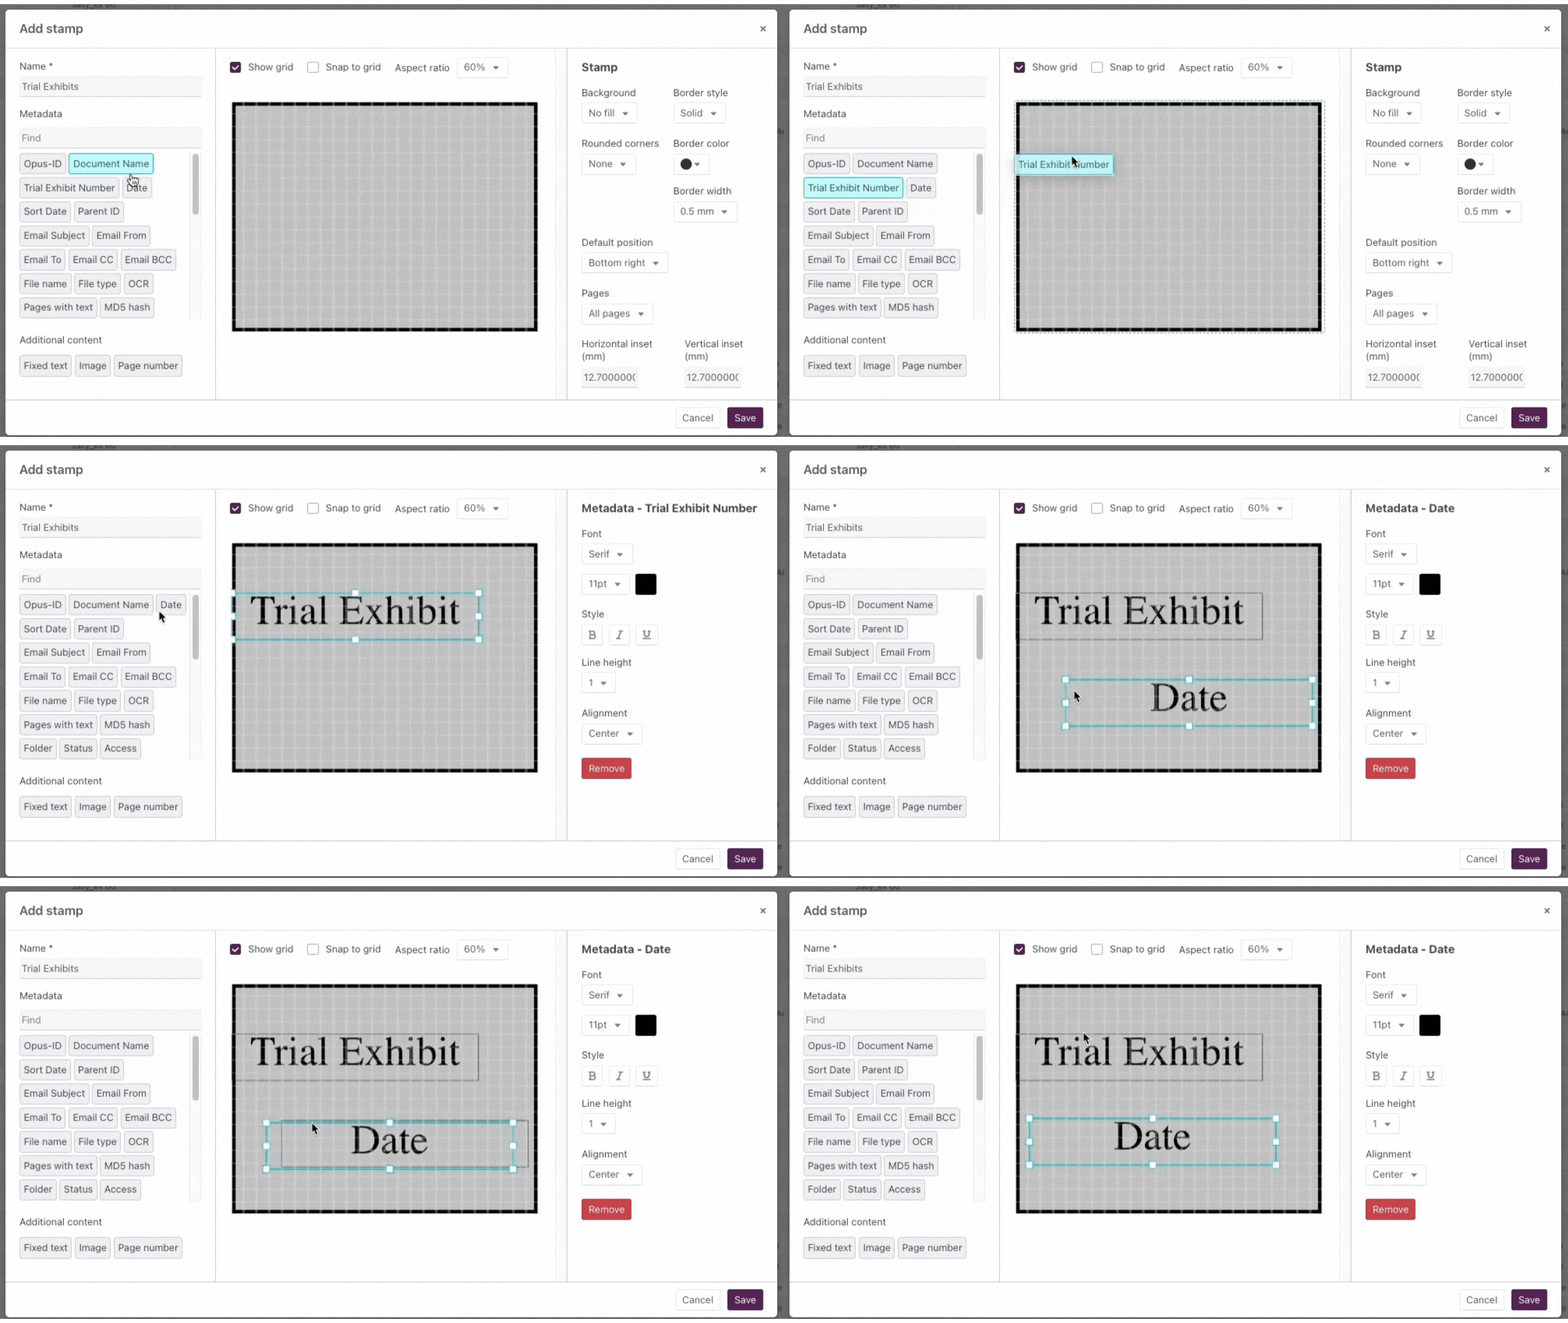
- Enter a Name for the stamp.
- Drag the desired Metadata from the left panel into the stamp builder.
- Drag the desired Additional content from the left panel into the stamp builder.
Tip: Metadata and content boxes can be moved, removed, and resized. Use the options on the right to customise the font, style, line height, and alignment for each box.
- Select anywhere in the grey area of the stamp builder to open Stamp options.
- Use Stamp options to customise the overall stamp — including background, border style, default position, and pages.
Additional stamp builder options
| Option | Description |
|---|---|
| Show grid | Toggles the grid on or off while designing the stamp. The setting is retained when creating a new stamp. |
| Snap to grid | Forces text boxes and images to align with the grid. When disabled, items can be moved freely across the grey area. |
| Aspect ratio | Determines the proportional relationship between the stamp's width and height. Select between 20% and 100% at 10% intervals. 100% produces a square; lower values create a landscape-oriented rectangle. To calculate, divide the height by the width and multiply by 100. |
Editing an existing stamp
- Select the Manage dropdown.
- Select Manage stamps.
- Select the stamp to edit. The Edit stamp dialog opens with the stamp builder pre-populated.
- To remove content, select the desired metadata in the stamp builder and select Remove.
- To add new content, drag the desired metadata from the left panel into the stamp builder.
- Follow the same steps as when adding a stamp.
Related links
Related documentation
Opus 2 has help information accessible within the application; click the question mark and then select Documentation in the upper-right area of the platform. You can also access the documentation at: Opus 2 Support.
How to contact us
To contact us about the documentation, or if you have any other questions or issues about Opus 2 solutions, contact Opus 2 Platform Support by emailing Opus 2 Platform Support.