| Minimum Software Version | 8.18.10 |
| Solution(s) | Cases International ✓ Cases US ✓ Institutions ⨉ Counsel ✓ |
Linking Transcripts
Linking transcripts to exhibits allows users to quickly navigate from transcript references directly to the corresponding document exhibits. In Opus 2, this can be done automatically or manually, depending on the materials provided by the court reporter.
If the court reporter supplies a .LEF file, exhibits are uploaded and linked automatically. If no .LEF file is available, users can manually create links using the Autolink tool. Both the transcript and the exhibit documents must already be uploaded to the project before links can be created.
There are two supported methods:
- Using Reference Format – matches transcript text to document metadata
- Using Exhibit Map – supports multiple or alternate exhibit reference formats
Using Reference Format
Reference Format uses document metadata fields (such as document name or exhibit number) to find matches in the transcript.
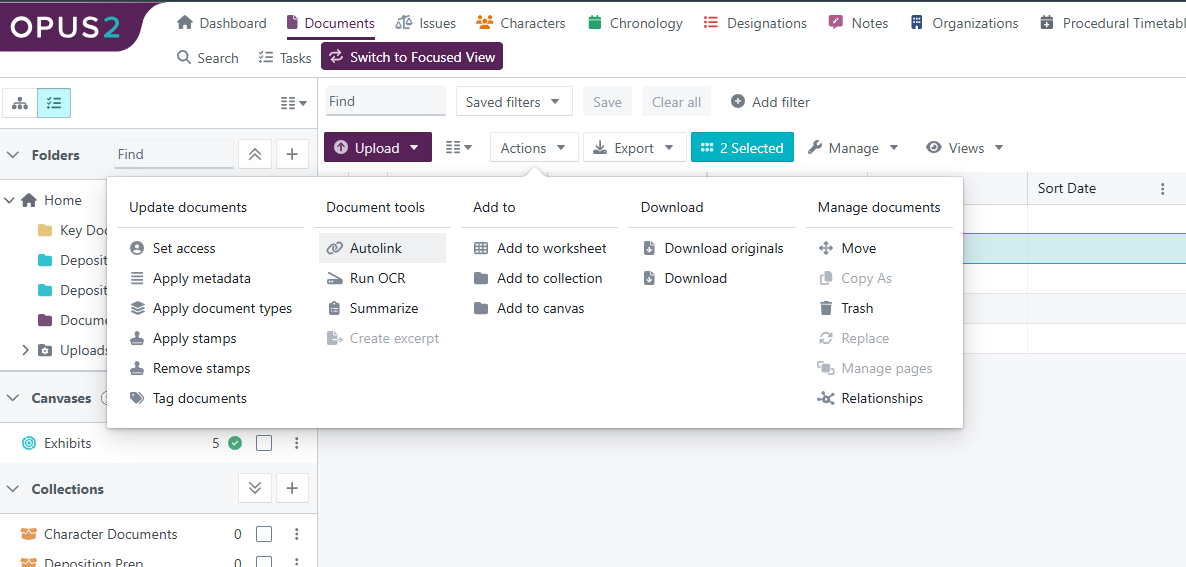
- Navigate to Documents in your project.
- Locate and select the transcript you want to link from.
- Click Actions → Autolink.
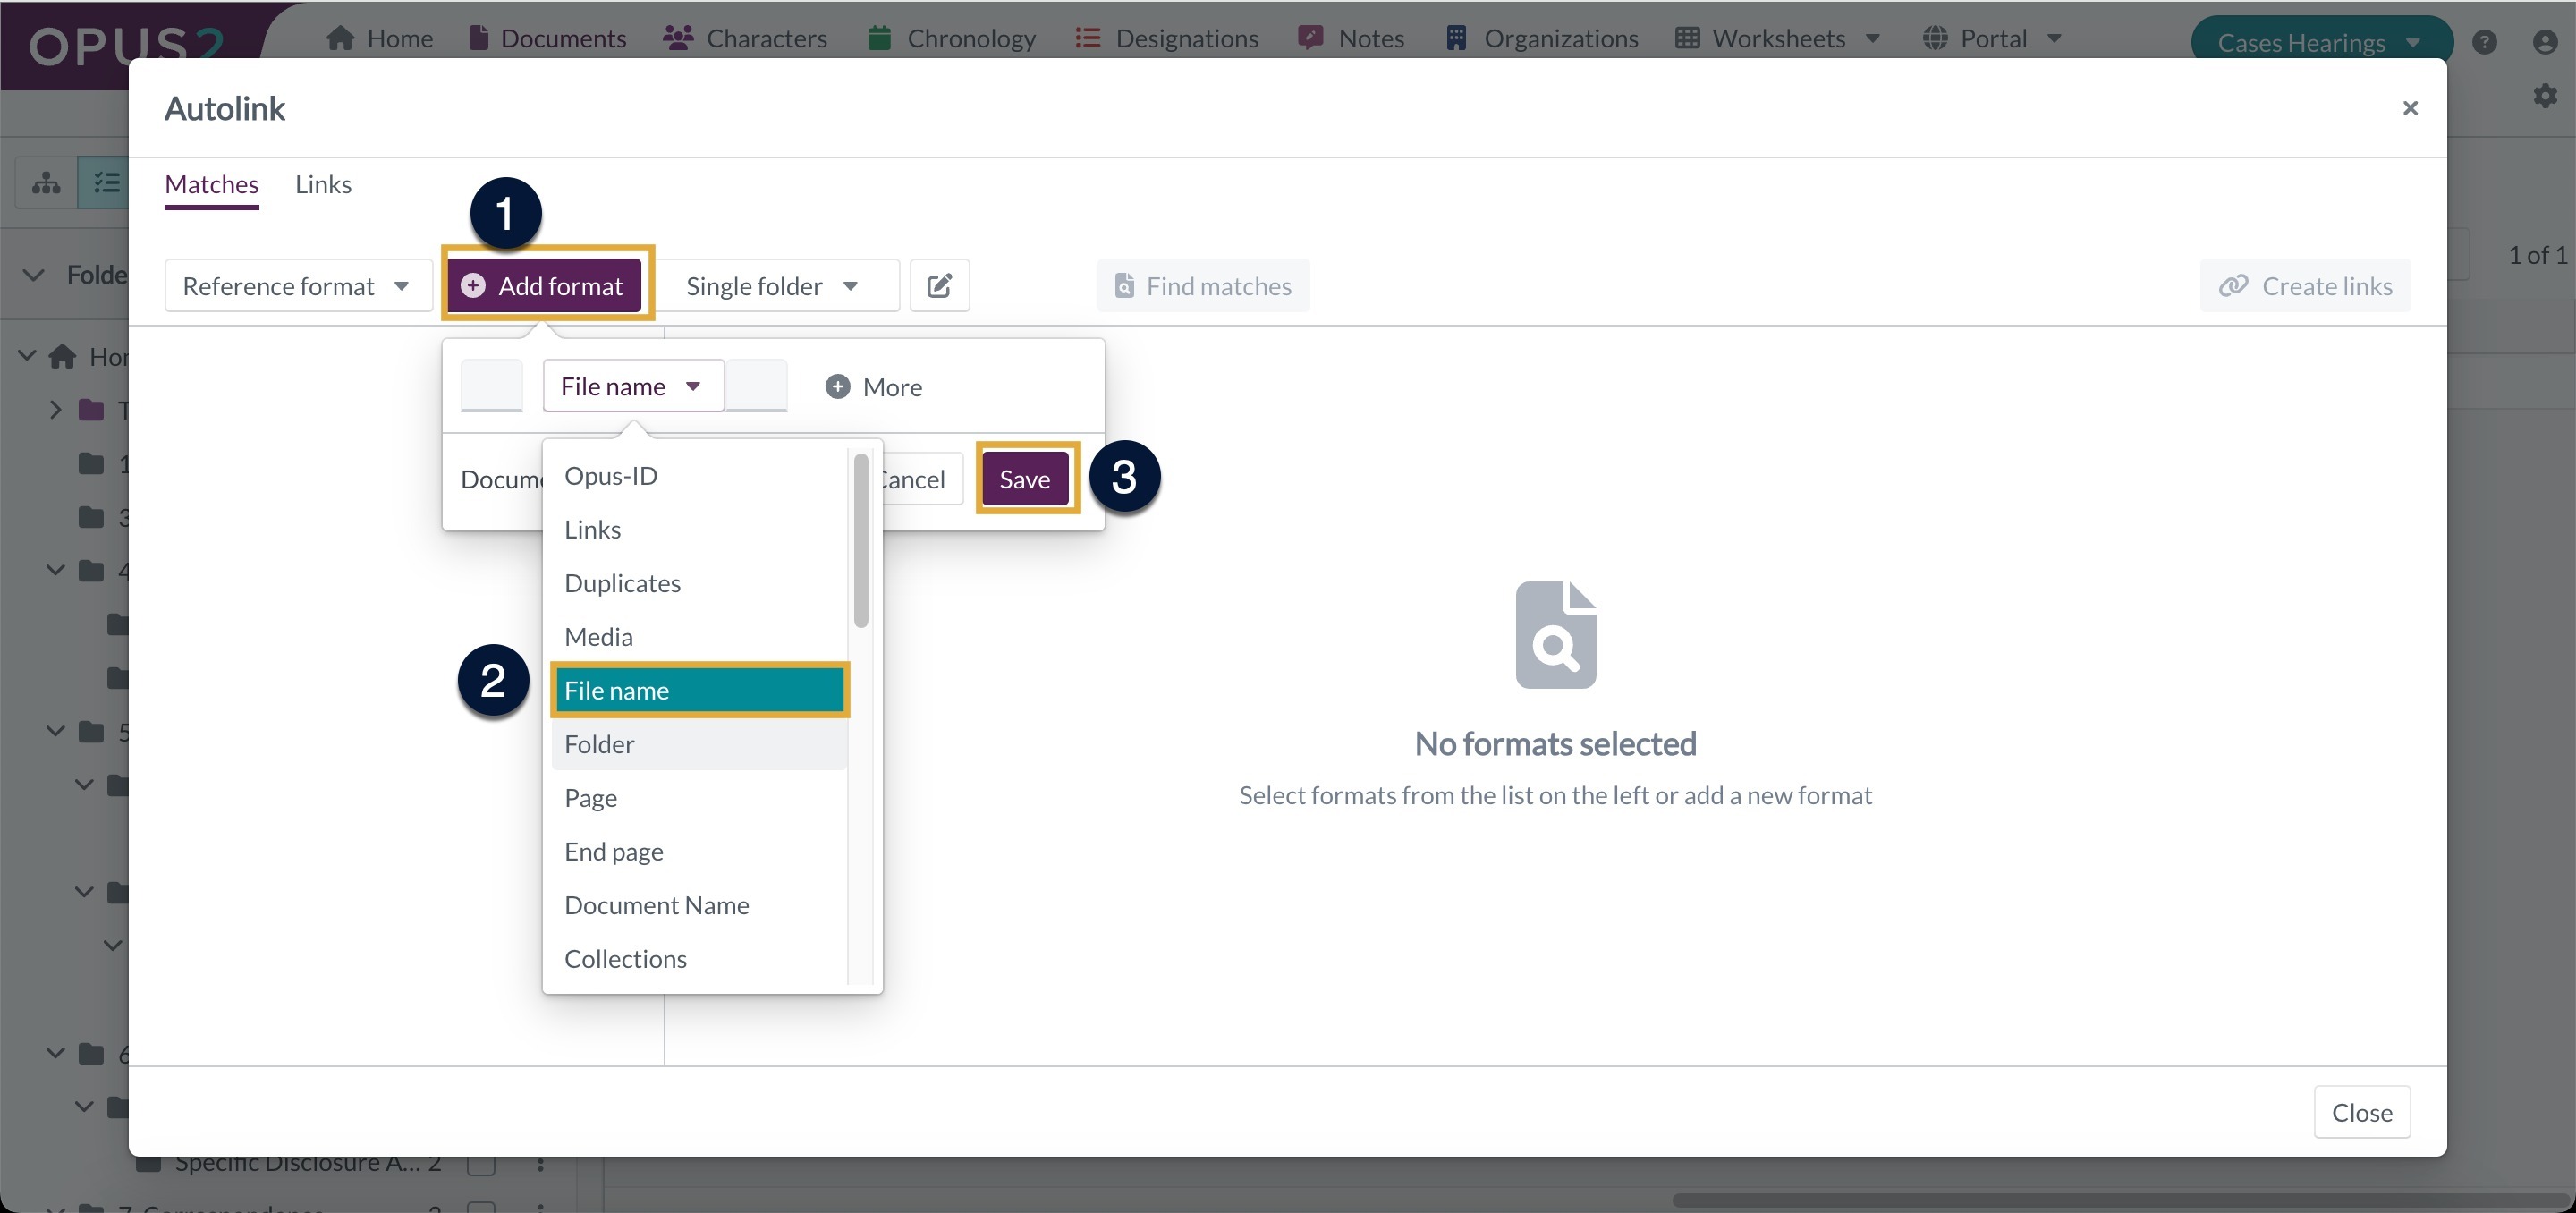
- In the Autolink dialog, open the Exhibit map dropdown and select Reference format.

- Click + Add format to create a reference format.
- Ensure exhibit files are named exactly as referenced in the transcript
(for example, “Exhibit 1”).
- Ensure exhibit files are named exactly as referenced in the transcript
- Click Save.
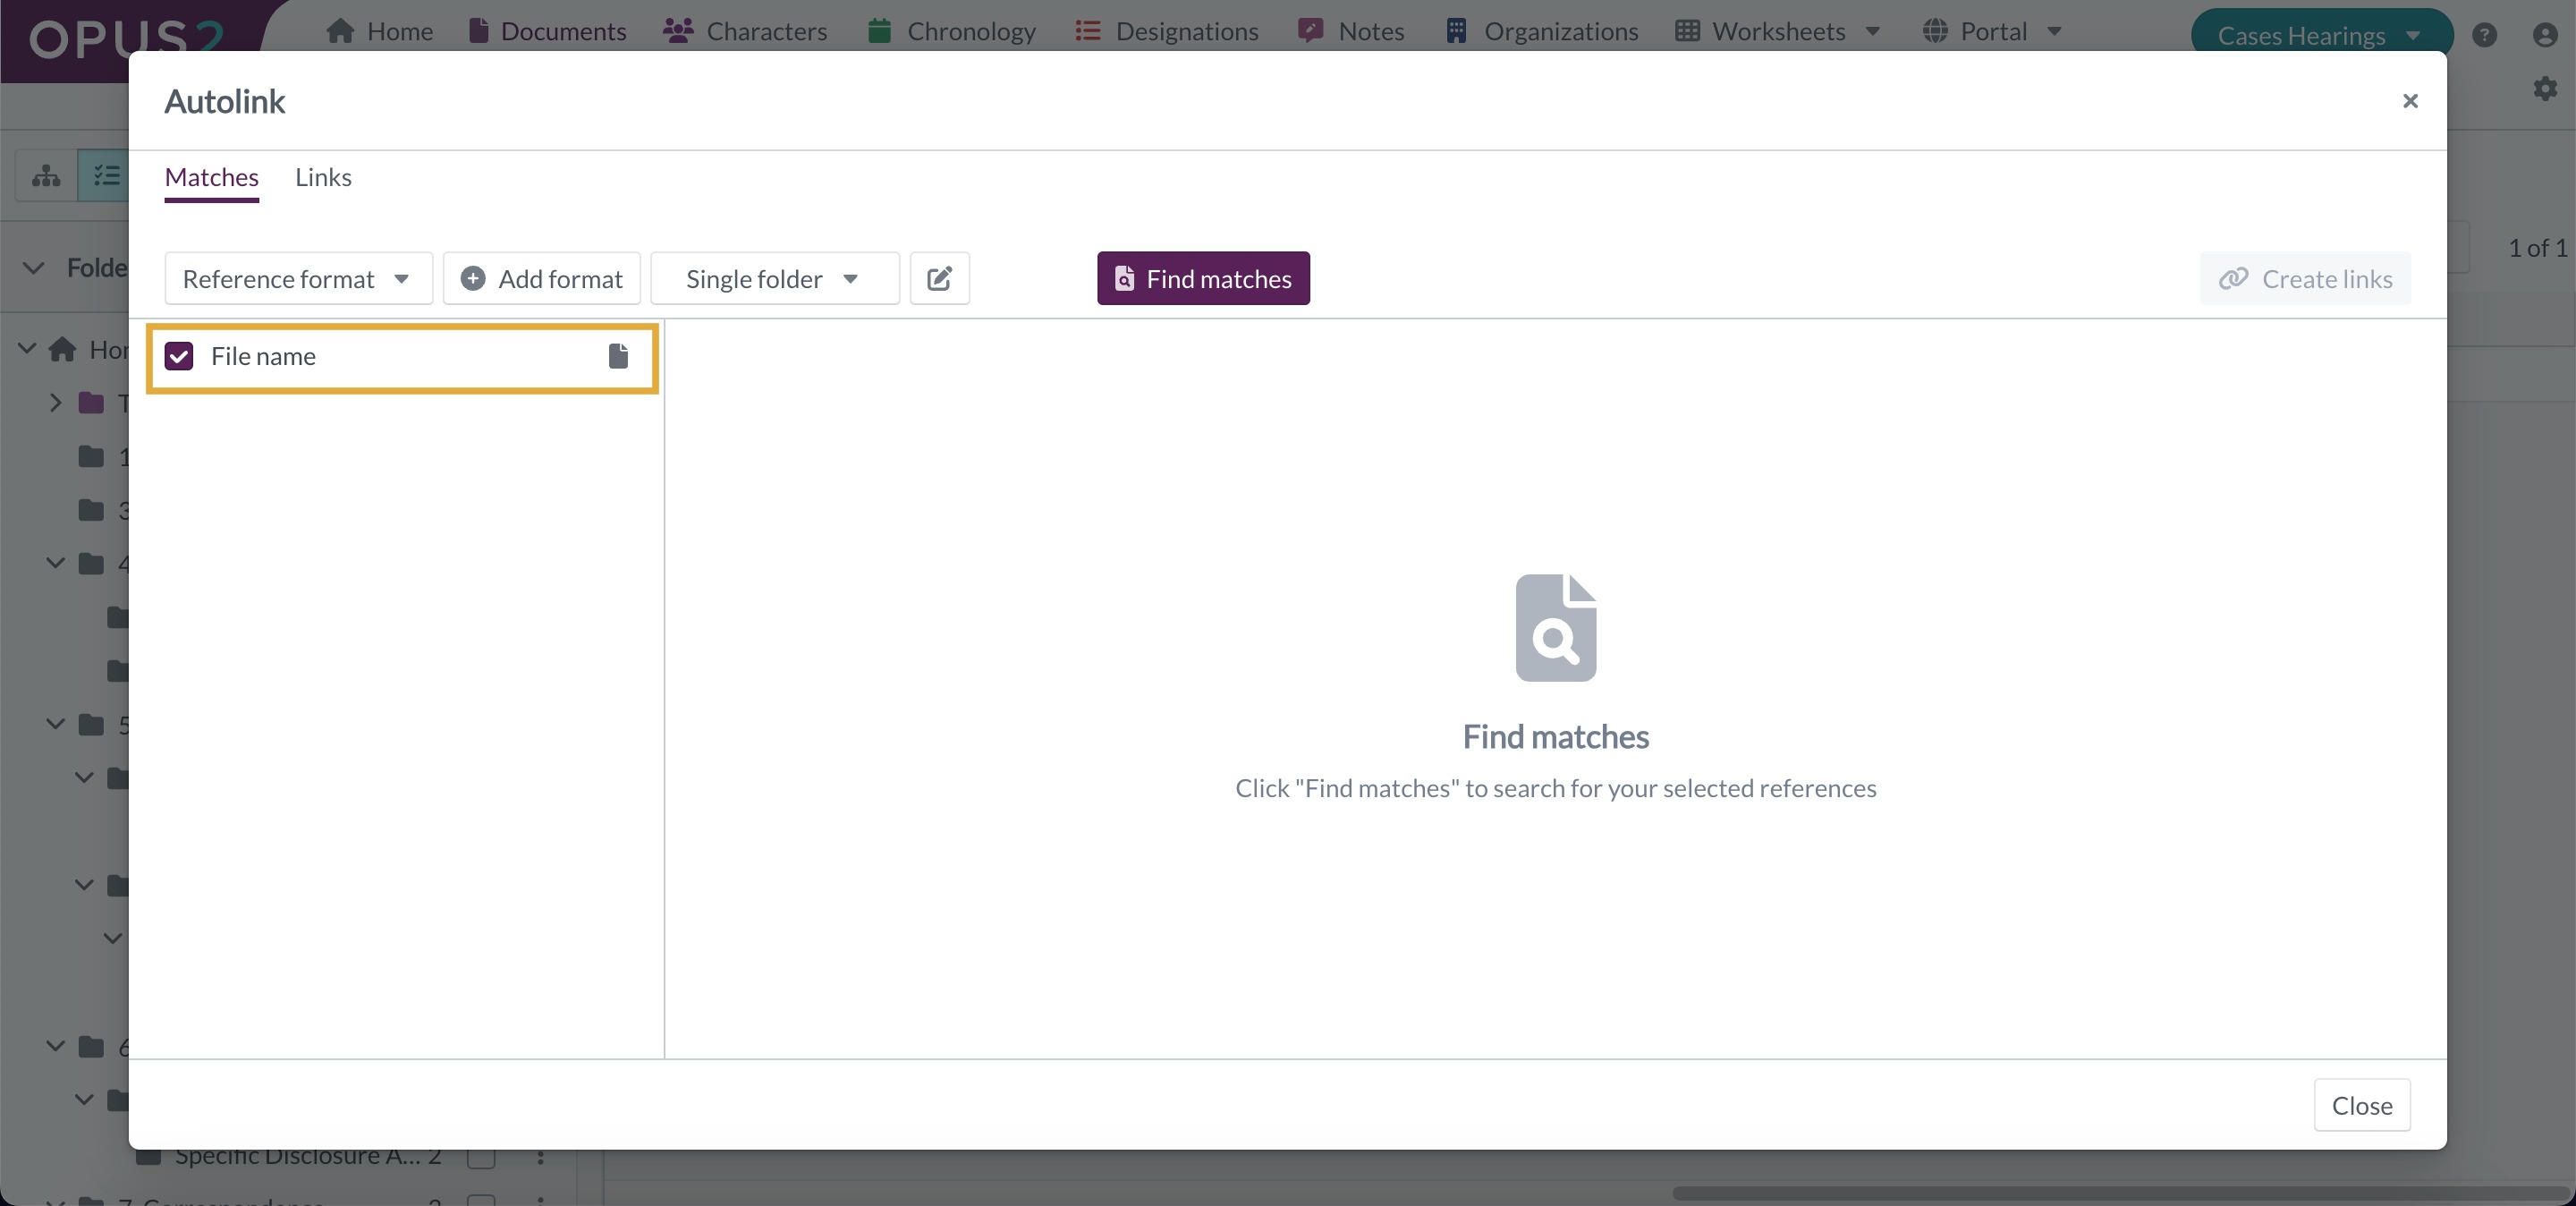
- In the left‑hand column, ensure only the correct reference format is selected.
- If the transcript references do not match document names exactly (e.g. “Smith 1” vs “Exhibit 1.pdf”), update the relevant metadata field (such as Depo Ex No) and match against that field instead.
- In the toolbar, click Single folder.
- Choose All documents, or
- Single folder and select the folder containing your exhibits.

- Click Find matches to view the results.
- Review match categories:
- New matches – Select all
- Multiple matches – Select all
- No matches – Deselect
- Already linked – Deselect
- Updated matches – Select all
- Click Create links to complete the process.

Once created, exhibit names in the transcript viewer become clickable and open a preview of the linked document.
Using Exhibit Map
Exhibit Map is useful when transcripts reference exhibits using multiple formats or when linking individual documents manually.
- Navigate to Documents.
- Select the transcript to link from.
- Click Actions → Autolink.

- Ensure Exhibit map is selected (default option).
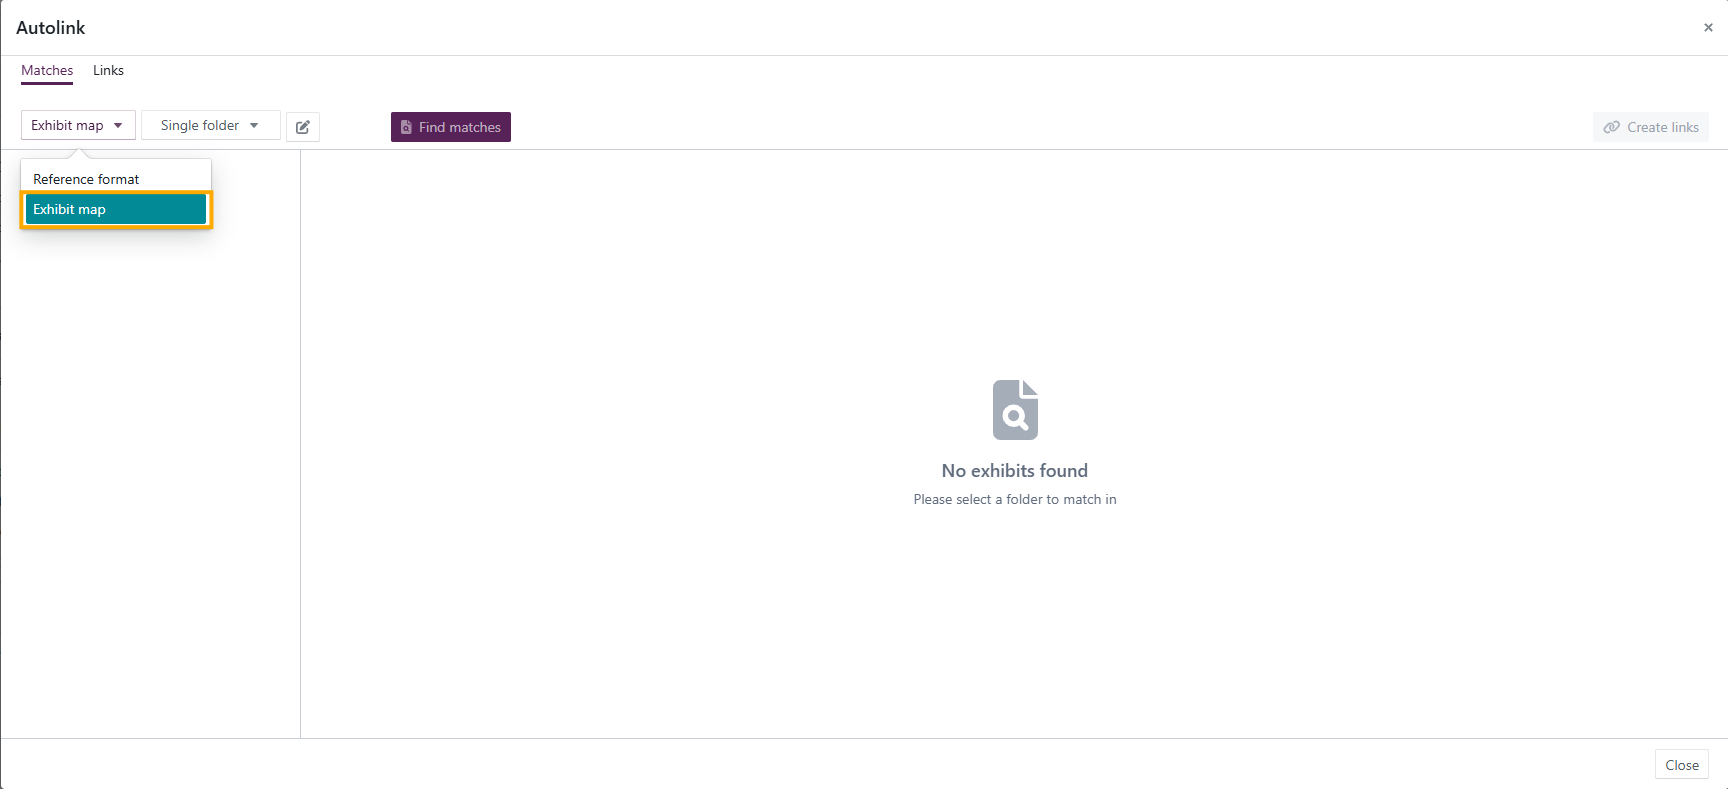
- Click Single folder and select the folder containing exhibit documents.

- The documents appear on the left‑hand side with default aliases
(document name without extension). - If an exhibit is referenced differently in the transcript, add alternative aliases using + Add.
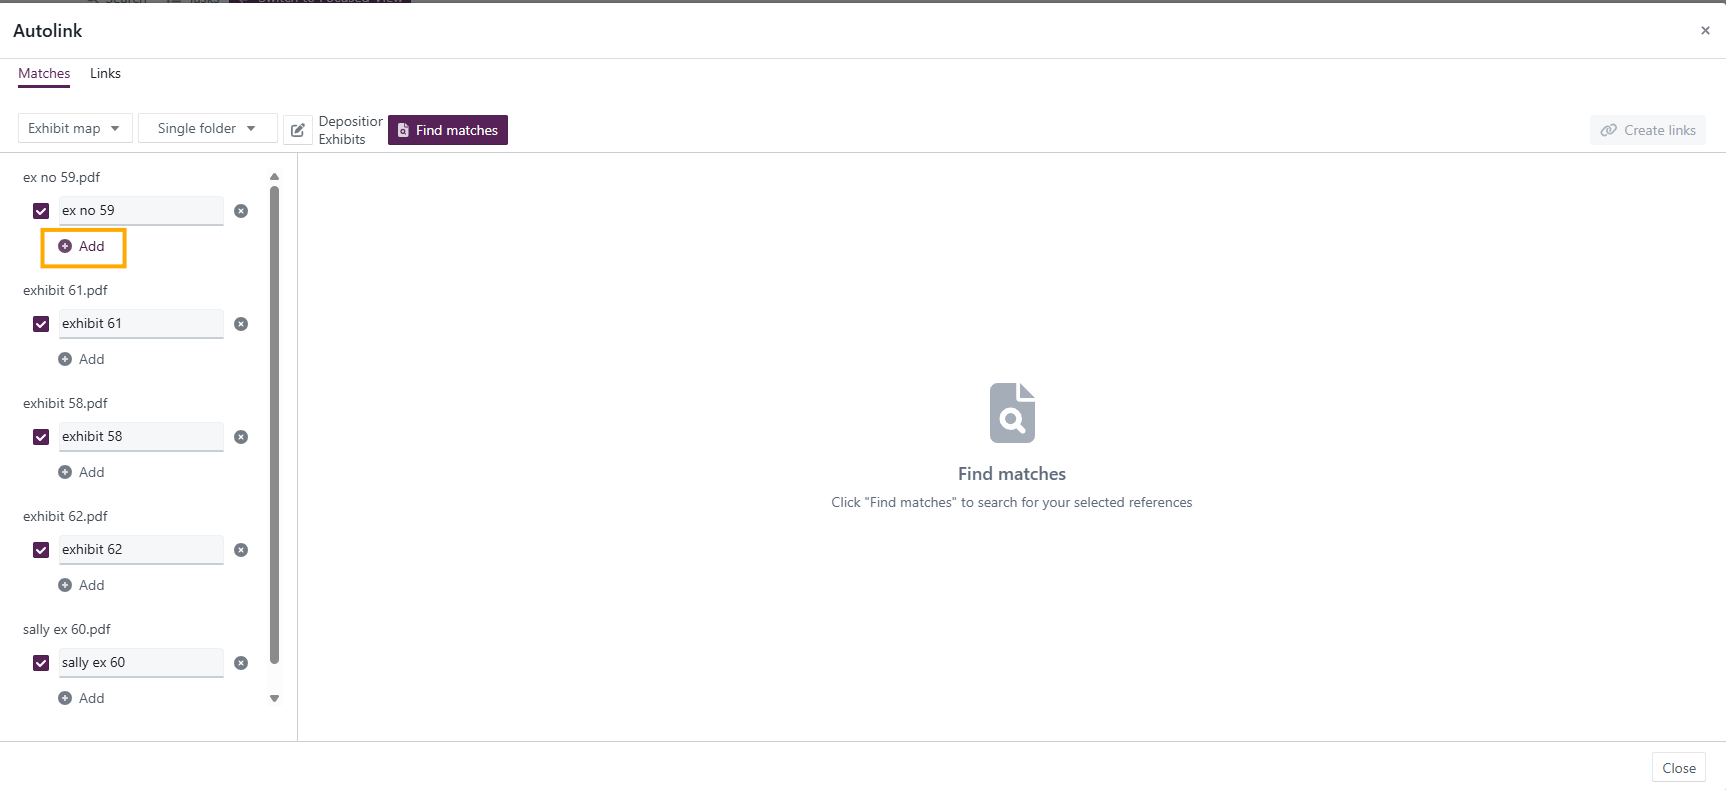
- Click Find matches.
- Review and select match categories:
- New matches – Select all
- Multiple matches – Select all
- No matches – Deselect
- Already linked – Deselect
- Updated matches – Select all
- Click Create links.

Exhibit numbers in the transcript viewer will now open the linked documents.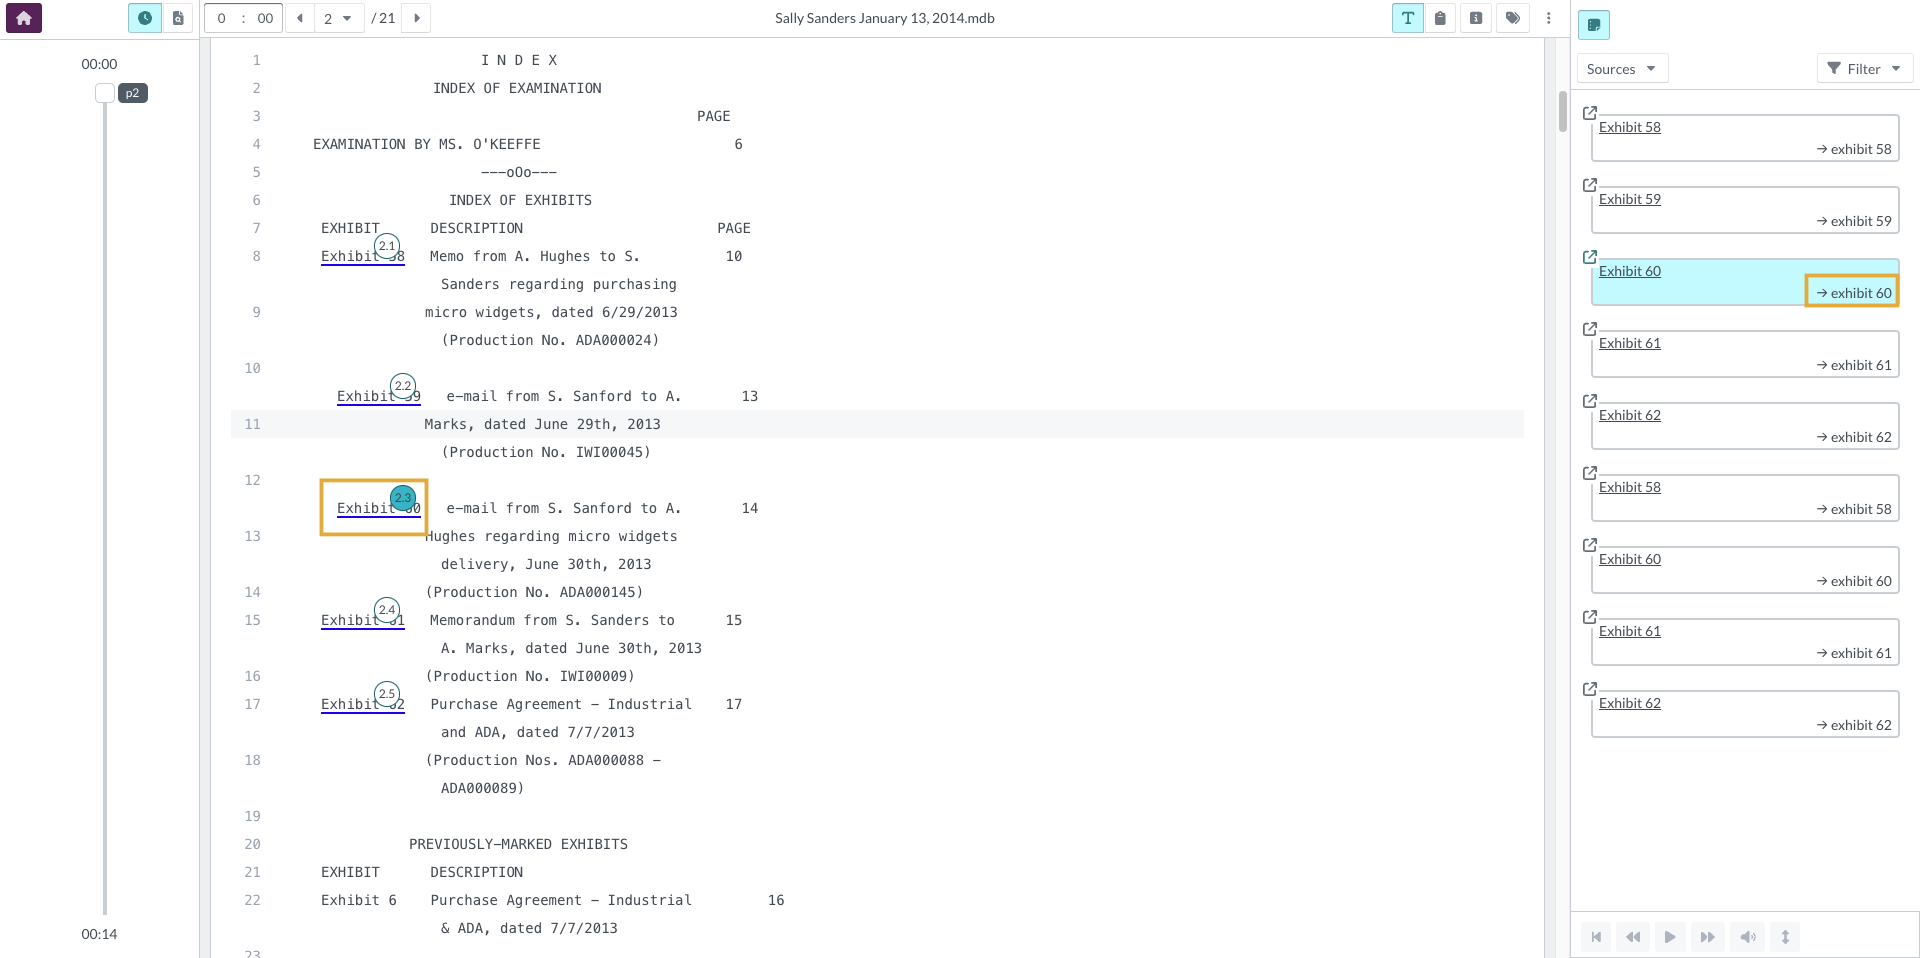
Deleting autolinks
Delete links individually
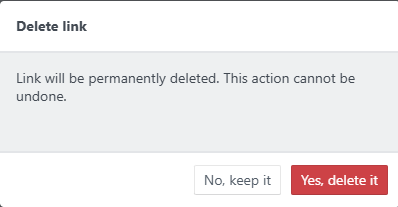
- Open the transcript in the Transcript Viewer.
- Select the exhibit link to remove.
- Click the delete option that appears.

- Confirm by selecting Yes, delete it.
Delete links in bulk
- From Documents, select the transcript.
- Click Actions → Autolink.

- Open the Links tab.
- Select the links to remove.
- Click Actions.
- Choose Delete links.
