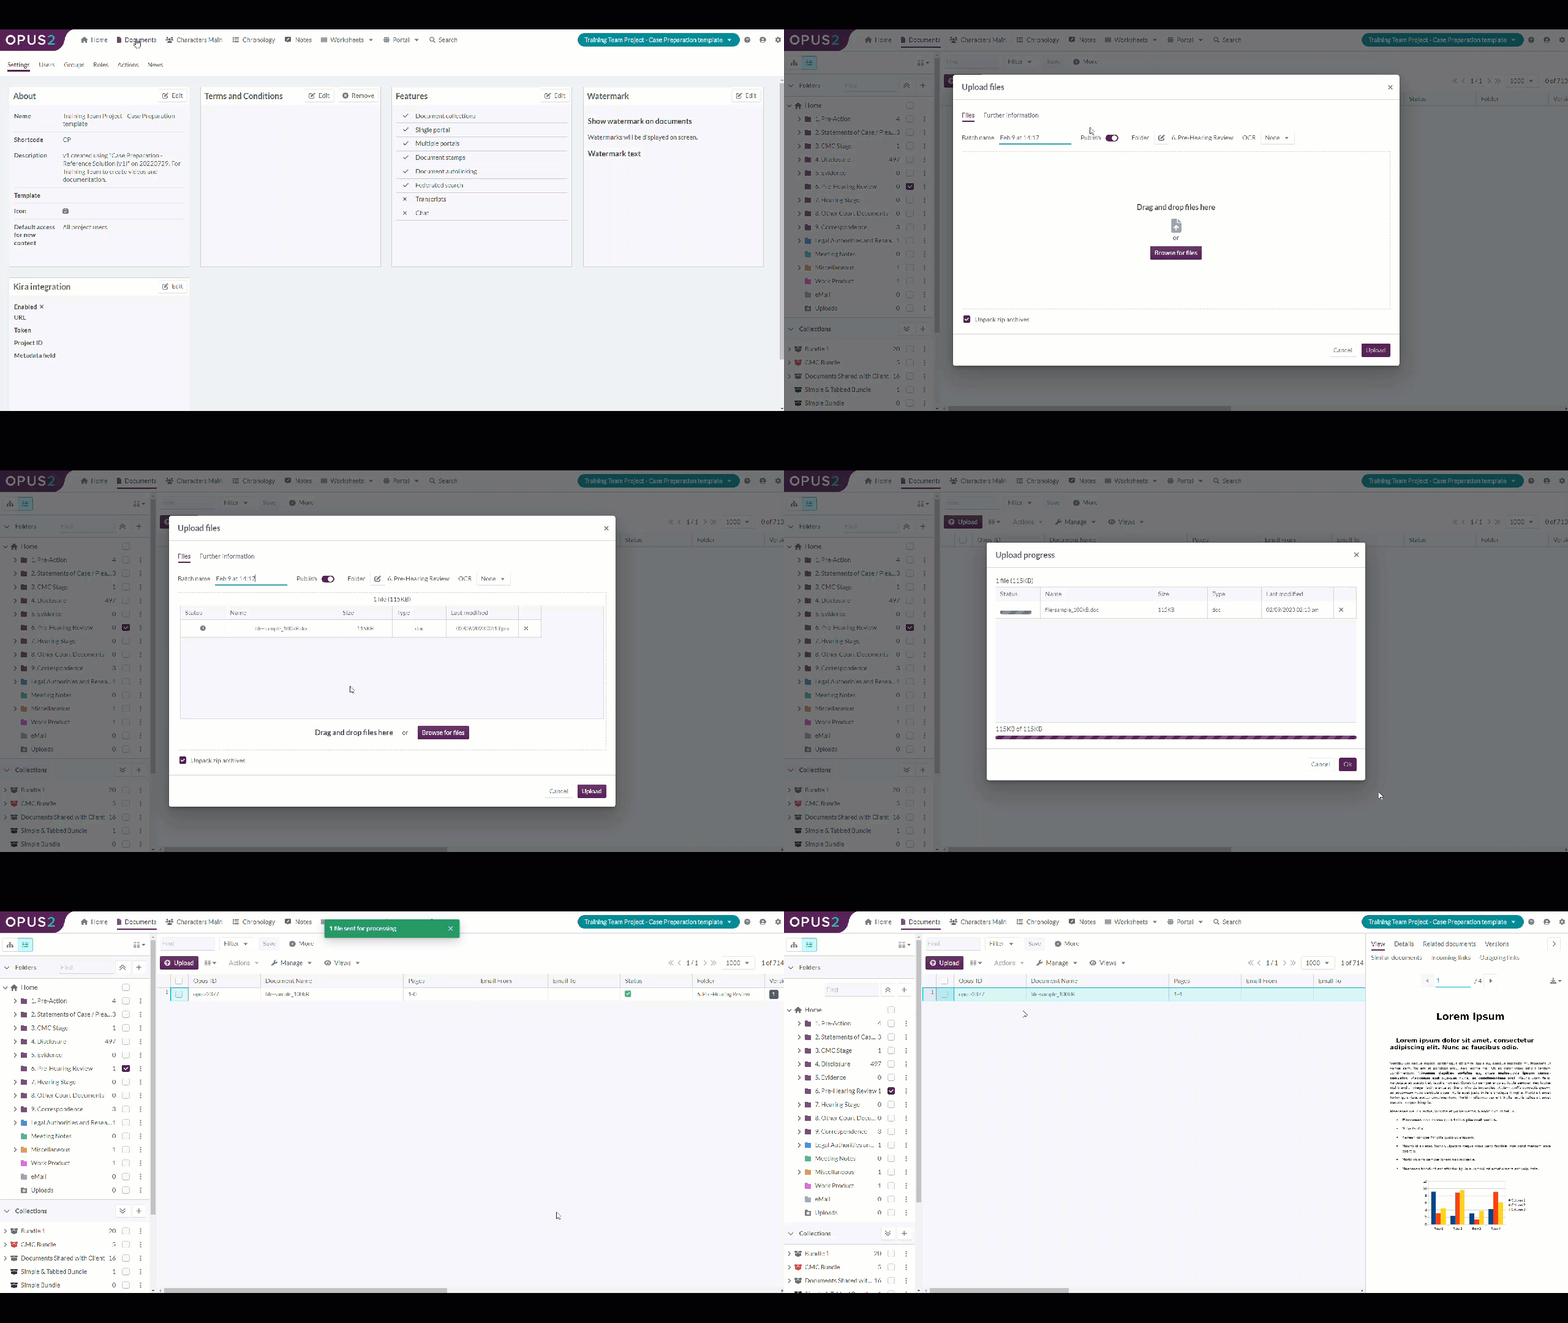
The following process will take you through the steps required to get files on to your project.

Navigate to Documents.
Select the folder you wish to upload documents into. The folder will be highlighted or ticked depending on your view.


Click Upload.

Drag and drop documents or a folder of documents into the dialog.
You can also click Browse for files to explore your local computer, network or external media.
Batch name – Leave this as selected.
Publish – There is no need to change the Publish setting, leave this as selected.
Publishing documents adds them directly to the Documents. If you turn publishing off, your documents will be sent to the Files page where they can be checked before being published.

Only System admins have access to the Files page.
Folder – Confirm the destination folder is correct. Click the
 button to change the destination.
OCR – Select If required.
Unpack zip archives – Leave this as selected.
Unticking this will upload .zip files onto your project. They can be unzipped from the Documents page to make them usable.

If you have a lot of mixed file types, including .zip, to upload, this will make the upload process quicker and smoother.
Click Upload.
The Upload dialog will close once the documents have been uploaded to the Project. The documents will continue to process (unzipping, converting and OCR) in the background.

A document is ready to view on the platform once it has a green tick in the Status column.
