
| Minimum Software Version | 8.18.10 |
| Solution(s) | Cases International ✓ Cases US ✓ Institutions ⨉ Counsel ✓ |
The Timeline portal component allows users to share key case-related events with portal users in a visual timeline view, providing a chronological overview of important milestones.
The Timeline component presents events from a selected worksheet in a horizontal, time-based layout. It is particularly useful for illustrating procedural history or the progression of a case over time. Events are pulled from a worksheet that contains date information and are displayed using a predefined card design.
Filtering and sorting options allow administrators to control which events appear, while portal users can easily navigate backward and forward in time to review past and upcoming activities.
Step 1: Prepare Required Components in the Platform
Before configuring the Timeline component, ensure the following exist:
- A worksheet that contains date-based entries
- At least one card to define how events are displayed
- (Optional) A form to display detailed event information
Important:
The worksheet and date column are mandatory requirements for the Timeline component.
Example:
Create a worksheet named “Procedural Timetable” with a column for event dates.
Step 2: Add a Timeline Component
- Open the Portal Builder.
- Add the Timeline component to the target page.
- Open the Properties tab.
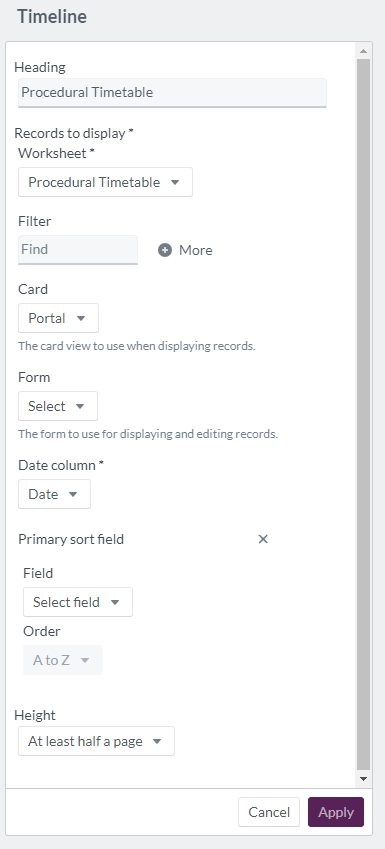
Step 3: Configure Timeline Properties
Configure the following options:
| Option | Explanation |
|---|---|
| Heading | Heading text for the Timeline component (maximum 100 characters). |
| Worksheet | Required. The source worksheet for timeline data. |
| Filter | Apply filters such as date, party responsible, procedural step, status, date added, added by, date updated, or updated by. |
| Card | Required. Card layout used to display timeline events. |
| Form | Optional form view for detailed event records. |
| Date column | Required. Choose event date, date added, or date updated (event date is recommended). |
| Primary sort field: Field | Field used for primary sorting. |
| Primary sort field: Order | Sort order: A–Z or Z–A. |
| Height | Display size: fit to content, at least half a page, or at least a full page. |
Example:
Configure a timeline titled “Procedural Timetable” sorted by event date to present milestones in chronological order.
Step 4: Portal User Timeline Experience
When viewed by portal users:
- The heading is displayed at the top
- A Find option allows searching events using metadata
- A More option enables additional filtering
- The displayed time range is shown beneath the controls
- The number of events within the selected period is displayed on the right
Users can:
- Click and drag left or right to scroll through the timeline
- Review events displayed using the configured card layout
All events shown originate from the selected worksheet and reflect the applied filters and sorting rules.
Example:
A portal user drags the timeline to the left to review earlier procedural steps in the case history.
Display example of 'timeline' component: 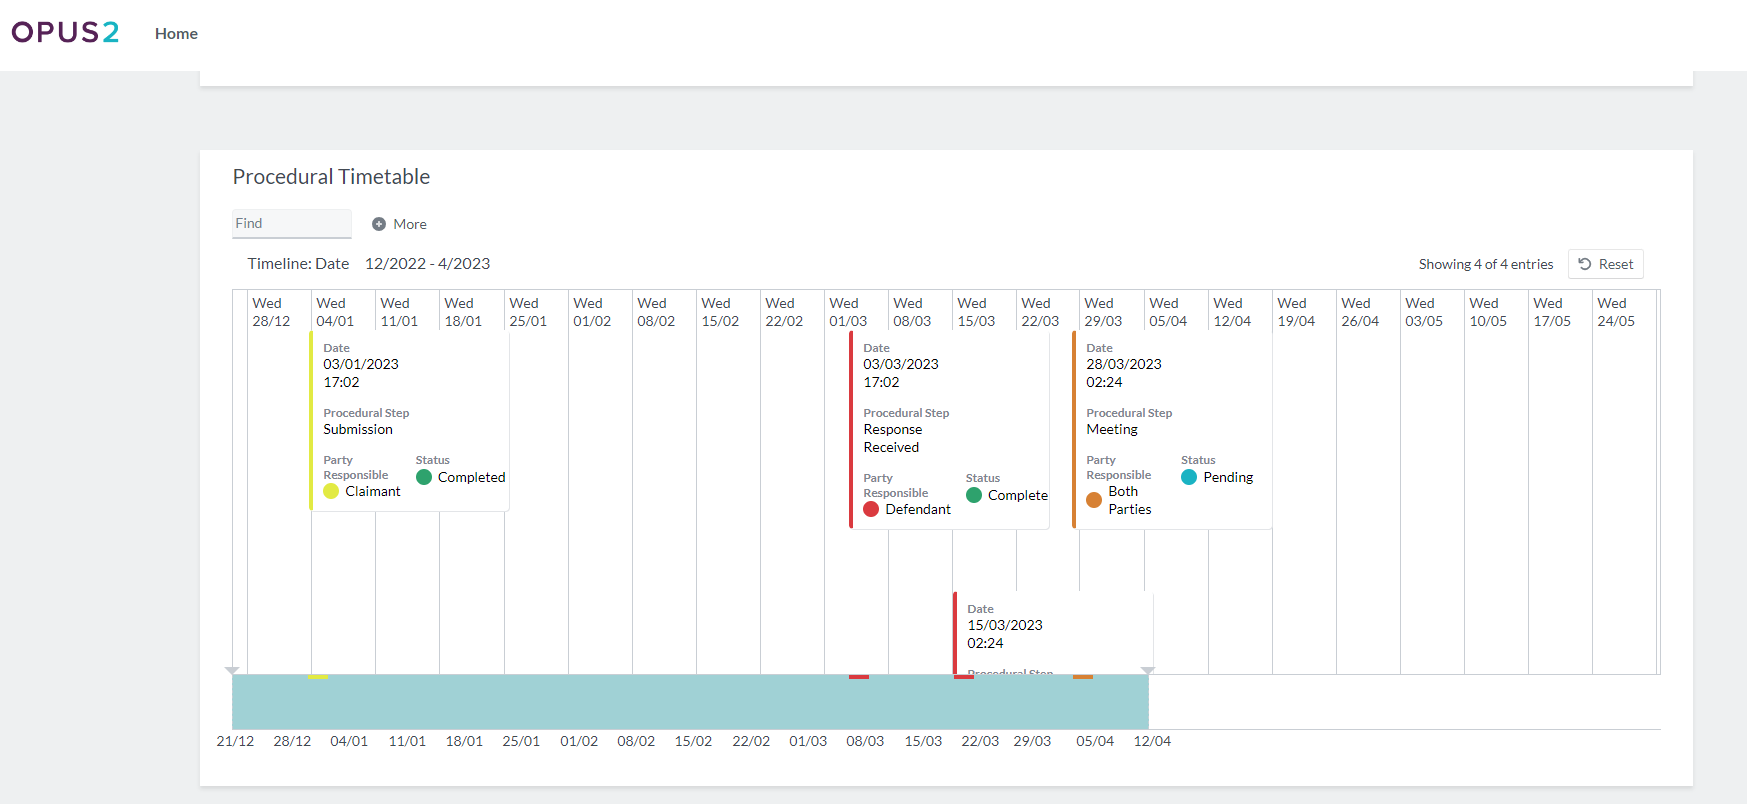
Related Links
Use the Timeline component to present a clear, intuitive view of case progression and key events, helping portal users quickly understand important developments over time.