
| Minimum Software Version | 8.16.3 |
| Solution(s) | Cases International ✓ Cases US ✓ Institutions ✓ Counsel ✓ |
Explains how to upload transcripts to a project in Opus 2, including supported file formats, configuring transcript parameters, and uploading associated media files.
Transcripts are uploaded from the Documents or Transcripts tab of a project. Supported formats are TXT, PTF, PCF, MDB, LEF, and XMEF. If the court reporter provides a .LEF file, exhibits can be automatically uploaded and linked. If you want to upload a transcript with synchronised media files, the transcript must be in MDB format and the media file in MPG or MP4 (preferred) format.
Note: To upload transcripts, a user must have the Manage transcripts capability set.
For more information on transcript formats, see Transcript file types.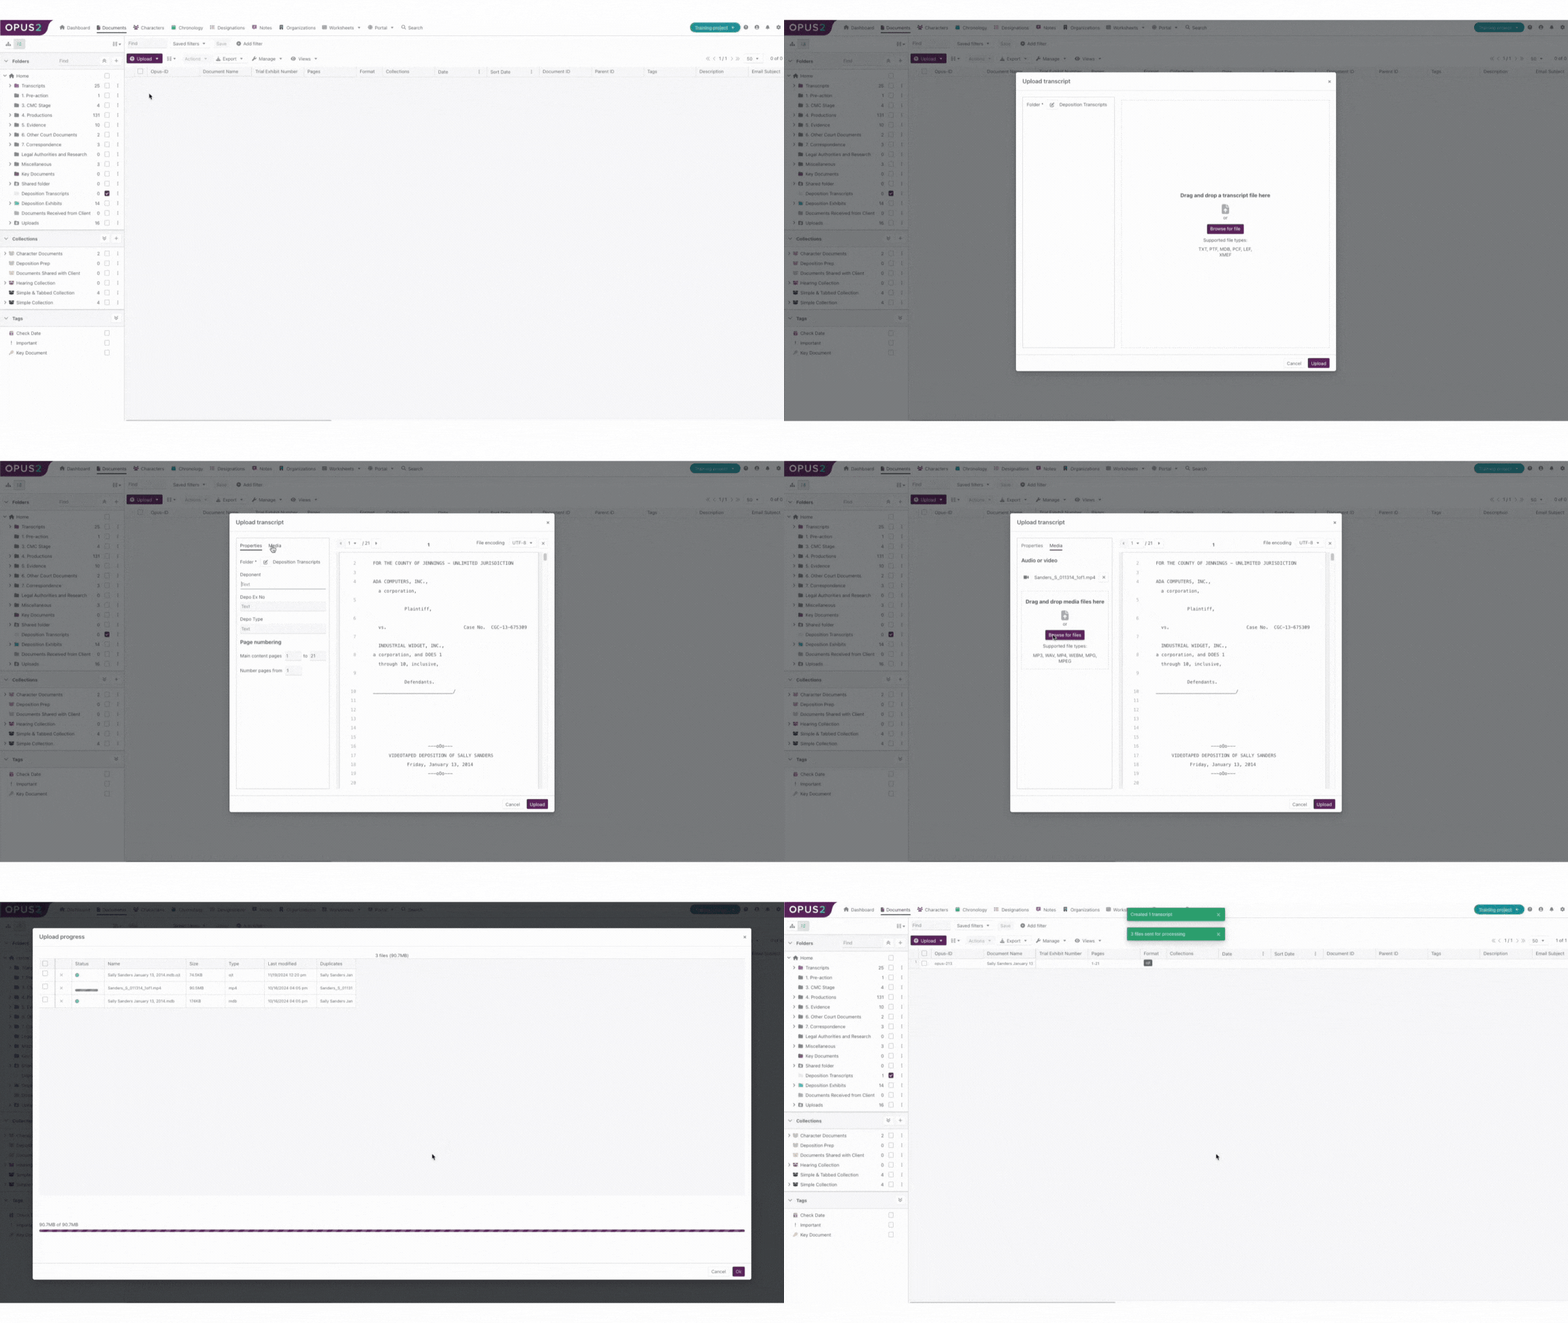
Uploading a transcript
- In your project, navigate to the Documents or Transcripts tab.
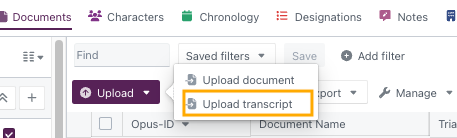
- Select Upload and choose Upload transcript. The Upload Transcript dialog opens.
- Select the folder icon beside Transcript Folder and select the destination folder if the correct folder is not shown automatically. A dropdown menu lists all available folders, with a Find option to search and an option to create a new folder. If no folder is selected, the transcript is uploaded to a sub-folder within the Uploads folder.
- Select Browse for file or drag a transcript into the dialog. Selecting a valid file displays a preview of the transcript. If an unsupported format is selected, a warning message is displayed.
Once a transcript file has been successfully imported, additional options appear for setting transcript parameters and uploading media files.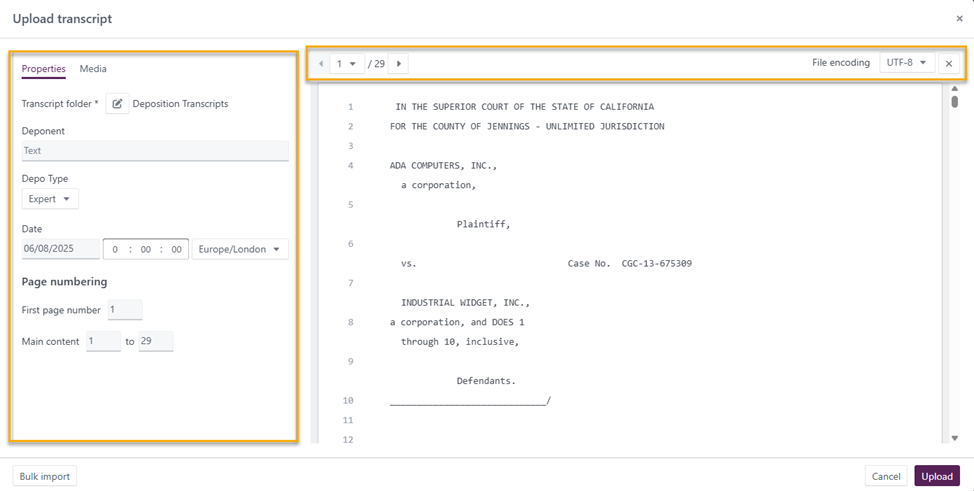
Transcript parameter options
The left-hand pane of the dialog contains the following options:
| Option | Description |
|---|---|
| Transcript folder | Choose or change the destination folder for the transcript. |
| Exhibit folder | Available for .LEF and .XMEF format files. Uploads exhibits directly to a selected destination folder. After upload, exhibits are placed in a new folder named [original transcript name] - Exhibits inside the selected exhibit folder. This saves users from having to manually move exhibits after upload. |
| Deponent | The name of the person who testified. Metadata field exclusive to specific transcript file types. Maximum 80 characters. |
| Deponent Ex No | The deponent exhibit number. Metadata field exclusive to specific transcript file types. Maximum 80 characters. |
| Deponent type | A type for the deponent, for example, Expert. Metadata field exclusive to specific transcript file types. Maximum 80 characters. |
| Date | The upload date for the transcript and optional timezone. |
| First page number | Determines the page from which page numbering begins (auto-populates to 1). Useful when importing part of a transcript that must be continuous with another. The transcript preview updates when this field is changed. |
| Main content | Determines whether there are pages at the start or end of the transcript that are not part of the main content (for example, an index). Pages outside the main range are shown with Roman numerals in the transcript viewer. |
| Audio or video | Lists any media files uploaded in the right-hand pane of the dialog. |
Note: For MDB transcripts, the Main content pages and Number pages from fields are pre-populated. If manually changed and other controls such as start time or encoding are then used, the manually entered value is not overwritten.
Transcript preview options
| Option | Description |
|---|---|
| Page navigation | Navigate between pages using the left and right buttons, or type a page number to jump directly to it. |
| File encoding | Set the character encoding format for the transcript. Options: UTF-8, ASCII, Windows 1252. |
| Delete | Remove the uploaded transcript from the dialog. |
| Transcript preview | The transcript is displayed here and can be scrolled vertically to navigate pages. |
Uploading media files
Select the Media tab, then select Browse for files or drag the media into the dialog.
Note: Media can also be uploaded after the transcript has been saved.
Supported browser-playable media formats: MP3, WAV, MP4, WEBM, OGG (except Safari). Files up to 2 GB can be uploaded. Multiple media files can be uploaded.
MDB files contain metadata about expected media and its start time relative to the transcript. If an MDB file is uploaded and the user proceeds without uploading media, a confirmation message is displayed. When media with the same name as expected in the MDB file is uploaded, the start time is pre-populated.
For non-MDB formats, any uploaded media has a start time of 0, meaning the very beginning of the transcript. For synchronisation to work, the transcript must contain timecodes and the media must fall within the range of those timecodes.
Tip: Double-check page numbering before uploading. First volumes should typically begin with page 1, and subsequent volumes should begin after the last page of the previous volume.
Completing the upload
Select Upload to upload the transcript to your project. If media files have been added, they are uploaded and synchronised (for MDB format) during the same process.
Related links
Related documentation
Opus 2 has help information accessible within the application; click the question mark and then select Documentation in the upper-right area of the platform. You can also access the documentation at: Opus 2 Support.
How to contact us
To contact us about the documentation, or if you have any other questions or issues about Opus 2 solutions, contact Opus 2 Platform Support by emailing Opus 2 Platform Support.